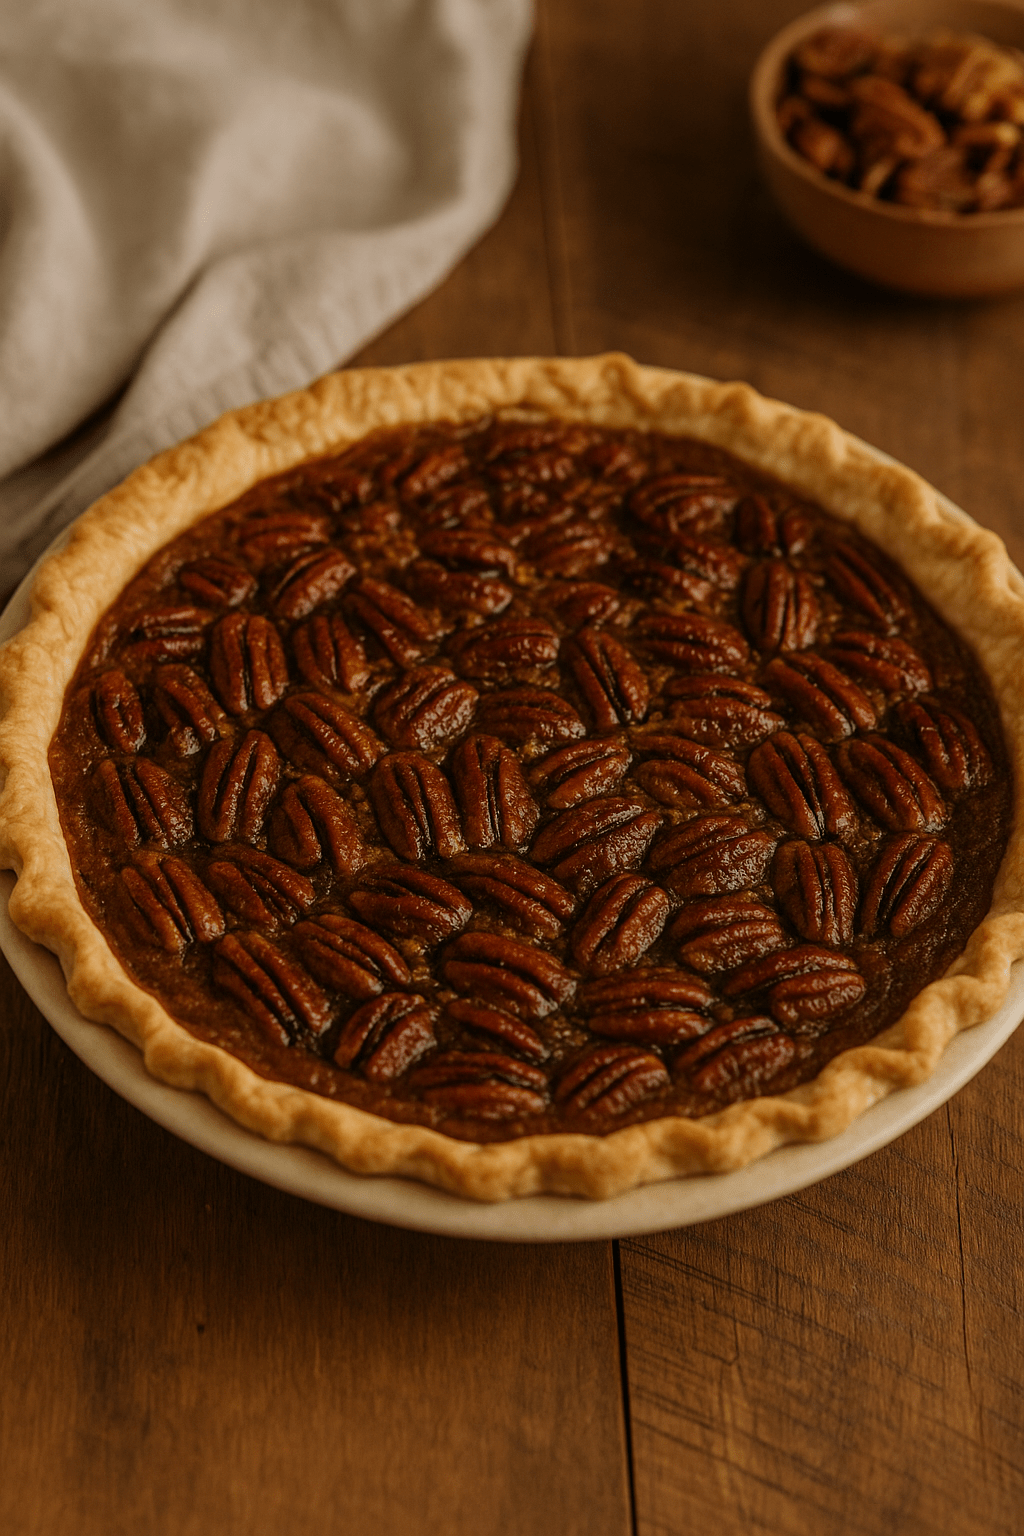
This is the pecan pie people sneak a slice of before dinner — rich, buttery, gooey, caramel-sweet, and full of toasted pecans. Simple ingredients, classic flavor, and a flaky crust that makes it absolutely irresistible.
🧂 Ingredients
For the Filling
1 cup light corn syrup
1 cup sugar
3 large eggs
¼ cup (4 Tbsp) melted butter
1 ½ tsp vanilla extract
½ tsp salt
1 ½ cups pecan halves
For the Crust
Use a homemade flaky pie crust for the best results. You can find my recipe here: LINK:FlakyHomemadePieCrustRecipeLINK: Flaky Homemade Pie Crust RecipeLINK:FlakyHomemadePieCrustRecipe
(A store-bought unbaked 9-inch crust works in a pinch, but the homemade one really makes this pie shine.)
🔪 Instructions
1. Prepare the crust.
Press your unbaked pie crust into a 9-inch pie pan. Crimp or flute the edges. Keep chilled while you mix the filling.
2. Mix the filling.
Whisk together the corn syrup, sugar, eggs, melted butter, vanilla, and salt until smooth.
3. Add the pecans.
Fold in the pecan halves until everything is evenly coated.
4. Assemble and bake.
Pour the filling into your prepared crust.
Bake at 350°F for 55–65 minutes, or until:
the top is golden and set,
the edges are firm,
and the very center still has a gentle wobble.
5. Cool completely.
Let cool at least 2 hours so the filling fully sets and slices cleanly.
💡 Tips for the Best Pecan Pie
If the crust edges brown too quickly, tent them loosely with foil.
Toast the pecans in a dry skillet for 3–5 minutes for deeper flavor.
For a slightly less-sweet pie, swap ¼ cup of the sugar for brown sugar.
This pie slices beautifully when made a day ahead.
🕯️ Bringing Life Note
A flaky crust really is the foundation of the perfect pecan pie. If you haven’t tried my homemade version yet, this is a place to make it shine. Rich, buttery filling + crisp, tender crust = pure holiday comfort.
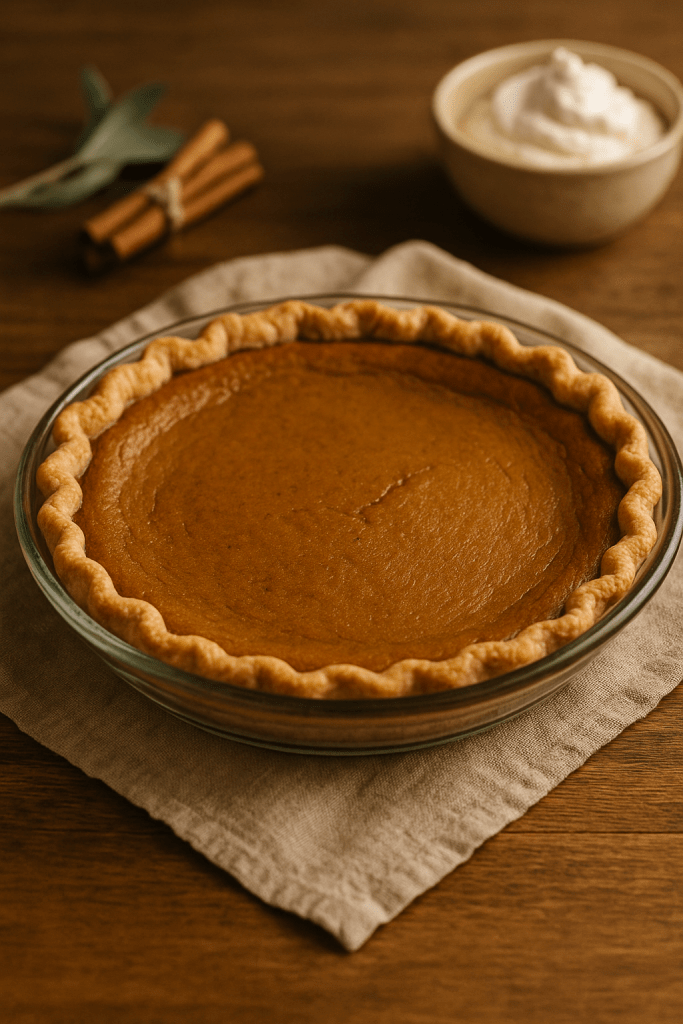
This is the pumpkin pie everyone hopes will show up on the Thanksgiving table — smooth, rich, warmly spiced, and nestled in a flaky, buttery crust. No shortcuts, no odd flavors, just the holiday classic done right.
🧂 Ingredients
For the Pie Filling
1 (15 oz) can pumpkin purée
1 cup heavy cream
½ cup whole milk
¾ cup sugar
2 large eggs
1 egg yolk
1 ½ tsp cinnamon
½ tsp ginger
¼ tsp nutmeg
¼ tsp cloves (or allspice)
½ tsp salt
1 tsp vanilla
For the Crust
Use your favorite homemade pie crust (your flaky one!) or a good-quality unbaked 9-inch pie shell.
🔪 Instructions
1. Prepare the crust.
Place your unbaked pie crust into a 9-inch pie dish. Flute or crimp the edges. Keep chilled while you mix the filling.
2. Mix the filling.
In a large bowl, whisk together the pumpkin, sugar, spices, and salt. Add eggs + yolk and whisk until smooth. Stir in cream, milk, and vanilla until fully combined.
3. Fill the crust.
Pour the pumpkin mixture into your prepared pie shell.
4. Bake.
Bake at 425°F for 15 minutes, then reduce heat to 350°F and bake 40–50 minutes, or until:
the edges are set,
the center still has a gentle wobble,
and a knife inserted 1 inch from the crust comes out mostly clean.
5. Cool completely.
Let cool on a wire rack for at least 2 hours. This helps it fully set and slice cleanly.
💡 Tips for the Perfect Pumpkin Pie
If the crust edges brown too quickly, tent them with foil.
Don’t over-bake — slight jiggle = creamy texture.
Serve with lightly sweetened whipped cream and a dusting of cinnamon.
Make it a day ahead for the best flavor and cleanest slices.
🕯️ Bringing Life Note
Pumpkin pie is the warm smell of Thanksgiving — cinnamon drifting through the house, a flaky crust cooling on the counter, and that first velvety slice after supper. Keep it simple, keep it classic, and it will never disappoint.
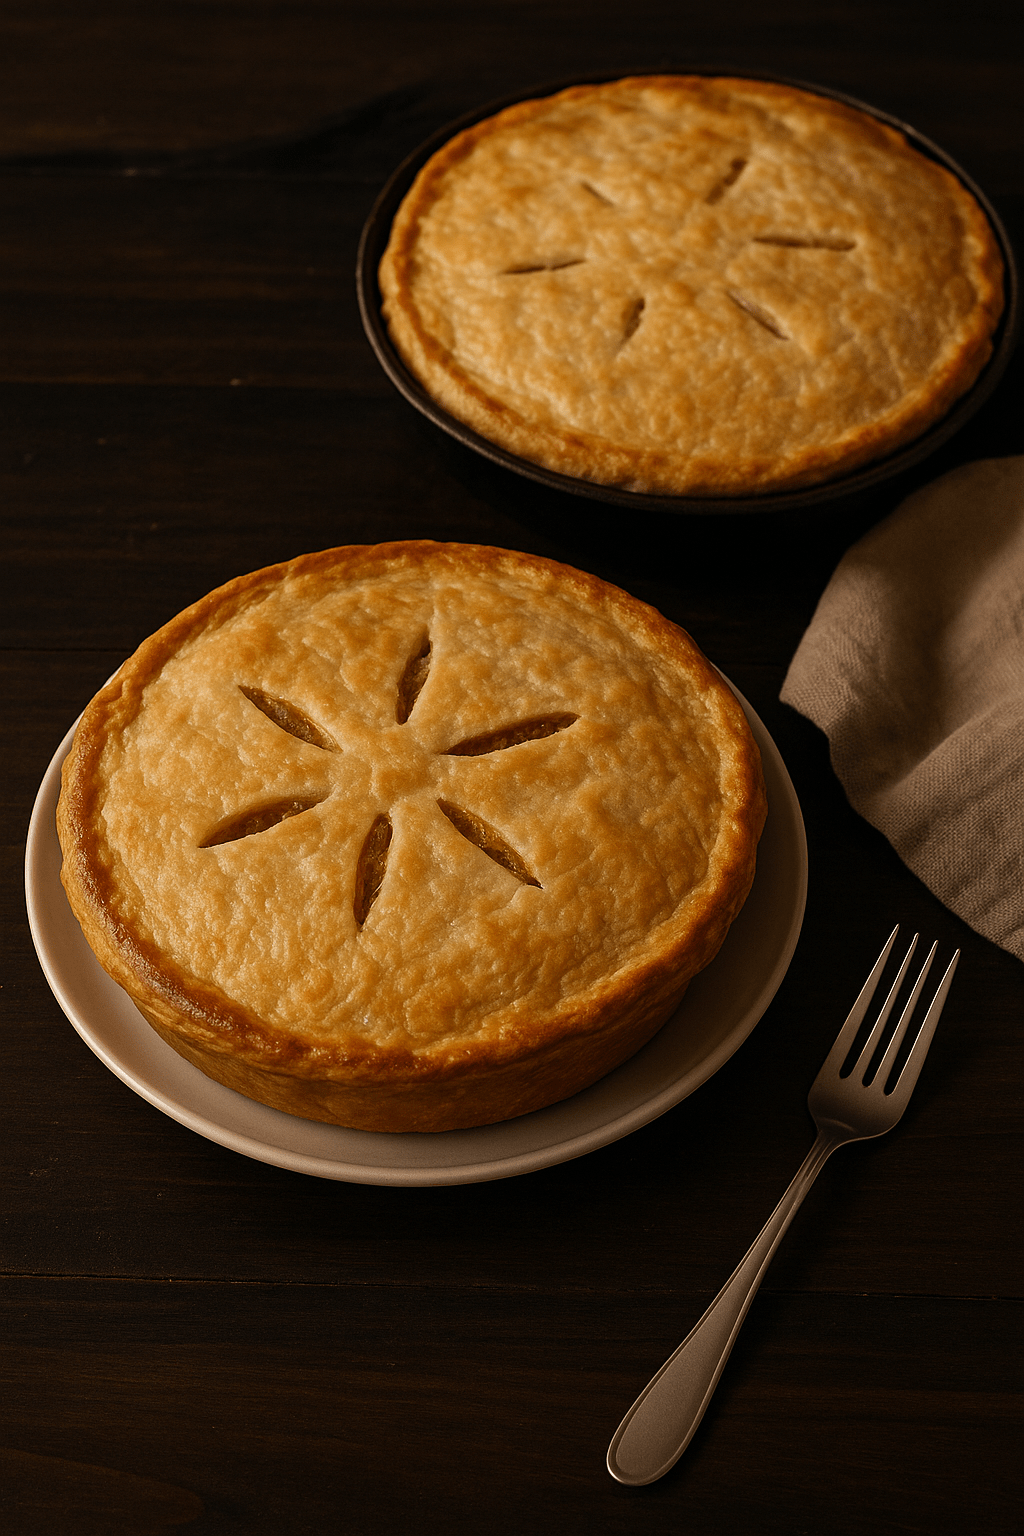
A classic, buttery, reliable crust for fruit pies, pot pies, cream pies, and more.
This is my go-to pie crust — tender, flaky, and simple enough for everyday baking yet sturdy enough for deep-dish pies and savory pies. It uses basic pantry ingredients and comes together quickly, even in large batches.
Ingredients
(Makes one double crust or two single crusts)
2 ½ cups (315 g) all-purpose flour
1 teaspoon salt
1 cup (2 sticks / 226 g) cold unsalted butter
or ½ butter + ½ lard for extra flake
6–8 tablespoons ice water
Optional: 1 teaspoon vinegar or lemon juice (helps prevent toughness)
Instructions
1. Mix dry ingredients.
Whisk together flour and salt in a large mixing bowl.
2. Cut in the fat.
Add cold, cubed butter. Use a pastry cutter or your fingertips to blend until the mixture has pea-sized pieces with some larger flakes. Visible butter = flaky crust.
3. Add water.
Sprinkle in 4 tablespoons of ice water, tossing gently. Add more water, 1 tablespoon at a time, just until the dough holds together when squeezed. Do not overwork.
4. Chill.
Divide the dough into two discs, wrap tightly, and refrigerate for at least 1 hour (or up to 2 days). This rest time relaxes the dough and keeps the butter cold.
5. Roll out.
Roll the first disc on a lightly floured surface to about ⅛ inch thick. Transfer to a 9-inch pie dish. Add your filling or continue to the prebaking instructions below.
When to Prebake (Blind Bake)
Most pies do NOT need the crust baked ahead of time. Use the guide below to choose the right method:
NO Prebake Needed
Use a raw crust for:
Apple pie
Berry pies
Cherry, peach, rhubarb
Pumpkin pie
Pecan pie
Meat/vegetable pot pies
Just fill the raw crust and bake according to your recipe.
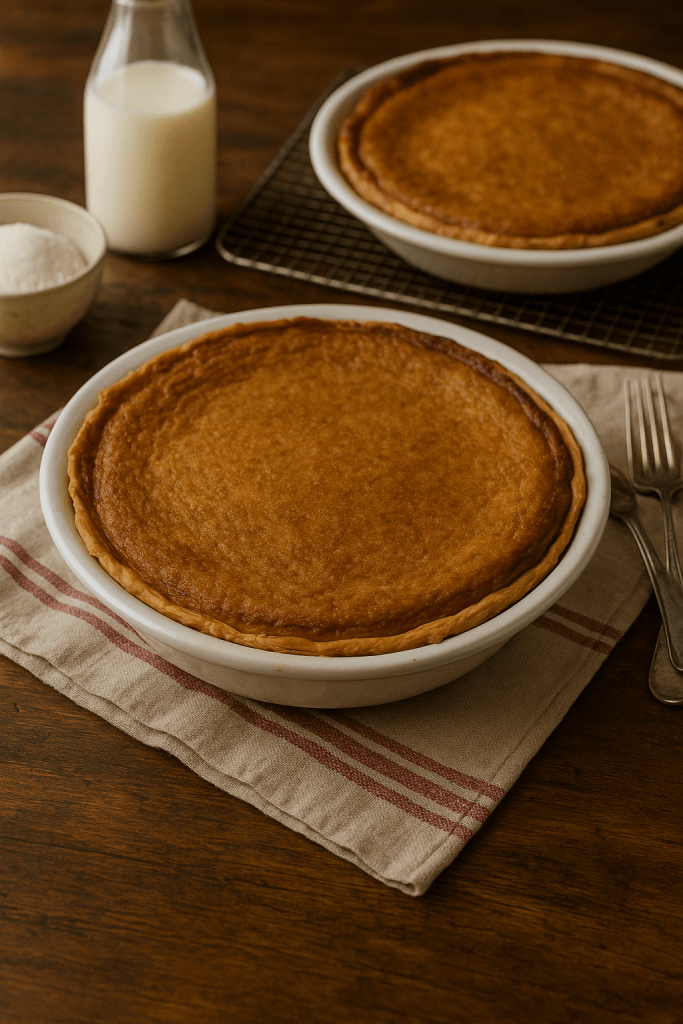
There’s something comforting about the simplicity of an old-fashioned pie. This one, baked as a thank-you for our FedEx driver, quickly earned a place among our family favorites. It’s buttery, sweet, and smooth — the kind of dessert that tastes like home.
📜 Ingredients
(Makes one 9-inch pie)
1 unbaked 9-inch pie crust
1 cup granulated sugar
½ cup light brown sugar, packed
2 tablespoons fine cornmeal (optional for a touch of tradition)
1 tablespoon all-purpose flour
¼ teaspoon salt
½ cup (1 stick) unsalted butter, melted and slightly cooled
4 large eggs
½ cup buttermilk
1 teaspoon vanilla extract
👩🍳 Instructions
Preheat the oven to 350°F (175°C). Place your unbaked crust in a 9-inch pie dish and crimp the edges.
Mix dry ingredients. In a large bowl, whisk together the sugars, cornmeal, flour, and salt.
Add butter and eggs. Stir in melted butter until smooth. Add eggs one at a time, whisking well after each.
Finish the filling. Whisk in buttermilk and vanilla. The mixture will be thin — that’s normal for chess pie.
Pour and bake. Pour filling into the crust. Bake 45–55 minutes, or until the center is just set and the top is golden with a delicate sugary crust. (If the crust browns too quickly, cover edges loosely with foil.)
Cool completely. Let the pie rest at room temperature for at least 2 hours before slicing. It continues to set as it cools.
🍴 Serving & Storage
Serve at room temperature or slightly chilled. Store covered in the fridge up to 4 days.
💡 Notes & Variations
No brown sugar? Use 1½ cups raw sugar (or 2¾ cups if doubling the recipe) and add a teaspoon of molasses for deeper flavor.
Lemon Chess Pie: Add zest and juice of one lemon.
Chocolate Chess Pie: Add 2 tablespoons unsweetened cocoa powder with the dry ingredients.
Maple Chess Pie: Swap ¼ cup sugar for maple syrup and reduce buttermilk slightly.
❤️ From Our Kitchen
This pie started as a simple thank-you — a small way to show appreciation to someone who carries heavy boxes to our door year-round. But after one bite, Tim and I decided it won’t just be a thank-you pie anymore. It’s officially part of our family favorites list.
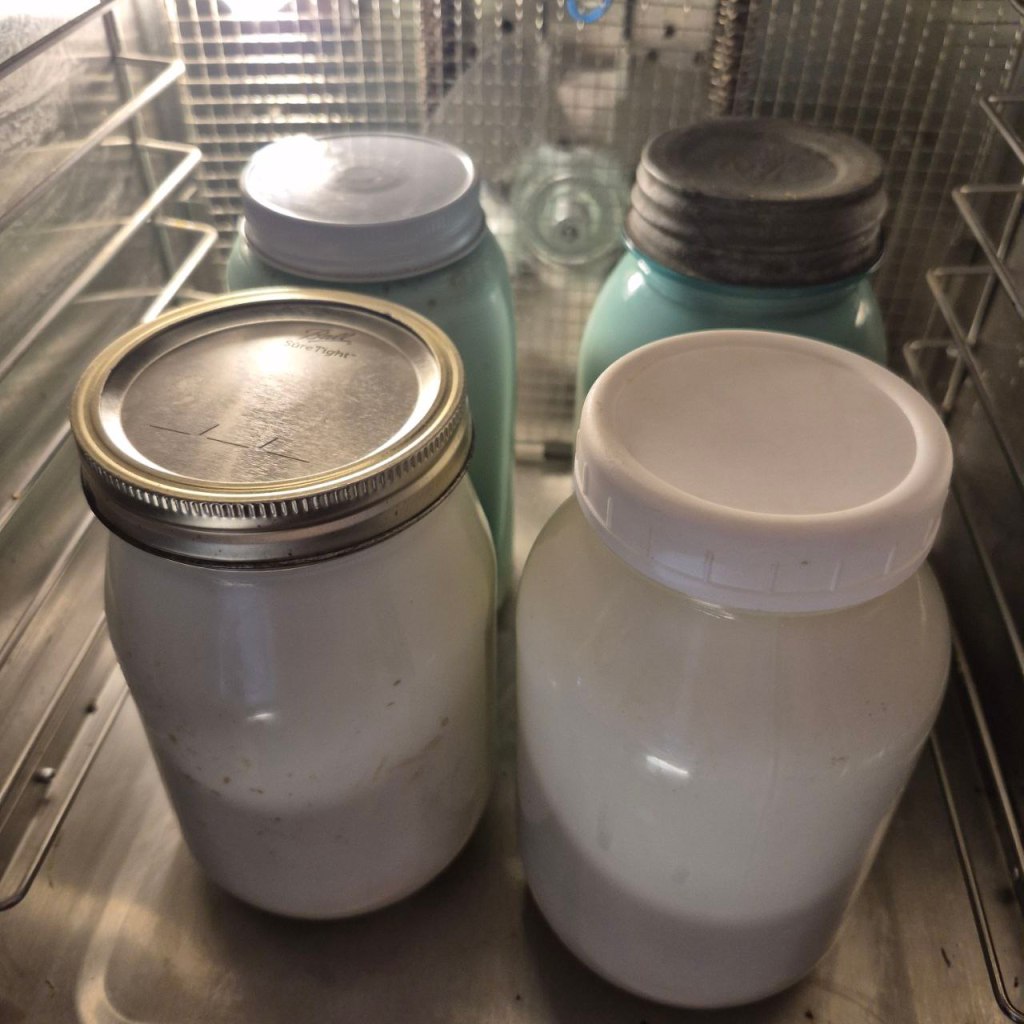
Homemade yogurt isn’t just about saving money—it’s about freshness, control, and nutrition. When you make it yourself:
Cost savings: A single gallon of milk can yield 8 cups of yogurt for less than store-bought tubs.
Customization: You choose the milk type (whole, skim, goat, raw, organic, etc.), thickness (Greek-style or regular), and flavors.
Fewer additives: No thickeners, stabilizers, or hidden sugars—just milk and live cultures.
Sustainability: Making yogurt at home cuts down on packaging waste.
How Yogurt Works: The Science Behind It
Yogurt is created by fermenting milk with beneficial bacteria. The two classic starter strains are:
Lactobacillus bulgaricus
Streptococcus thermophilus
Together, they convert lactose (milk sugar) into lactic acid. This acid lowers the pH, thickening the milk proteins and giving yogurt its tangy flavor. Many store-bought starters also include additional strains like Lactobacillus acidophilus or Bifidobacterium lactis, which may aid digestion.
The fermentation process not only preserves milk but also boosts probiotic content, supporting gut health.
Ingredients
1 quart (4 cups) milk – whole milk makes creamier yogurt, but any type works
2 tablespoons plain yogurt with live, active cultures (store-bought or from a previous batch)
Equipment
Saucepan
Thermometer (optional but helpful)
Whisk
Clean glass jar or container with lid
Towel or blanket for insulation
Step-by-Step Instructions
Heat the milk Pour milk into a saucepan and gently heat to 180°F (82°C). This denatures proteins so the yogurt sets thicker.
Cool the milk Remove from heat and let it cool to 110°F–115°F (43–46°C). This is the ideal range for the cultures.
Add starter Whisk 2 tablespoons of yogurt into a small bowl with a bit of the cooled milk. Then stir this mixture back into the pot.
Incubate Pour into a clean jar, cover, and keep warm (around 110°F) for 6–12 hours.
For thinner, milder yogurt: check at 6 hours.
For thicker, tangier yogurt: let it go longer. You can wrap the jar in a towel, place it in an oven with the light on, use an Instant Pot’s yogurt setting, or a dehydrator set to 110°F.
Chill and enjoy Once it’s set, refrigerate for at least 2 hours. The yogurt will thicken further as it cools.
Variations
Greek Yogurt: Strain finished yogurt through a cheesecloth or coffee filter for 2–4 hours to remove whey.
Flavored Yogurt: Stir in honey, fruit purée, vanilla, or jam just before eating.
Storage
Homemade yogurt keeps for about 2 weeks in the refrigerator. Save 2–3 tablespoons from each batch to use as the starter for the next one.
If you would like a video on the process, check out this one on our YouTube channel!
Do you ever start out to make one thing, but the farther you go the more you realize you’re actually making something else? That’s what happened with these cookies.
I went into the kitchen fully intending to make snickerdoodles. That’s what had been requested and that’s what I had a recipe for.
But then, as often happens, Tim came to help. Don’t get me wrong, that wasn’t a problem. Tim is, after all, the one who taught me to cook, and I enjoy working in the kitchen with him. But… It did mean the recipe was changing cause that’s what Tim does.
Soon, I was pulling fresh cookies from the oven and trying to convince everyone that they would survive if they waited a few minutes for the cookies to cool.
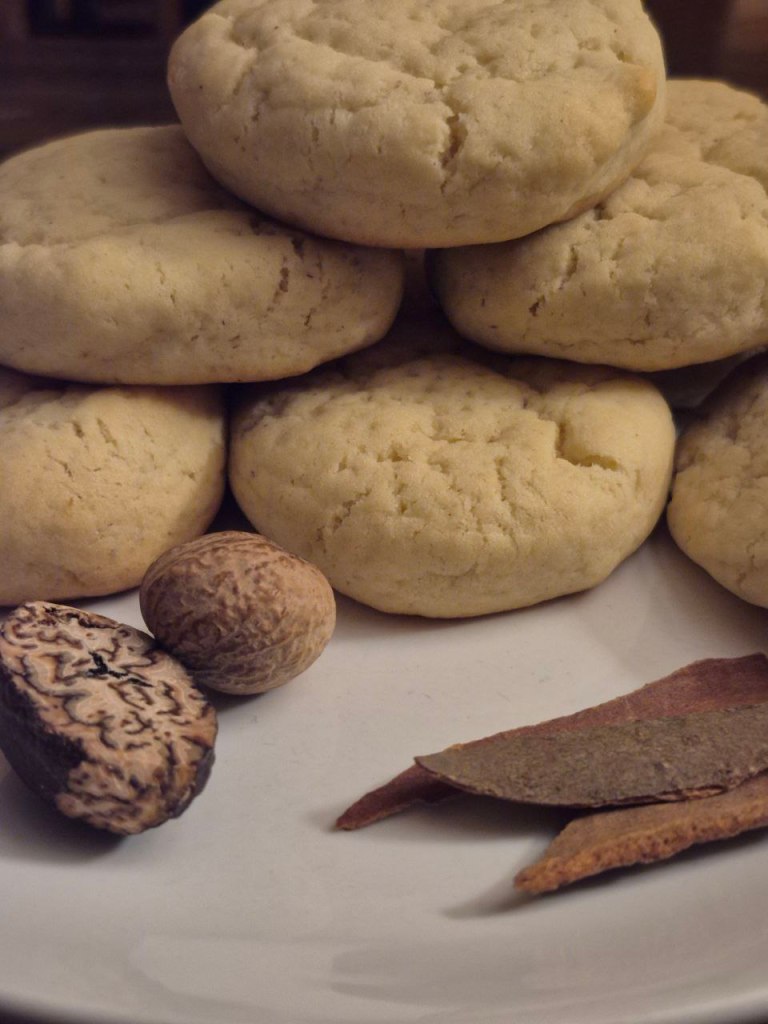
Then, came the first taste. All it took was one bite to know these were definitely not snickerdoodles. They had the same cinnamon sugar coating, but after Tim had added ginger, cinnamon, and nutmeg the cookies had morphed into… well… Spicedoodles.
So a new favorite was created and now I’m passing it one to you!
Spicedoodle Cookies
Ingredients (For approx 36 cookies)
1 cup (2 cubes) Butter, softened
1 cup Sugar
1 teaspoon Vanilla
2 Eggs
4 teaspoons Baking Powder
1 teaspoon Baking Soda
1/2 teaspoon Salt
1 tablespoon Cinnamon
2 teaspoons Nutmeg, grated
1/2 teaspoon ground Ginger
3 1/2 cups Flour
Instructions
Preheat the oven to 400 degrees.
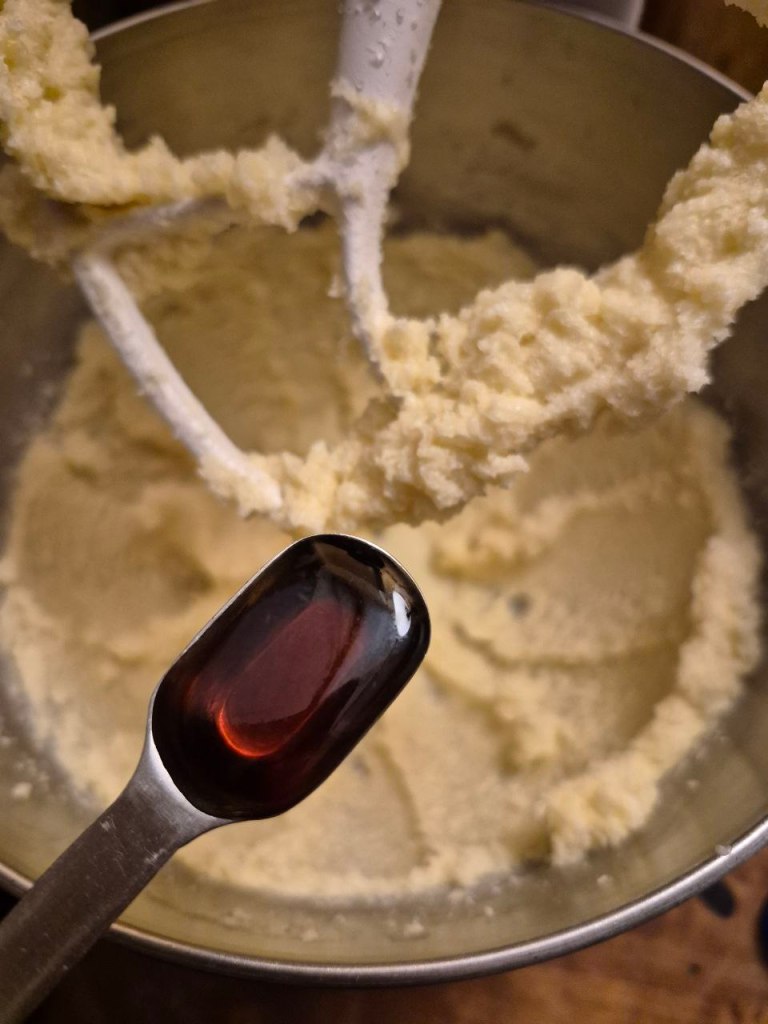
Combine softened butter, sugar, and vanilla until creamy.
Add the eggs and mix well.
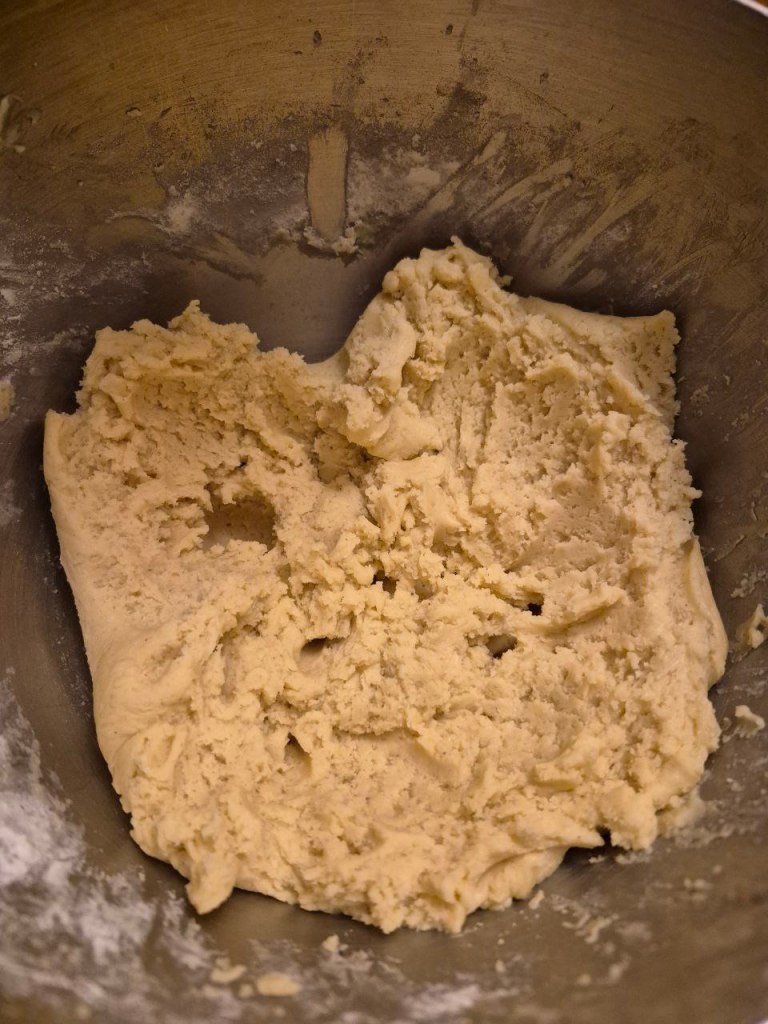
Mix in spices and dry ingredients. We like our spices strong, but if you want a more “normal” spice level, cut the amounts for the cinnamon, nutmeg, and ginger in half.
In a small bowl, mix sugar and cinnamon to roll the cookies in. Ratios can vary depending on how strong you want the cinnamon.
Form cookies into ping-pong sized balls and flatten slightly. This will help them stay thicker as they bake and come out softer.
Roll them in the sugar/cinnamon mixture and place on a cookie sheet an inch or so apart.
Bake at 400 degrees for 7-8 minutes. They will still look soft, but will be delicious and perfectly done. For my family at least. Feel free to adjust if you want, but I wouldn’t suggest going over 9 minutes.
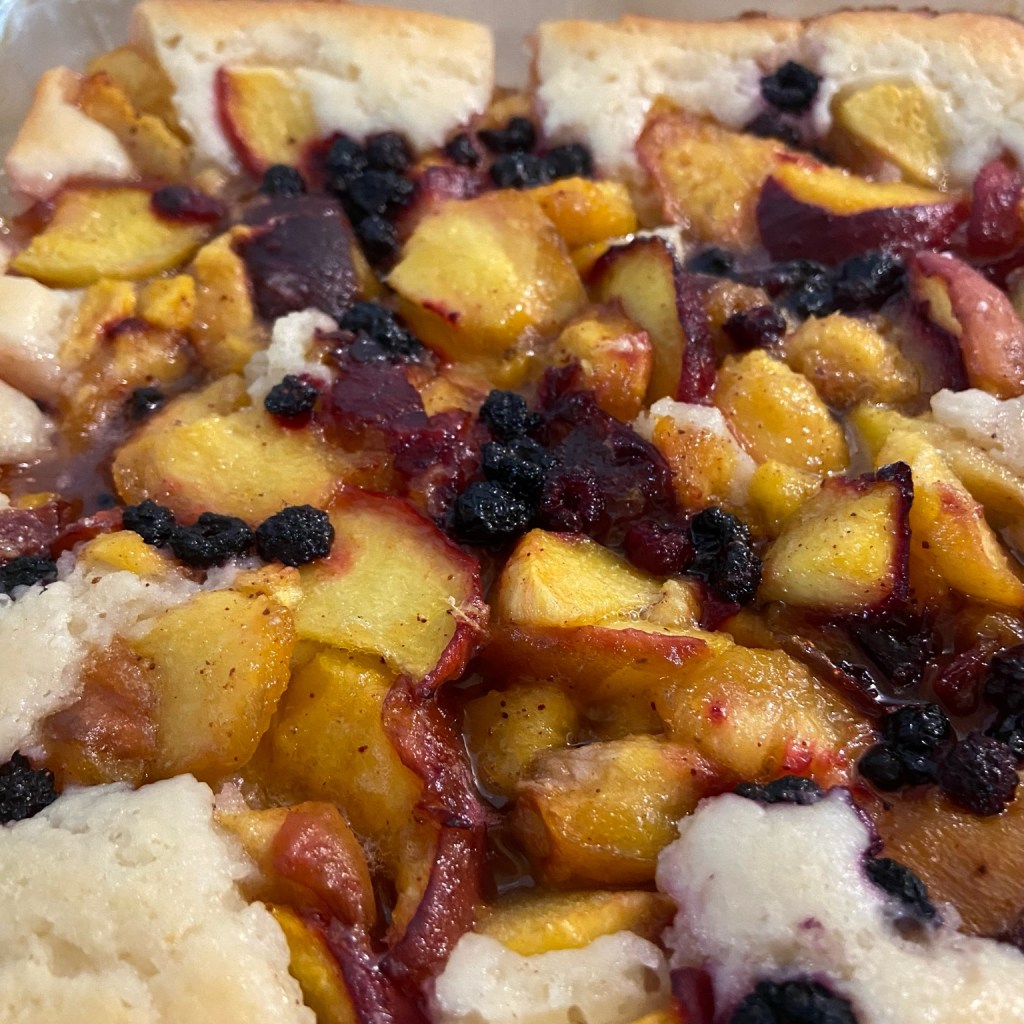
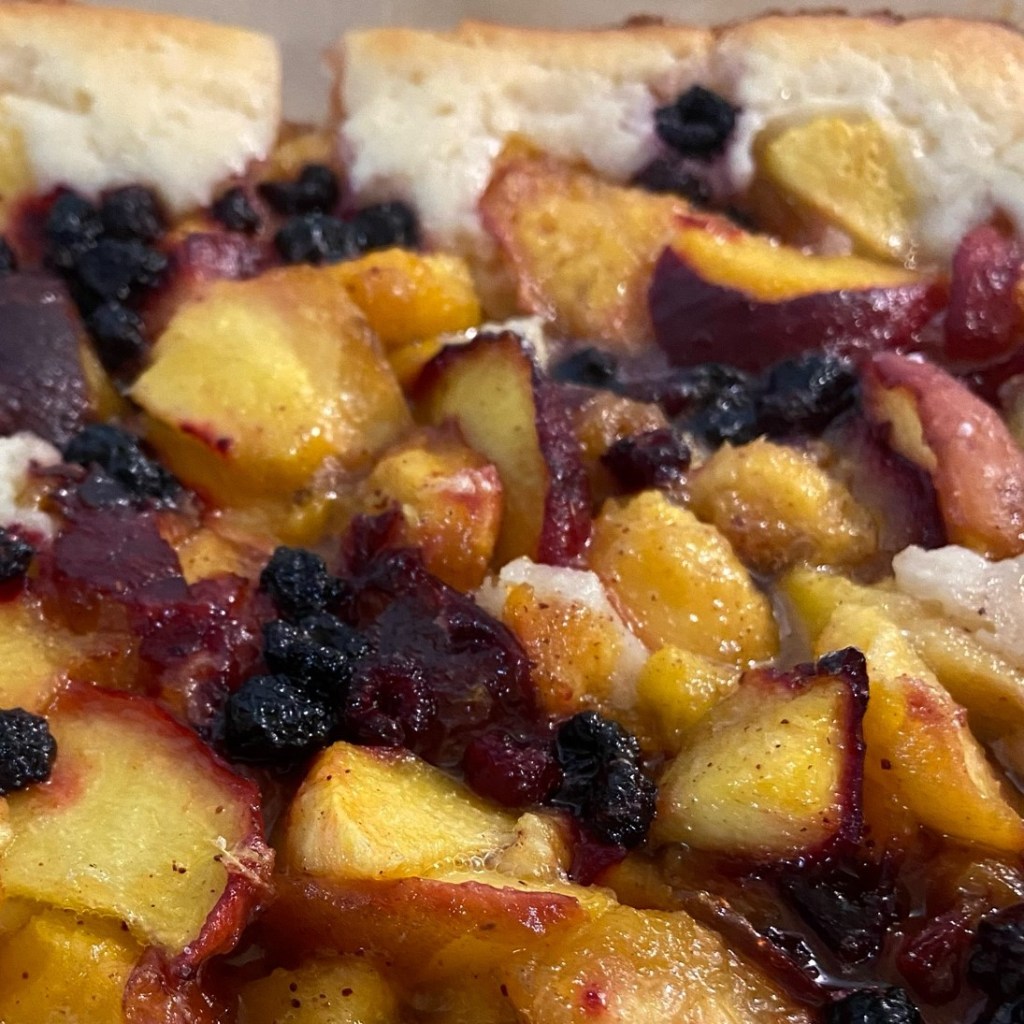
When summertime rolls around and the days start heating up, one thing that helps make up for the sticky discomfort is peaches.
Now, I like peaches. I like them fresh, sliced with a little brown sugar and milk. I like them in muffins, in oatmeal, in cinnamon rolls… and did I mention fresh?
But around here, if we have peaches, there’s one thing that always gets requested: peach cobbler. Sometimes I think I could make it every single day and no one would complain. I doubt I’ll test that theory—but I wouldn’t be surprised if they tried to talk me into it. 😊
What makes peach cobbler so special—at least to me—is that it’s basically summer in a pan. You get the soft, bright flavor of peaches, the warmth of nutmeg and cinnamon, and the rich depth of vanilla, all paired with the buttery crunch of the buttermilk topping. It’s practically unbeatable.
And in our house, everyone has their favorite part. The kids go for the fruity pockets. I like a solid mix of topping and fruit, especially with those sweet drippings you get when you’re last to serve and scraping the pan. And Tim? Tim always gets a corner or edge piece—the one with the well-browned, butter-crunchy topping I make just for him.
Now, I had thought that I had my perfect peach cobbler recipe all figured out and set in stone. I use buttermilk, never regular milk, for the topping. The peaches always get freshly grated nutmeg, none of that store-bought ground nutmeg. Don’t get me wrong, I’m not saying you can’t get a good cobbler by using slightly different ingredients. I’m just saying that if I tried it, I think my family would accuse me of fraud or something.
The last peach cobbler I made, though, threatened to change some of my “set in stone” ways. You see, we didn’t have enough buttermilk. And I didn’t even have any regular milk to stretch it with. So I gathered up my courage and tried something I wasn’t positive would work. I added enough sour cream to get the buttermilk to the amount I needed and hoped for the best.
When I pulled it out of the oven and dished it up, I asked Tim his opinion of the substitution. He said it wouldn’t work as a substitute, but I had to start doing it that way from now on. Success!
So, in honor of summer, peaches, and Tim’s crunchy-corner approval, here’s my go-to peach cobbler—with a slightly unexpected twist.
Preheat your oven to 350 degrees F. Place the butter in an 8×8* baking dish and place it in the oven to melt while you prepare the topping and fruit.
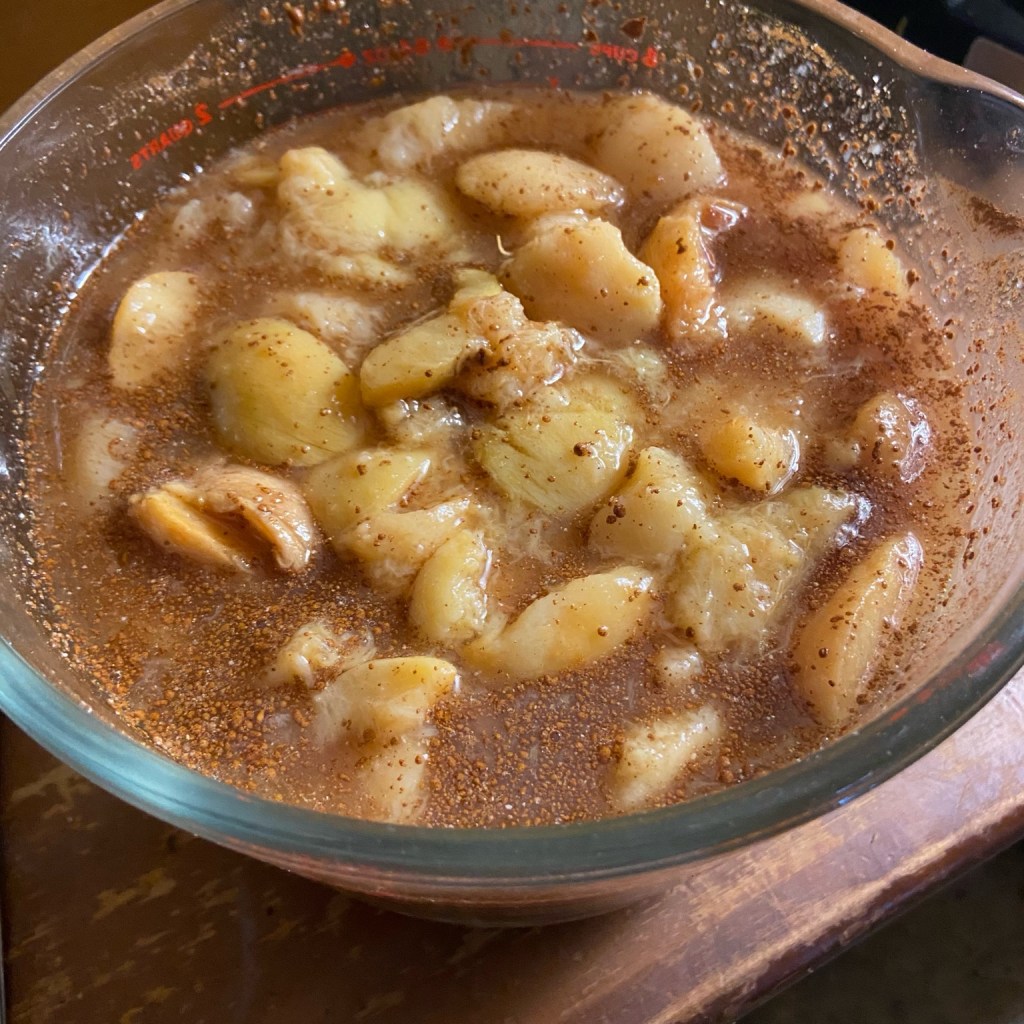
In a bowl, combine the sliced peaches with the sugar, vanilla, and spices. Set it aside to let the juices develop.
In another bowl, whisk together flour, sugar, baking powder, and salt. Stir in the buttermilk and sour cream until just combined. The batter will be thick.
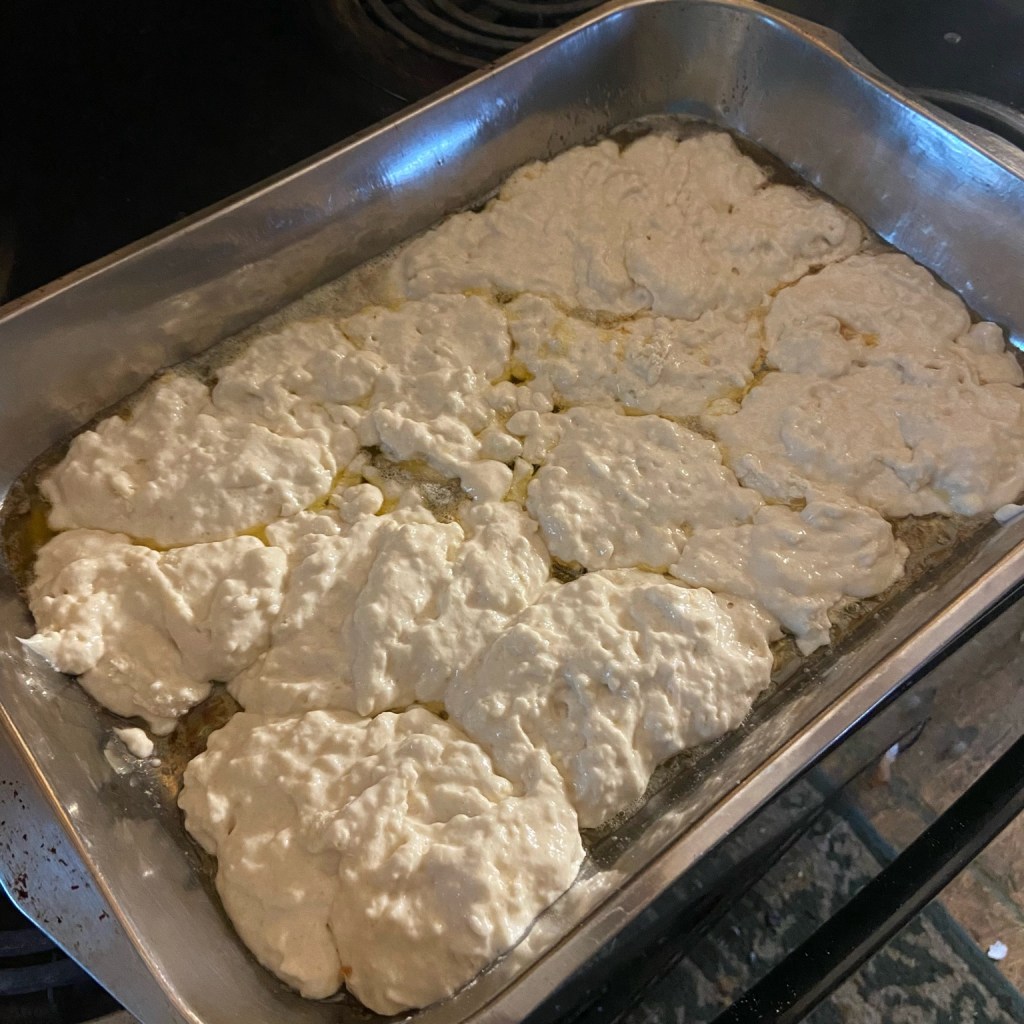
Once the butter is completely melted, carefully remove the dish from the oven. Drop the batter by large spoonfuls over the hot butter. Do NOT stir. It’ll look messy, but that’s what you want.
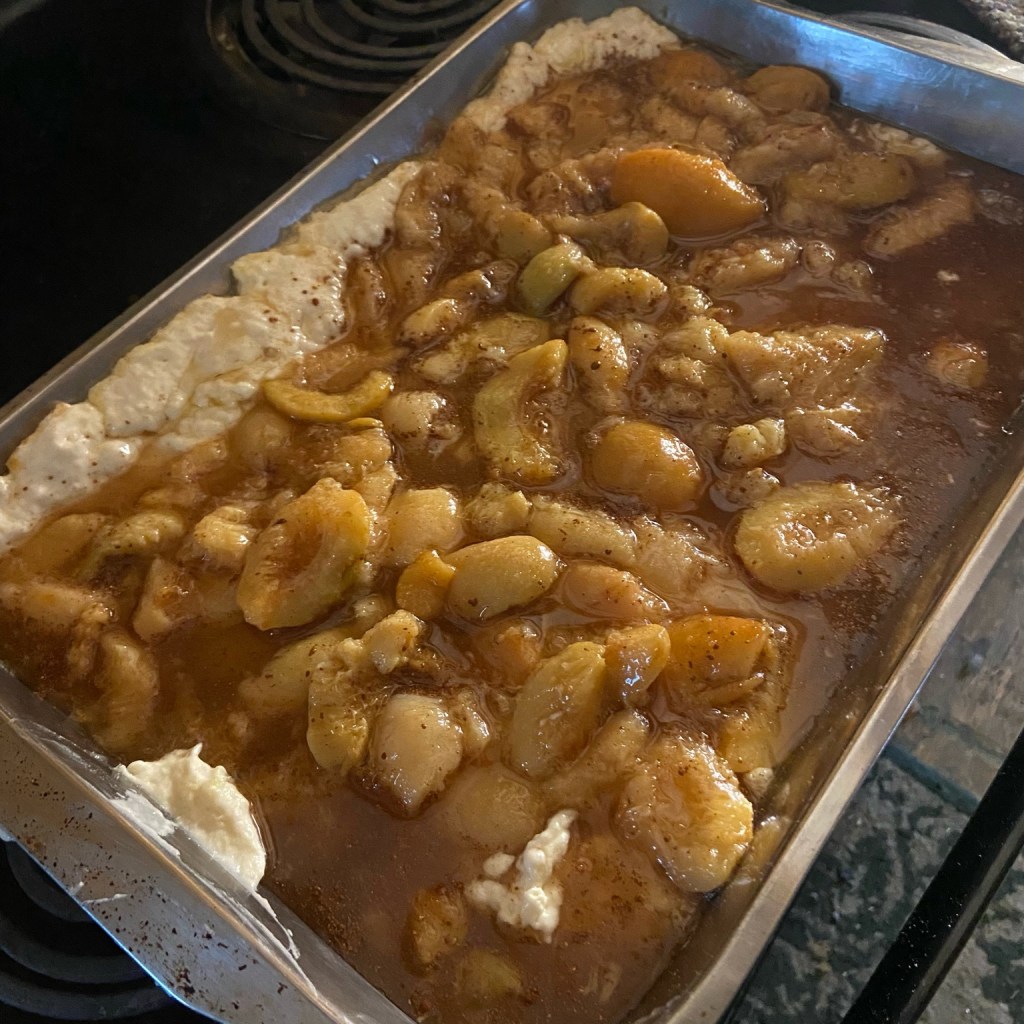
Gently spoon the peach mixture over the batter. Again, no stirring!
If desired, sprinkle the extra tablespoon of sugar over everything for a slightly crispy finish.
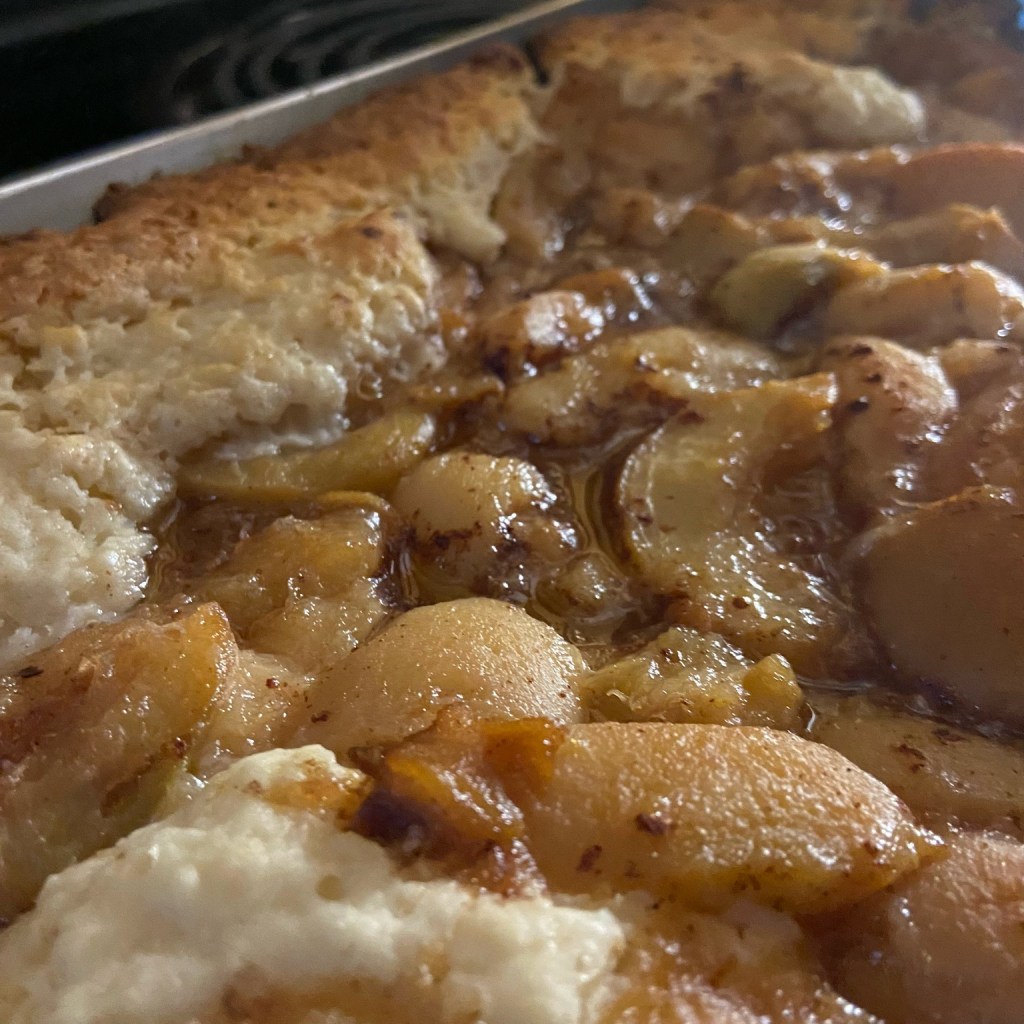
Bake for 45 minutes, or until the topping is golden brown and cooked through. Let it cool slightly before serving.
Best served warm. Great with vanilla ice cream or homemade whipped cream, our family’s favorite.
Recipe Notes
If you want to double this recipe, it still works great. Just use a 9×13 and bake for 1 hour 15 minutes to 1 hour 30 minutes.
Home canned peaches work great too, but you might want to drain some of the liquid off them before adding the other ingredients.
My family likes the spice a little more than some people, so feel free to use less nutmeg and cinnamon if desired. And I’ll be honest, I never measure the vanilla, nutmeg, or cinnamon. I go by what smells right, so these measurements are estimates.
A great variation is to add some raspberries to the peaches for pops of color and tartness.
Whether you serve it warm with ice cream or sneak a bite cold from the fridge the next morning (guilty), I hope this cobbler brings your people to the table the way it always does mine.
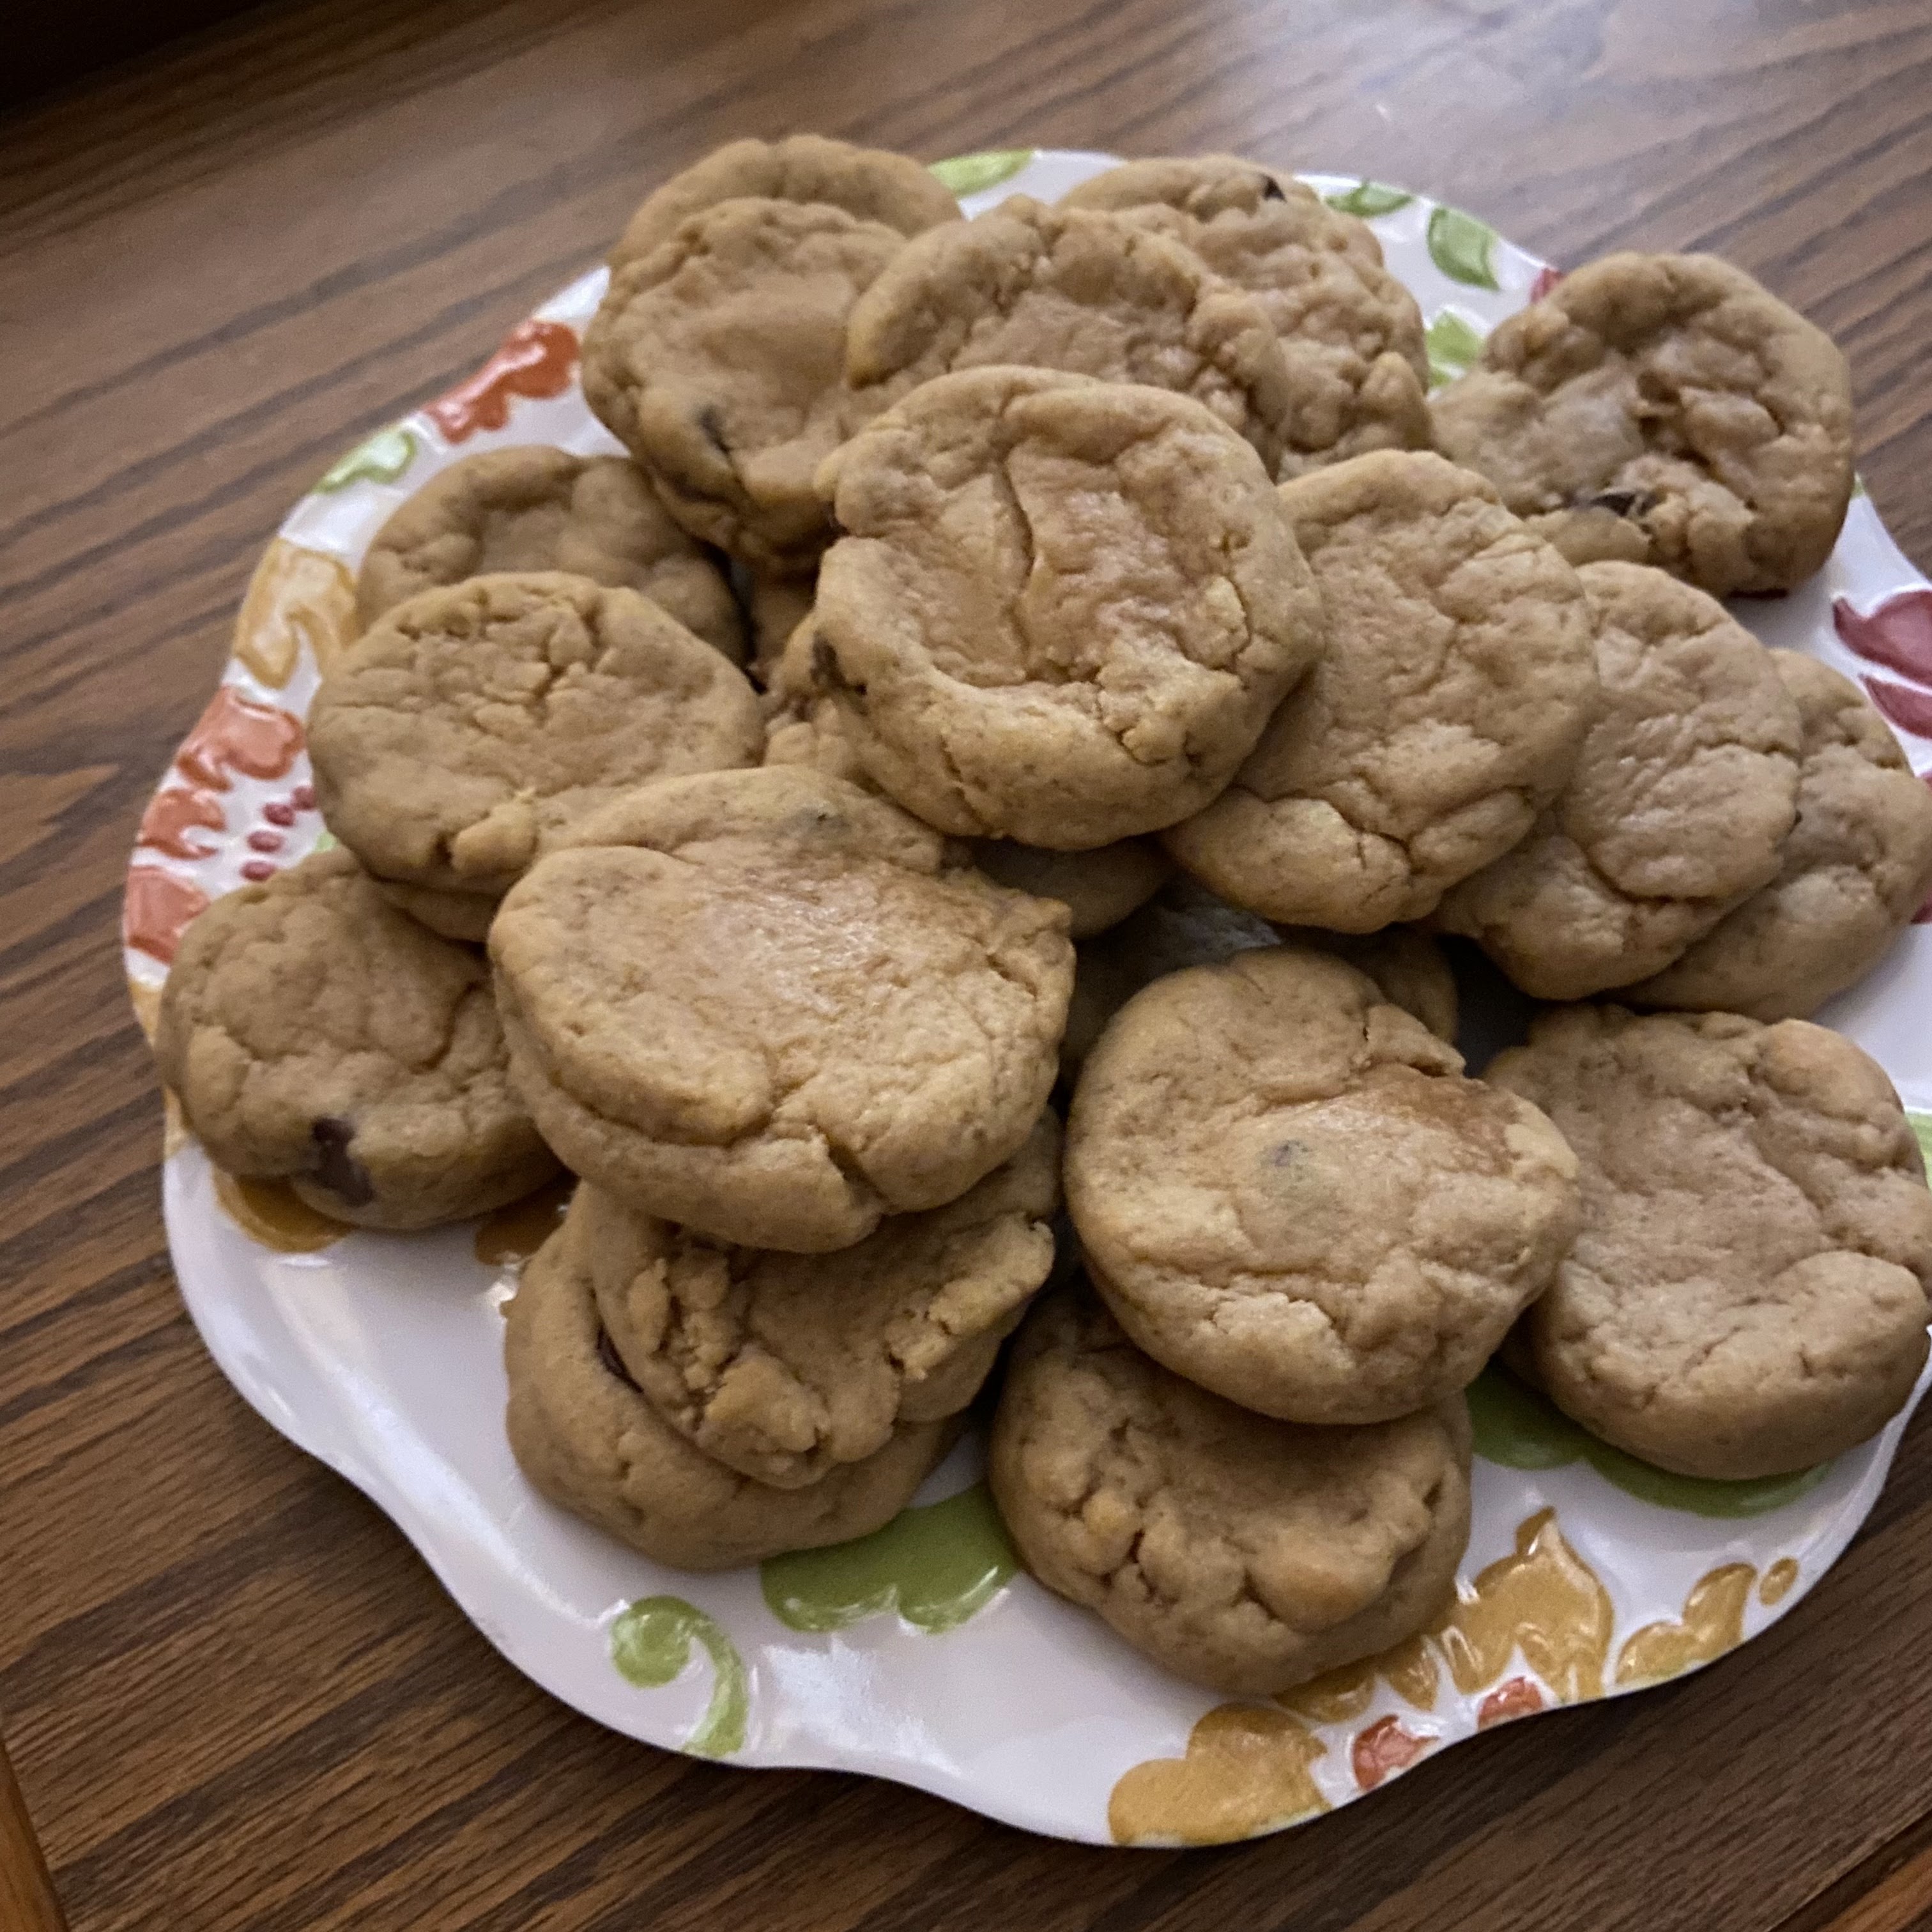
If any of y’all are like us, you have a go-to dessert recipe for when the sugar cravings hit or you want to relax with a favorite snack. For us, it’s chocolate chip cookies. But, these aren’t just any chocolate chip cookies. When we got married, Tim was very much NOT a fan of chocolate chip cookies. But sometimes I’d try different recipes to see if I could find one he did like. Because, Hello… Chocolate!
A couple of years ago, I found a recipe that sounded promising and decided to give it another try. Now, when I make something, it is pretty rare for me to follow the recipe exactly. So I did my usual and tweaked these. The original recipe called for nuts, and while I don’t have any problems with nuts, I don’t often use them in cookies. Instead, I increased the amount of flour.
I mixed up all of the ingredients, placed the cookies on the sheet, and baked them for two minutes less than the recipe said. With bated breath, I pulled the finished cookies out of the oven and watched as Tim sampled one. And something wonderful and new happened!
Alright, I may have gotten a little dramatic there, but something exciting did happen. Tim quickly proclaimed them the best chocolate chip cookies he had ever eaten, and the rest of the batch quickly followed the first as he and the kids (and me, too) basically inhaled them.
You might now be curious about what makes this recipe so special—why these cookies stand out from the rest. Well, there are a couple things that I think really made the difference for us.
Dark Chocolate
I might be stepping into a controversial subject (I don’t know), but my family is of the firm opinion that dark chocolate is VASTLY superior to milk chocolate or even semi-sweet chocolate. It keeps the rich decadent taste of chocolate without overloading on the sweet taste.
Firm Dough
Again, each to their own, but I like my cookie dough firm enough that it doesn’t spread all out in the oven. That way, the cookies come out thick enough to have soft chewy centers instead of being flat and crispy.
Shorter Bake Time
I pull these cookies out of the oven before the centers look completely set and dry. It keeps some of the moisture in them so they stay soft and moist for several days. Tim actually likes them best a day or two after baking, when the flavors have had plenty of time to blend.
So what’s in these cookies? It’s pretty much what you would expect.
Butter – I have used both salted and unsalted butter in this recipe and both work. I normally use salted without having to adjust the salt amount.
Sugar – I use raw natural sugar, but plain white sugar works too. I also cut the sugar amount as we don’t like them really sweet, but if you prefer a sweeter cookie increase the sugar by a 1/4 cup.
Brown Sugar – My preference is dark brown sugar as it adds a deeper taste, almost a caramel-ly taste. Light brown sugar works great too, though. I have even made my own brown sugar by adding molasses to raw sugar.
Vanilla – I use real vanilla extract, but imitation vanilla would probably work as well.
Eggs – I have only ever used chicken egg for this recipe. Hopefully, one of these days I can let you know how it works with duck eggs! I have never used an egg substitute.
Salt – My normal is pink Himalayan salt, but white table salt is fine too.
Baking Soda – Pretty basic, I think.
Flour – I use organic white flour. I don’t have any experience with whole wheat flour or nut flours in this recipe.
Dark Chocolate Chips – And last, but not least, the star of the show! I have used milk chocolate mini chips and semi-sweet chocolate morsels, but my definite favorite is dark chocolate chips. The darker the better. You can use a bit more than the recipe calls for with no problem or can cut it down and use less. I often use less as Tim really likes the taste of the actual cookie dough with only occasional chocolate chips.
Our Family-Favorite Soft & Chewy Chocolate Chip Cookies
1 Cup of Butter, Softened
1/2 Cup Sugar
3/4 Cup Brown Sugar
1 Teaspoon Vanilla
2 Eggs
1 Teaspoon Salt
1 Teaspoon Baking Soda
3 Cups Flour
1 1/2 Cups Dark Chocolate Chips
Instructions:
Preheat oven to 375 degrees.
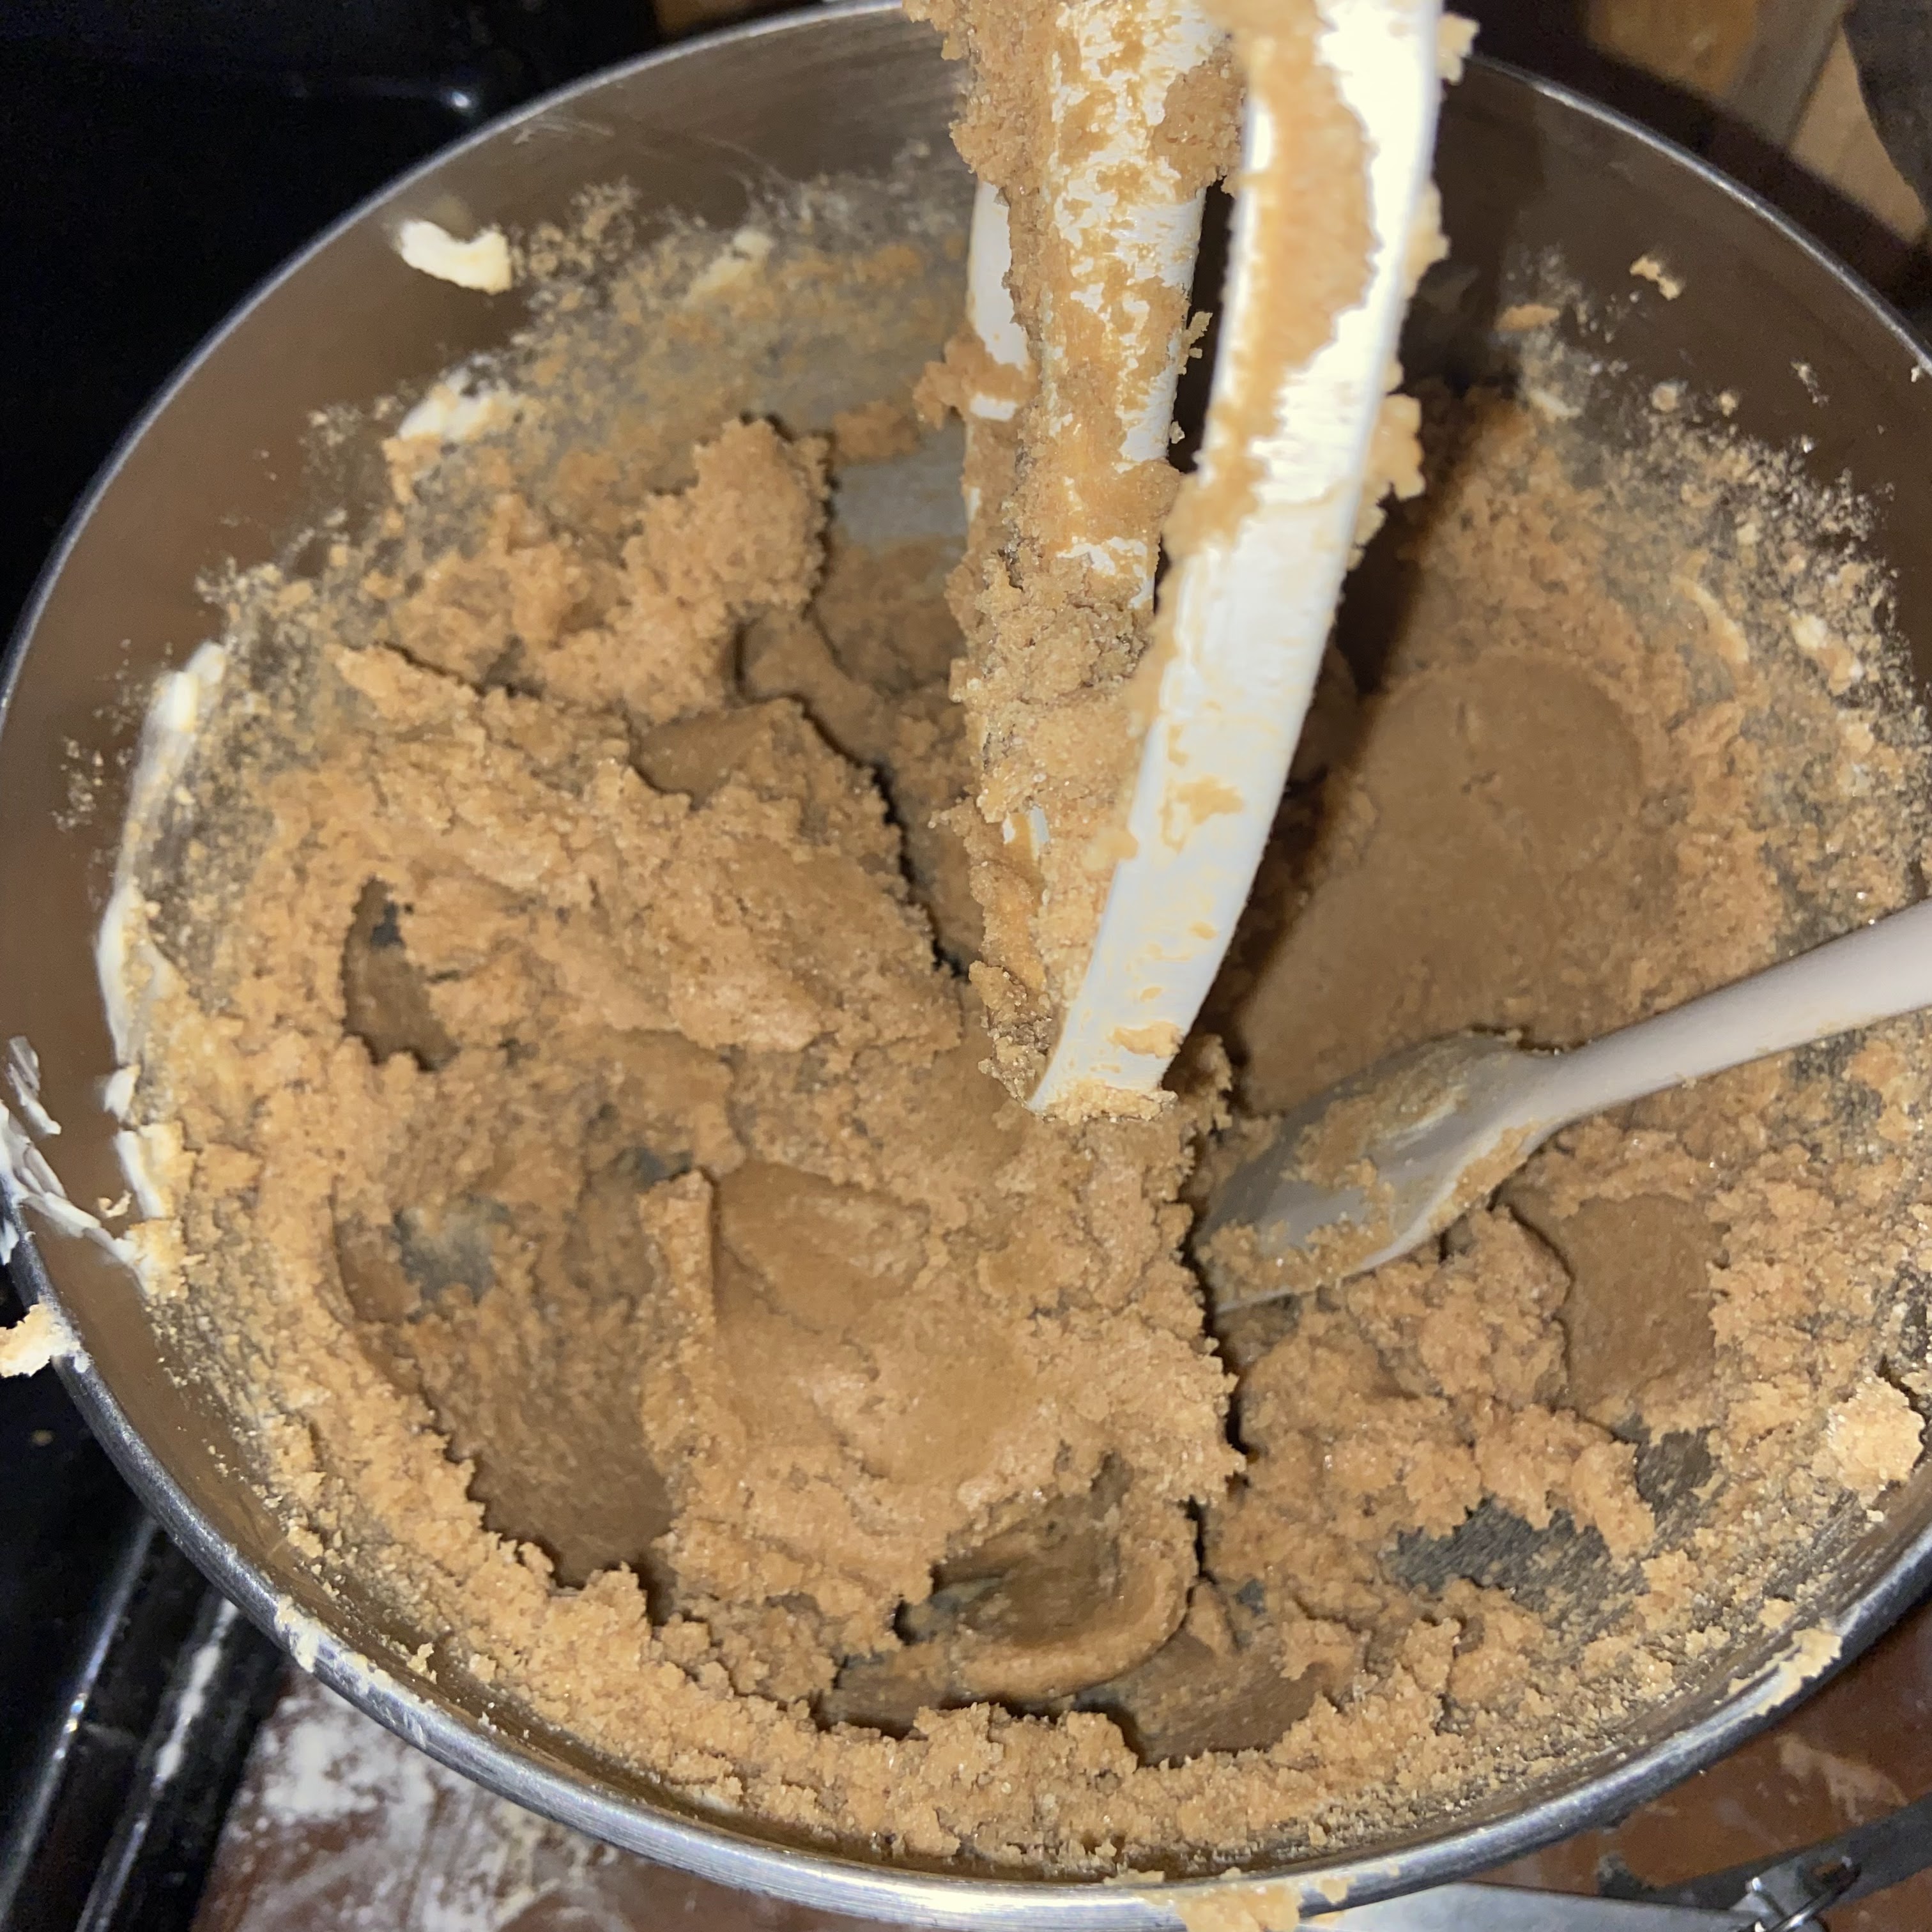
Cream the butter, sugars, and vanilla together in a stand mixer until creamy.
Add the eggs one at a time, beating after each one.
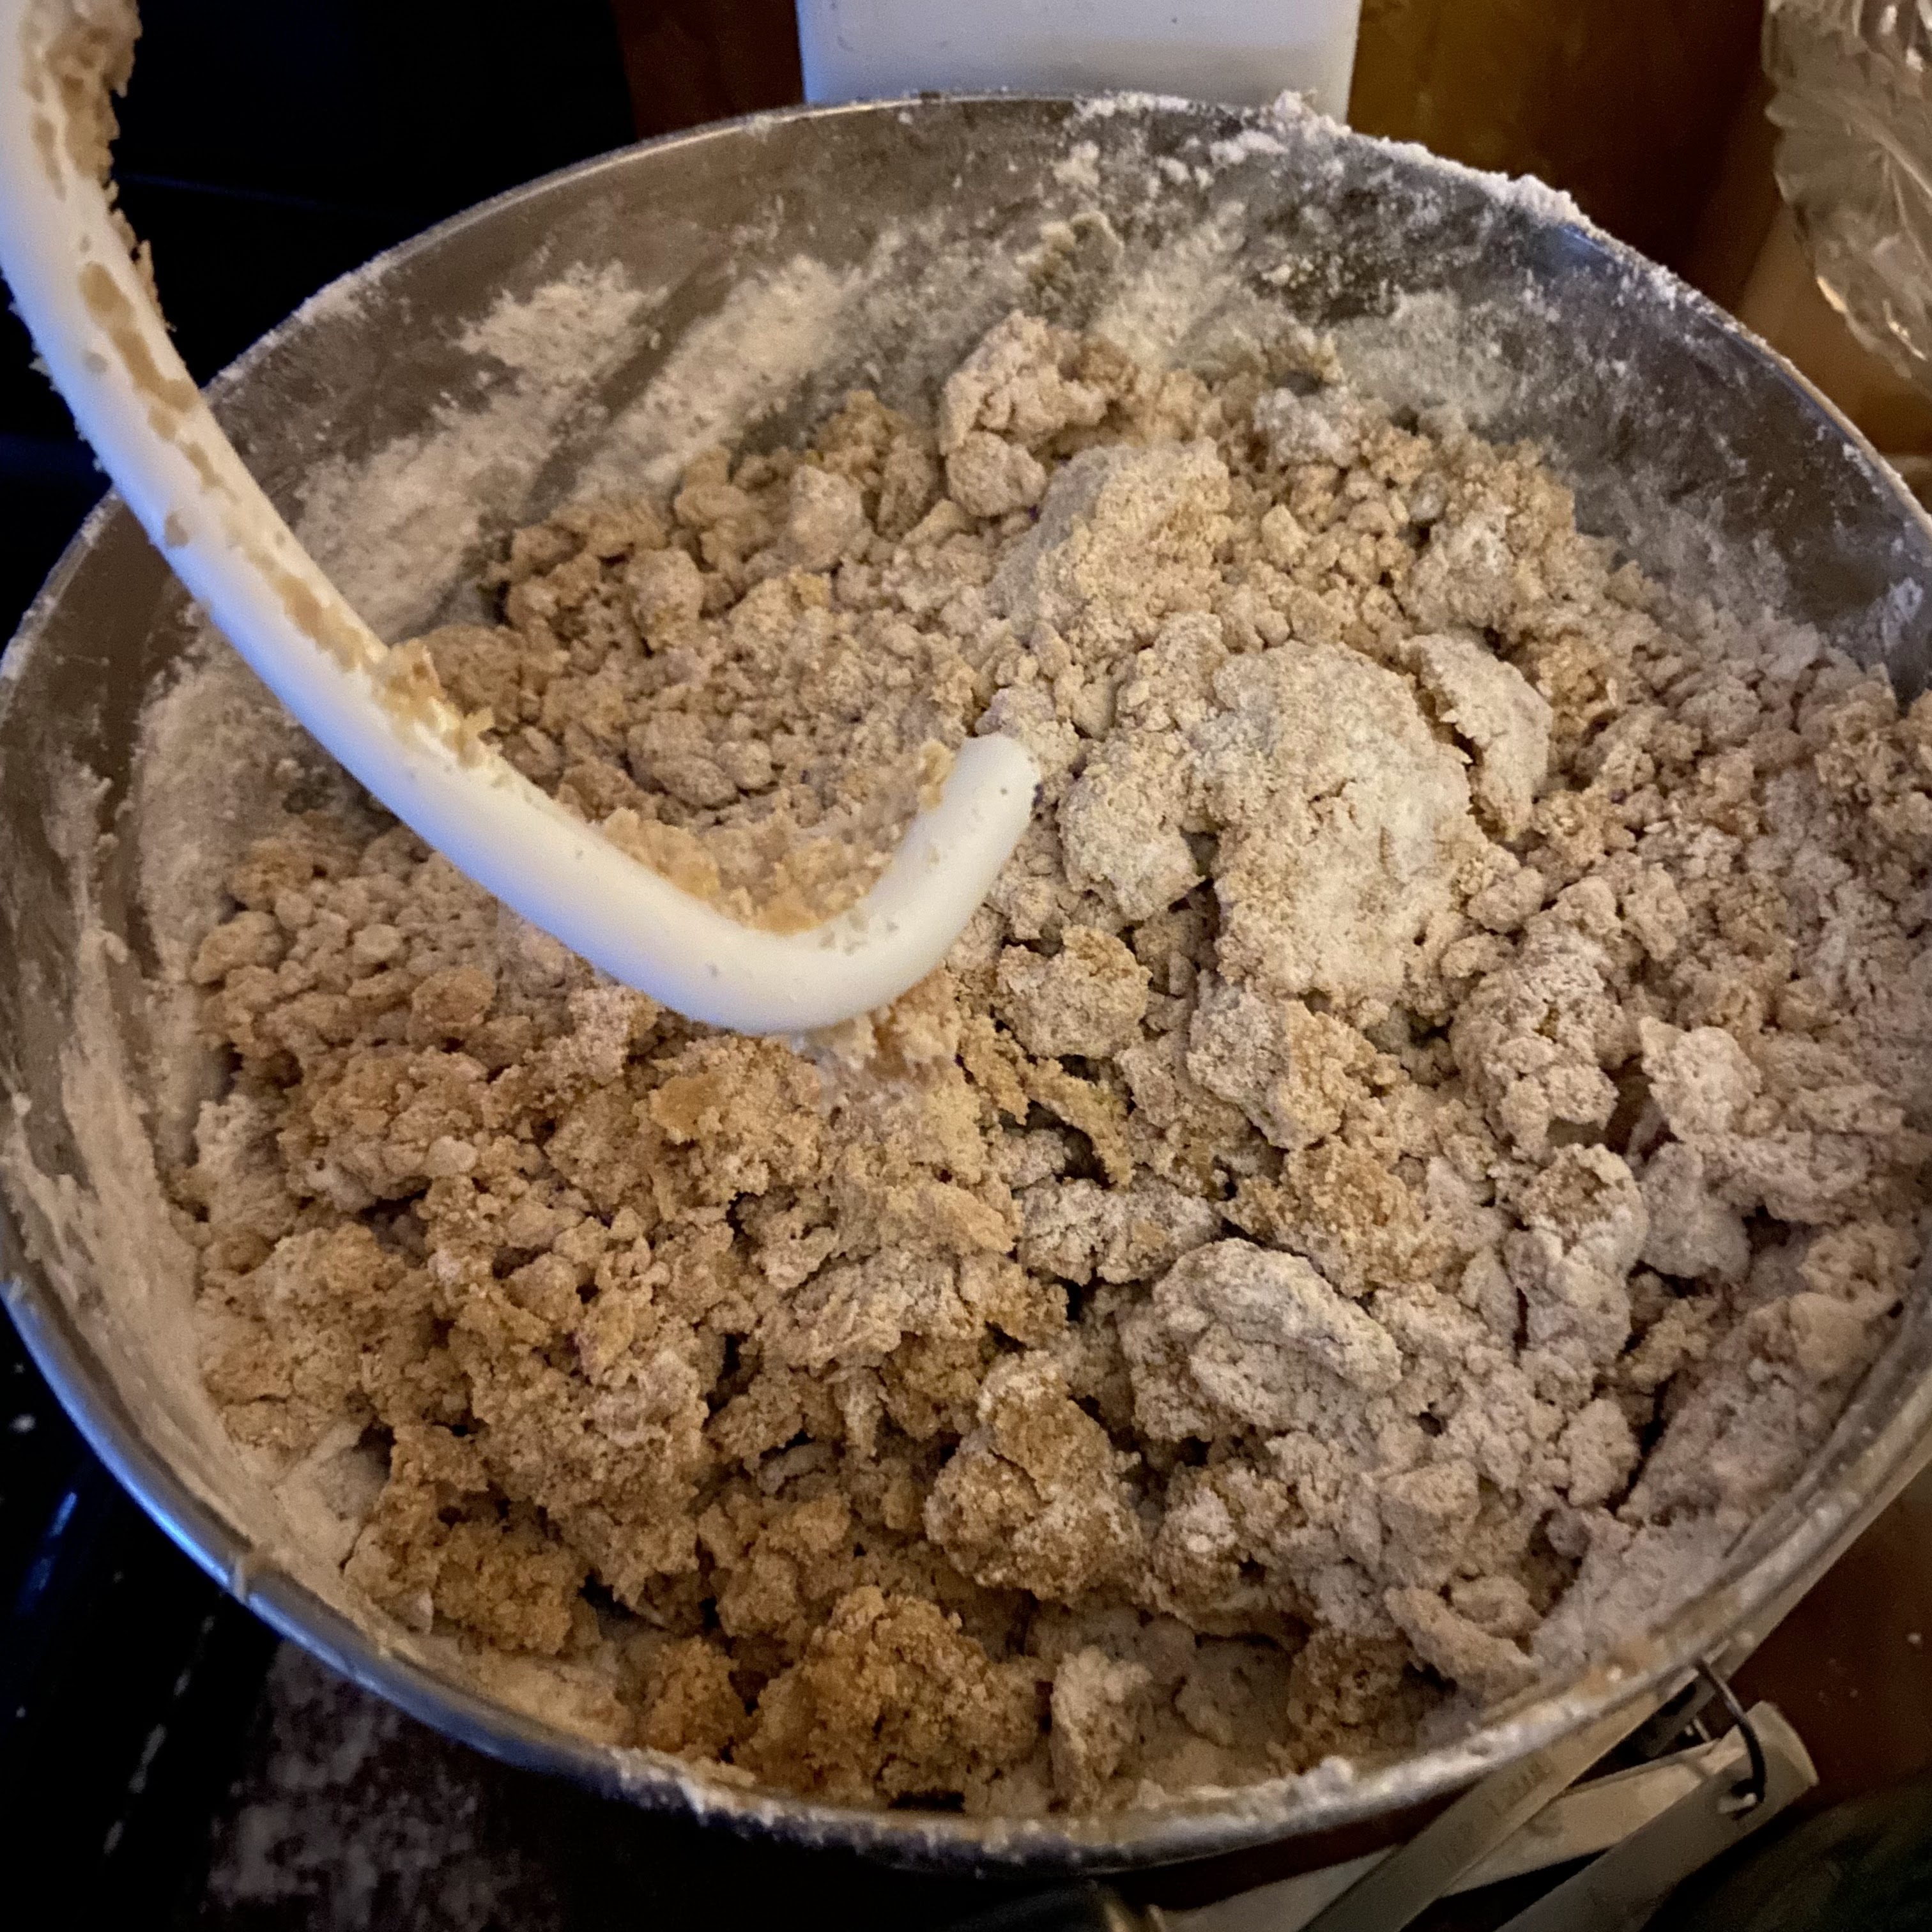
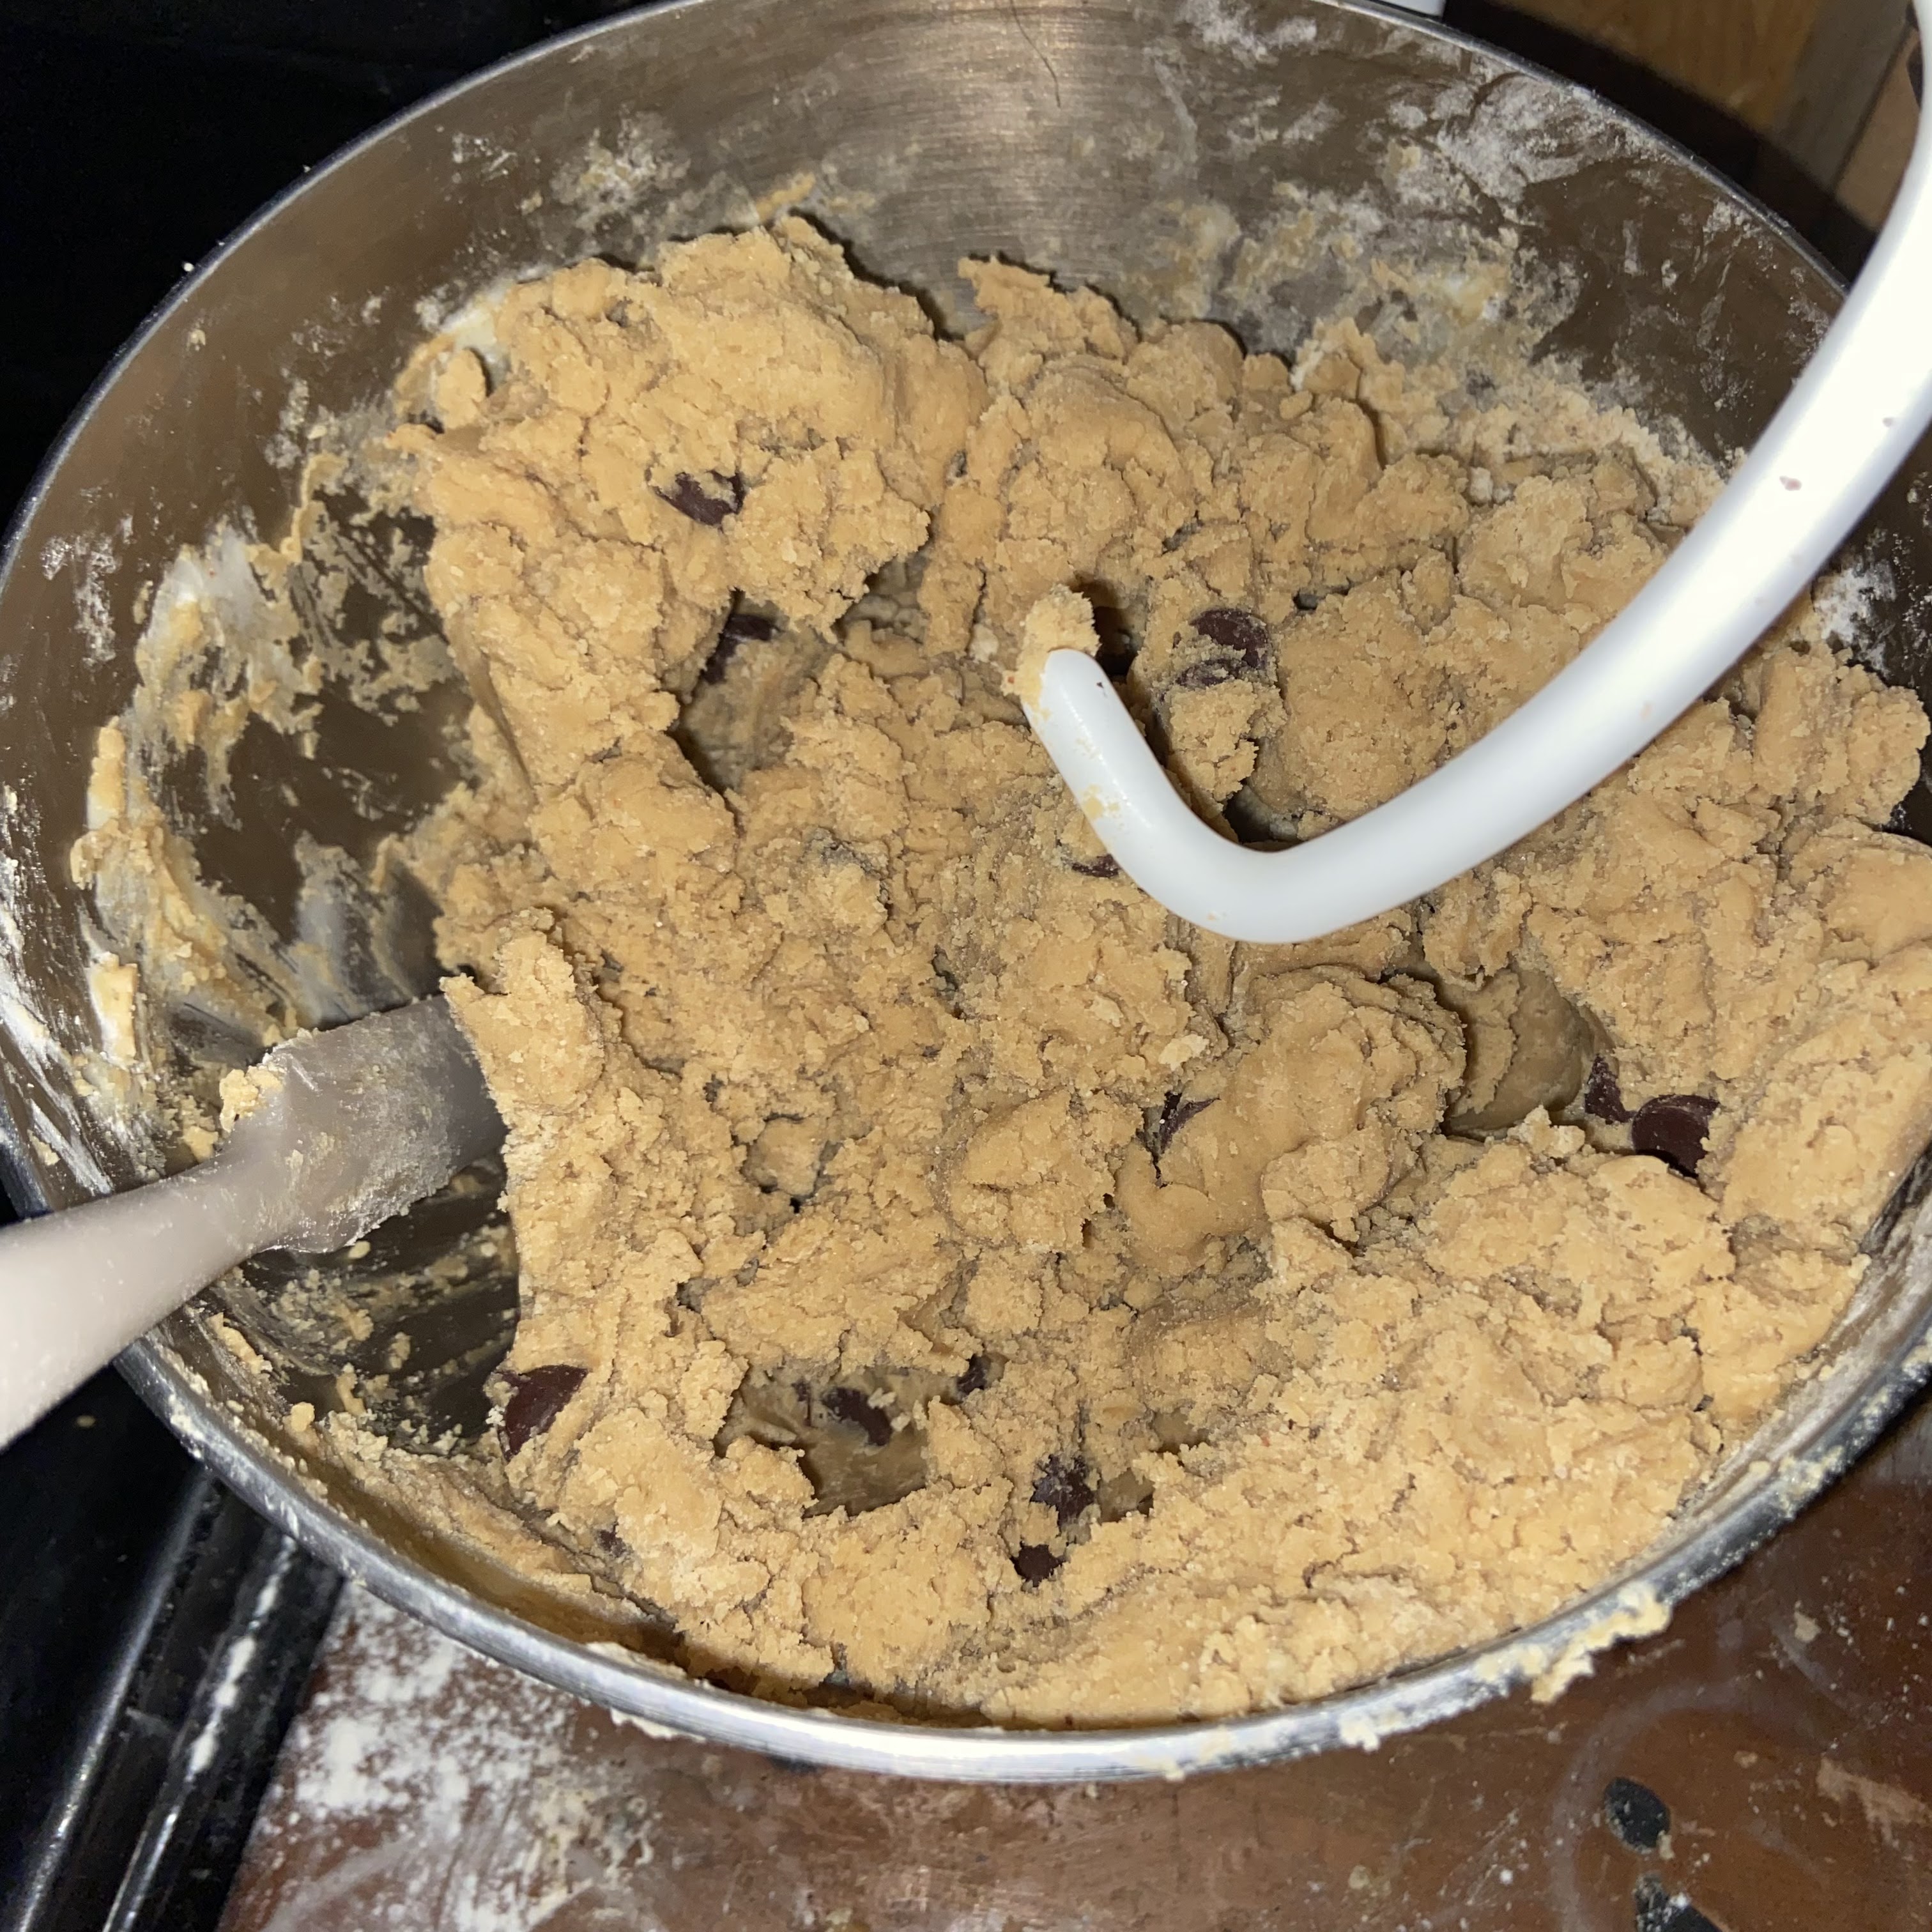
Switch to dough hook and mix in salt, baking soda, and flour. The dough may look crumbly but usually fixes itself once the flour is all mixed in.
Mix in chocolate chips.
Place thick rounds of dough about 2 inches apart on ungreased cookie sheets.
Bake for 8 minutes for soft and chewy cookies. 10 minutes if you want a crispier cookie.
Let them cool—if you can resist! At our house, they rarely last that long.