Tag: diy

  • Homemade Laundry Detergent

    For Pennies A Load!

    Like maybe some of you, I used to enjoy meandering down the candle aisle in Walmart and smelling every one that sounded interesting. And I’d check every single bottle of soap or shampoo to make sure I bought the one I liked the best.

    Now, I find myself preferring, by far, natural scents over commercial ones. In fact, just one sniff of one candle or bottle of soap is often enough to bring on a headache.

    Add to that kids who break out from harsh chemicals in most laundry detergents, and we aren’t the easiest people to buy laundry soap for.

    So, the other day, I thought, why buy it?

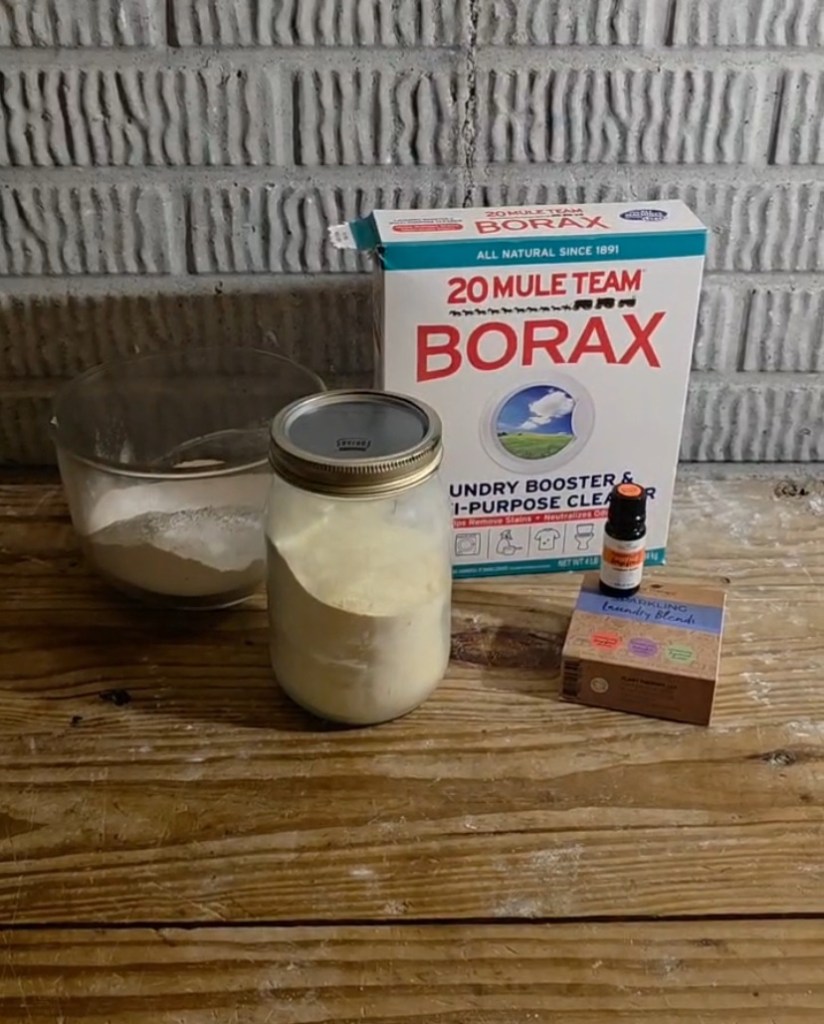
    I started checking and soon found a recipe for laundry detergent powder with only 4 clean natural ingredients, one of them being fragrance of my choice. It sounded great to me and we even had most of the ingredients on hand.

    • Borax for odor control, stain removal, and general whitening. I used 20 Mule Team brand.
    • Fels-Naptha for cleaning and stain removal. I used Purex brand
    • Washing Soda for more cleaning power and odor control. I used Arm and Hammer brand.
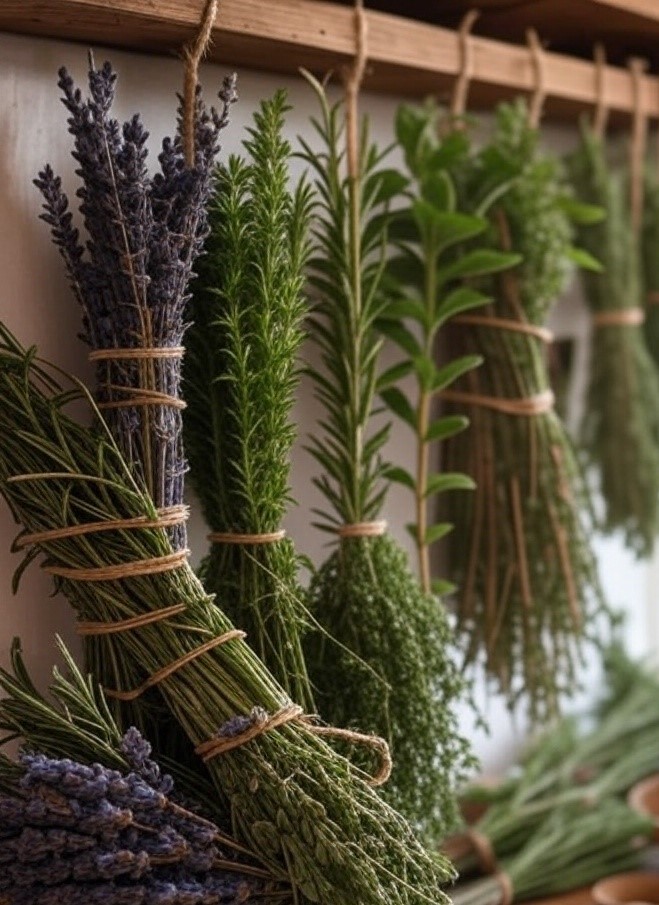
    • Essential Oils for a great natural smell. I used one of Plant Therapy laundry blends.

    I didn’t have Borax or Washing soda, but a quick trip to our little local store provided Borax and we found a way to make our own Washing soda.

    It turns out, if you put regular baking soda on a cookie sheet in the oven at 400 degrees for an hour, you have Washing Soda!

    A box of Borax, a bar of Fels-Naptha, a box of essential oils, a bowl of washing soda, and a jar of laundry detergent powder.

    Homemade Laundry Detergent


    1 cup Borax Powder

    1 cup Washing Soda

    1 cup Fels-Naptha, grated (about 1 bar)

    15-20 drops of essential oil, your choice

    If you have Washing Soda, put it and the Borax in a jar or container. You will want to use a mask or something to cover your face to keep you from breathing in the fine powders. If you don’t have Washing Soda, you can make your own by putting a cup of baking soda on a cookie sheet in a 400 degree oven for an hour. This changes the chemical formula and makes Washing Soda.

    Take the bar of Fels-Naptha and grate it. You can use the fine side of a cheese grater or your food processor shredder disc on the small side. Again, the powder is very fine and not something you want to breathe so wear something over your mouth and nose. Let it settle before you open the food processor.

    Put all three dry ingredients in a container or jar. I used a jar so I could just put a lid on and shake it to mix it.

    Let the mixture settle and then open and add 15-20 drops of essential oils for scent.

    Shake to mix in the oils and let sit overnight.

    Use 2 tablespoons for a regular load and 3 tablespoons for a heavy load.

    I also have a video showing the process on YouTube at Bringing Life Homestead.

  • No Thyme For Bugs?

    No Thyme For Bugs?

    If there is one thing about warm weather that I dislike and makes me start itching for the cold, it’s mosquitoes. With a pond nearby, a stream on the property, and a wetland down the road, we can get more mosquitoes than you can shake a stick at. Or your hand.

    After our flood earlier this year, we had clouds of biting pests so thick that someone actually put their vehicle into the ditch trying to swat them out of their face.

    Needless to say, bug repellent became a top priority. No one enjoyed being a buffet for bugs while feeding the dog or working in the garden or checking the mail.

    So I did what I do. I started researching and experimenting. I found the essential oils that are supposed to repel mosquitoes and went to work. I diluted them with carrier oils and water and added some vanilla to emulsify them or help them all mix together. Then we sprayed it on and ventured into the fray. 

    A vicious fight ensued in which we came out the losers. Maybe even sore losers. We retreated indoors to apply lavender to our wounds and discuss strategies.

    Now, if there’s one thing I’m good at, it’s coming up with ideas. I don’t guarantee them all as good ideas, but they are ideas, nonetheless. So, a few days later, after the itching calmed down some, I tried again. 

    This time I took three of the essential oils most known for repelling mosquitoes, mixed them with non-scented lotion, and applied the concoction liberally. The kids and I noticed a definite difference. We could now boldly leave the house and work outside while the mosquitoes kept a respectful distance of 6 inches or so. This blissful triumph lasted about 15 minutes. Once the lotion was all absorbed, we were right back to square 1. 

    So far, it was Mosquitoes 2; Rachel 0.

    Then, to add insult to insect injury, Tim noticed a definite difference, too. Everywhere he used the anti-bug lotion, he had broken out in a rash. Apparently, he can’t handle essential oils on his skin unless they are extremely diluted. This brought the score to a lovely Mosquitoes 2; Rachel -1.

    That put an effective stop to my experiments with bug repellent for a while. And thankfully, the majority of the flying hordes moved off or disappeared, making life much more manageable. 

    But then, Tim started taking walks almost every morning and night. He’s been given permission to even do some off-road exploring in the wetland, which opened up a slew of new opportunities for him and his camera. This brought insect repellent right back to the forefront though, since he and sometimes the kids were tramping through brush and weeds. So something had to be done for the bugs. 

    I tiptoed back to my research, unsure if I could find anything that would help without causing side effects. Finally, I found a recipe that looked promising. It called for beef tallow as the main part of the base since that stays on the skin longer than lotion or water. It also didn’t rely on just essential oils for its potency.

    No Thyme For Bugs Cream


    2 T Tallow

    1 t Beeswax

    1 T Vinegar (White or ACV)

    1 T Thyme Tea*

    10-15 Drops Lavender Essential Oil

    1/4 t Ground Clove

    Melt the tallow and beeswax in a double boiler or heat-safe bowl over simmering water. Once it is all melted, remove from heat and let cool 2-3 minutes.

    Stir in remaining ingredients and pour into a jar or sealable container. 

    Shelf life at room temperature should be 6-9 months.

    *To make the thyme tea, put 1 t of dried thyme in 1 c of boiling water, and let steep at least 5 minutes. The longer it steeps, the more potent the tea.


    Now, I know I said Tim cannot have essential oils on his skin, but that does not apply to lavender, which is how it made it into this recipe. If you know you’re sensitive to oils, feel free to test this on just a small patch of skin to see if it’s safe for you.

    I’m sure there will be more posts in the future about the efficacy of this anti-bug cream and any tweaks I make. But, I’d love to hear what worked for you and, as always, thanks for stopping by.

  • Homemade Beard Balm

    Homemade Beard Balm

    Tim has had a beard for over five years now, and it has been a surprising learning curve — for both of us. Apparently, the right way to grow a beard is not to simply quit shaving and hope for the best. It seems there are techniques and right and wrong ways to do it. Who knew growing hair could be complicated? 🙂

    For a while, he would just trim off all the tangly bits and edges and move on. But then disaster struck, the clippers clipped too much, and the whole thing had to be trimmed nearly off.

    To avoid ever doing that again, improve the overall health of his beard, and not need to worry with trimming, Tim started looking into different beard care products. But just take a wild guess how much that adds up to be in expenses over time! And the ingredients couldn’t always be vouched for either.

    So, since we were already moving away from buying things so much, beard balm joined the growing list of “Things To Make Ourselves”. Thankfully, finding a recipe wasn’t difficult and neither was mixing it up.

    Obviously, there are many recipes for beard balm. Probably as many recipes as there are men with beards, but anyway. This one uses what I had on hand, and according to Tim, works great.

    Homemade Beard Balm


    Ingredients


    1 Tablespoon Beeswax Pellets (Firmness and Hold)

    1 Tablespoon Jojoba Oil (Lightweight and Hydration)

    1 Tablespoon Argan Oil (Deep Conditioning)

    1 Tablespoon Evening Primrose Oil (Soothing and Anti-Inflammatory)

    Essential Oils (Optional, Your Choice, 10-12 Drops)


    4 Drops Cedarwood

    4 Drops Patchouli

    2-4 Drops Bergamot

    Instructions


    Melt the beeswax and carrier oils in a double boiler or a heat-safe bowl or jar over simmering water.

    Stir gently until everything is fully liquid.

    Remove from heat and let cool 2-3 minutes so it won’t scorch the essential oils.

    Add the essential oils of your choice and stir thoroughly.

    Pour into a 2 oz tin or small jar and let it harden uncovered. Then cover and store.

    This balm might not harden as much as some you might be used to as it does not have shea butter in it. If you would like it more firm, remelt, but only just as to not damage the essential oils, and add a little more beeswax.

    Also, be sure to buy only high-quality organic oils from sources you trust. According to my research, food-grade beeswax and carrier oils is best, and therapeutic-grade essential oils. I got my beeswax and carrier oils on Amazon, and I will do my best to add links as soon as possible. But, obviously, do your own research and make your own educated choices.

    While helping make this, a worried Micah handed me the Evening Primrose oil and half whispered, “Daddy can’t use this. Men can’t smell like roses.”

  • Decorating With Dreams And Dirt

    Decorating With Dreams And Dirt

    Hi!

    The thing with building a new house from the ground up is that you also have to decorate the entire house. This may seem strange, but up until now, I have never really had a whole house to decorate. As a result, I am still trying to piece together what styles and themes I like.

    Growing up, decorating always followed a theme. A style was chosen and then stuck with throughout the entire room if not the whole house. This technique is fine and I am not criticizing it. The only problem with it, at least in my case, is that I like too many styles. I like feminine and primitive, elegant and rustic, lace and cast iron.

    For a good while, I tried to wrangle my likes into a specific theme so I could be “normal” but finally I gave up and quit fighting myself. After all, normal is overrated. So I am working on a list of everything I like when it comes to decorating. It’s actually longer than I thought it would be and an interesting mixture of styles that may even fall under the definition of eclectic.

    While I won’t tire you out by including the entire list here, I would like to tell you about one specific part of it and especially the reason behind it.

    I have a collection of ceramic planters that I am in the process of painting. They came from a couple of ceramic businesses that Tim and I cleaned out after they closed.

    So far I only have two painted, but I have several more to go. They range from small to large, from simple to more ornate. I even have two that are owl-themed and one that has raccoons on it. They are fairly good-sized and will probably spend most of their time outside.

    Painting always interested me but seemed too daunting and above my skill level. Tim started painting first

    and pushed me to try it and now here we are! I found that not only do I thoroughly enjoy painting, but it is far easier than I expected. You never know until you try, do you?

    Anyway, all of that brings me to the main point. One thing I want in my house, one thing I am very adamant about having in my house, is an herb corner. Well, it doesn’t have to be a corner, but I want fresh herbs growing inside. I want the freedom to pick a few leaves of thyme for a marinade, a mint leaf for nausea, or fresh basil for a cucumber tomato salad. I want the look and smell of rosemary and lavender and sage growing here and there. I want to have bunches of herbs hanging to dry along the walls or in the kitchen.

    While I cannot lay claim to having the best of green thumbs, I am determined to do my best to keep my herb garden flourishing. Both indoors and outdoors.

    To me, herbs are a vital part of a homestead. There is just so much you can do with them! Each one has its own unique spot in cooking and in homemade medicine.

    When I think of what herbs I want to plant, lavender is usually one of the first that comes to mind. While not often used in cooking (although I have had lavender ice cream, yogurt, and coffee), its many medicinal benefits are amazing. Lavender tea is calming and helps with mild insomnia since it promotes relaxation and encourages restful sleep. It also may ease stomach issues. The scent of lavender can help with tension headaches and is a general mood booster. A lavender wash made from steeping the fresh flowers and then letting the water cool is wonderful for bug bites, bee stings, scrapes, minor cuts, bruises, and more as it is anti-inflammatory and a pain reliever. The plants are also supposed to repel mosquitos. Sounds like a winner to me!

    Thyme is pretty high on the list too. Wonderful on baked chicken, I also like to mix it with rosemary and parsley to make a delicious herb bread. Thyme is another powerhouse herb to have on hand in a home apothecary. Excellent for respiratory and digestive health, it can be used to open sinus passages and soothe coughs. It relaxes the GI tract and is known to help with intestinal parasites. But it doesn’t just kill internal bugs. Thyme is a strong antibacterial and antifungal herb making it great to use in homemade cleaners.

    Honestly, my list of “favorite” herbs is probably too long to talk in detail about them all. Others of note are mint for tea and nausea, rosemary for cooking and headaches, oregano for pasta sauce and immune boosts, and the list goes on and on.

    Needless to say, I have great plans for my herb corner, and I can’t wait to see them play out.

    I may not have it all figured out yet, but piece by piece—style by style and herb by herb—this house is becoming home.