Tag: from scratch

  • Thick, Chewy, Bold Gingerbread Cookies

    Thick, Chewy, Bold Gingerbread Cookies

    When I think of cookies, I think of thick cookies with centers that are still chewy. Cookies and cakey are seldom together in my vocabulary.

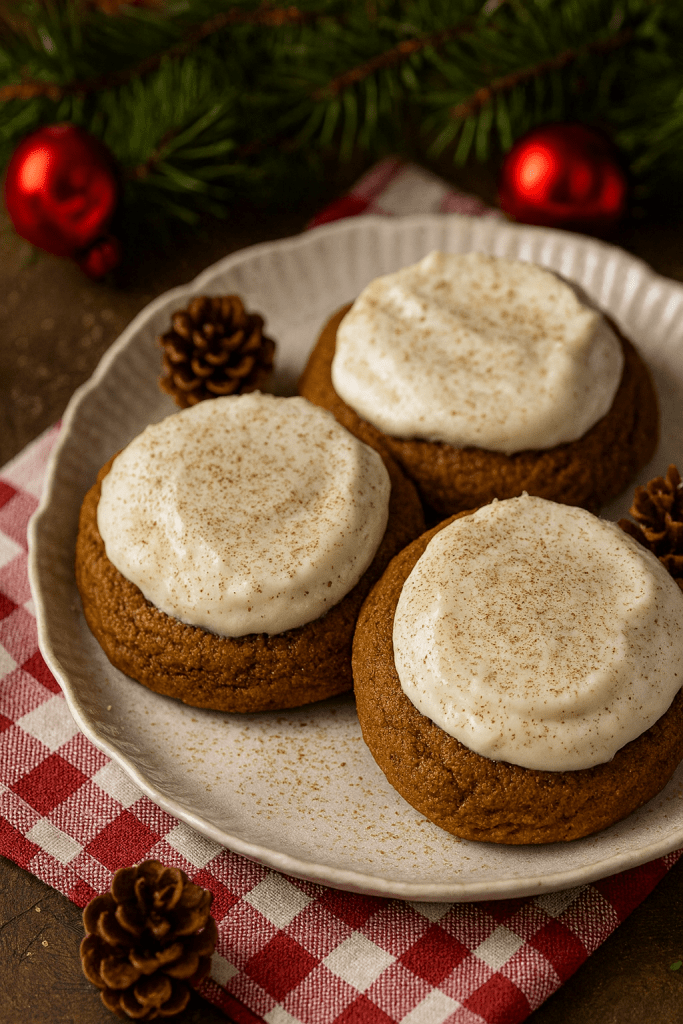
    That description applies to these gingerbread cookies too. While they could be rolled out and cut with cookie cutters, I much prefer them shaped into balls like one would for chocolate chip cookies. Thick and soft, even after a few days, these gingerbread cookies are full of warm spices and make an amazing addition to the holidays. Or any day, really.

    Dry Ingredients


    • 1 tablespoon ground ginger
    • 2 teaspoons ground cinnamon
    • 1 heaping teaspoon ground nutmeg
    • ½–1 teaspoon ground cloves (optional but adds wonderful depth)
    • 1 teaspoon salt
    • 1 ½ teaspoons baking soda
    • 4 cups all-purpose flour, sifted
    • PLUS ½–1 cup extra flour, only if needed

    Wet Ingredients

    • 1 cup (2 sticks) salted butter, softened
    • 1 cup packed brown sugar
    • 1 cup molasses
    • ¼ cup half-and-half
    • 1–2 teaspoons vanilla extract

    Instructions

    1. Cream butter + brown sugar + vanilla

    Beat until smooth, fluffy, and lighter in color.

    2. Add molasses and half-and-half

    Mix until combined. Slight separation is normal.

    3. Add all the spices, salt, and baking soda

    Stir well so they’re evenly distributed.

    4. Add the 4 cups of flour

    Mix until a soft but formed dough appears.

    5. Add extra flour only if needed

    Add 2–3 tablespoons at a time, stopping when the dough is:

    • Soft
    • Slightly tacky
    • But workable without heavy sticking

    (You want a tender dough, not stiff.)

    6. Chill at least 1 hour

    Improves flavor and prevents spreading.

    7. Roll out ½ inch thick

    Or shape into balls.
    These are meant to be thick, chewy cookies.

    8. Bake at 350°F for 8-10 minutes

    Pull when edges are set, but centers look slightly soft and puffy.
    They firm as they cool.

  • Classic Pecan Pie

    Classic Pecan Pie

    a pecan pie in a milk glass pie plate

    Prep Time: 10 minutes
    Bake Time: 55–65 minutes
    Serves: 8

    This is the pecan pie people sneak a slice of before dinner — rich, buttery, gooey, caramel-sweet, and full of toasted pecans. Simple ingredients, classic flavor, and a flaky crust that makes it absolutely irresistible.


    🧂 Ingredients

    For the Filling

    • 1 cup light corn syrup
    • 1 cup sugar
    • 3 large eggs
    • ¼ cup (4 Tbsp) melted butter
    • 1 ½ tsp vanilla extract
    • ½ tsp salt
    • 1 ½ cups pecan halves

    For the Crust

    Use a homemade flaky pie crust for the best results.
    You can find my recipe here:
    LINK:FlakyHomemadePieCrustRecipeLINK: Flaky Homemade Pie Crust RecipeLINK:FlakyHomemadePieCrustRecipe

    (A store-bought unbaked 9-inch crust works in a pinch, but the homemade one really makes this pie shine.)


    🔪 Instructions

    1. Prepare the crust.

    Press your unbaked pie crust into a 9-inch pie pan. Crimp or flute the edges. Keep chilled while you mix the filling.

    2. Mix the filling.

    Whisk together the corn syrup, sugar, eggs, melted butter, vanilla, and salt until smooth.

    3. Add the pecans.

    Fold in the pecan halves until everything is evenly coated.

    4. Assemble and bake.

    Pour the filling into your prepared crust.

    Bake at 350°F for 55–65 minutes, or until:

    • the top is golden and set,
    • the edges are firm,
    • and the very center still has a gentle wobble.

    5. Cool completely.

    Let cool at least 2 hours so the filling fully sets and slices cleanly.


    💡 Tips for the Best Pecan Pie

    • If the crust edges brown too quickly, tent them loosely with foil.
    • Toast the pecans in a dry skillet for 3–5 minutes for deeper flavor.
    • For a slightly less-sweet pie, swap ¼ cup of the sugar for brown sugar.
    • This pie slices beautifully when made a day ahead.

    🕯️ Bringing Life Note

    A flaky crust really is the foundation of the perfect pecan pie. If you haven’t tried my homemade version yet, this is a place to make it shine. Rich, buttery filling + crisp, tender crust = pure holiday comfort.

  • Classic Pumpkin Pie

    Classic Pumpkin Pie

    a pumpkin pie in a glass pie plate waiting to be sliced and served

    Prep Time: 15 minutes
    Bake Time: 55–65 minutes
    Serves: 8

    This is the pumpkin pie everyone hopes will show up on the Thanksgiving table — smooth, rich, warmly spiced, and nestled in a flaky, buttery crust. No shortcuts, no odd flavors, just the holiday classic done right.


    🧂 Ingredients

    For the Pie Filling

    • 1 (15 oz) can pumpkin purée
    • 1 cup heavy cream
    • ½ cup whole milk
    • ¾ cup sugar
    • 2 large eggs
    • 1 egg yolk
    • 1 ½ tsp cinnamon
    • ½ tsp ginger
    • ¼ tsp nutmeg
    • ¼ tsp cloves (or allspice)
    • ½ tsp salt
    • 1 tsp vanilla

    For the Crust

    Use your favorite homemade pie crust (your flaky one!) or a good-quality unbaked 9-inch pie shell.


    🔪 Instructions

    1. Prepare the crust.

    Place your unbaked pie crust into a 9-inch pie dish. Flute or crimp the edges. Keep chilled while you mix the filling.

    2. Mix the filling.

    In a large bowl, whisk together the pumpkin, sugar, spices, and salt. Add eggs + yolk and whisk until smooth. Stir in cream, milk, and vanilla until fully combined.

    3. Fill the crust.

    Pour the pumpkin mixture into your prepared pie shell.

    4. Bake.

    Bake at 425°F for 15 minutes, then reduce heat to 350°F and bake 40–50 minutes, or until:

    • the edges are set,
    • the center still has a gentle wobble,
    • and a knife inserted 1 inch from the crust comes out mostly clean.

    5. Cool completely.

    Let cool on a wire rack for at least 2 hours. This helps it fully set and slice cleanly.


    💡 Tips for the Perfect Pumpkin Pie

    • If the crust edges brown too quickly, tent them with foil.
    • Don’t over-bake — slight jiggle = creamy texture.
    • Serve with lightly sweetened whipped cream and a dusting of cinnamon.
    • Make it a day ahead for the best flavor and cleanest slices.

    🕯️ Bringing Life Note

    Pumpkin pie is the warm smell of Thanksgiving — cinnamon drifting through the house, a flaky crust cooling on the counter, and that first velvety slice after supper. Keep it simple, keep it classic, and it will never disappoint.

  • Classic Cranberry Salad

    Classic Cranberry Salad

    a cut glass footed bowl of classic cranberry salad with whipped cream on top

    Ingredients

    Cranberry Base:

    • 1 (12-oz) bag fresh cranberries, rinsed
    • 1 cup sugar
    • 1 large apple, peeled and diced (Honeycrisp or Gala works great)
    • 1 cup crushed pineapple, drained well
    • 1 orange, peeled and chopped (or use zest + segments)
    • ½–¾ cup chopped pecans or walnuts

    Cream Layer (optional but amazing):

    • 1 cup heavy whipping cream (or 8 oz Cool Whip if preferred)
    • 2 Tbsp powdered sugar
    • 1 tsp vanilla

    Instructions

    1. Prep the Cranberries

    • Pulse cranberries in a food processor until finely chopped (but not puréed).
    • Stir in sugar and let sit at least 30 minutes or up to overnight. This helps the cranberries release juices and mellow.

    2. Add the Fruit & Nuts

    Stir in:

    • diced apple
    • drained pineapple
    • chopped orange
    • chopped pecans

    Chill until ready to serve.

    3. Make the Cream Layer

    Whip the heavy cream with powdered sugar and vanilla until stiff peaks form.
    Fold into the cranberry mixture OR layer on top, depending on how you like it.

    (Some families add miniature marshmallows too—totally optional but classic!)

    4. Chill

    Refrigerate at least 2 hours to let flavors meld. Overnight is even better.


    Notes

    • Texture: If you want a firmer, more “salad-y” texture, stir in 1–2 cups mini marshmallows or fold in only half the whipped cream.
    • Sweeter: Add up to ½ cup more sugar depending on your preference.
    • Make Ahead: Keeps 2–3 days in the fridge and is best cold.
  • Flaky Homemade Pie Crust

    Flaky Homemade Pie Crust

    A classic, buttery, reliable crust for fruit pies, pot pies, cream pies, and more.

    This is my go-to pie crust — tender, flaky, and simple enough for everyday baking yet sturdy enough for deep-dish pies and savory pies. It uses basic pantry ingredients and comes together quickly, even in large batches.


    Ingredients

    (Makes one double crust or two single crusts)

    • 2 ½ cups (315 g) all-purpose flour
    • 1 teaspoon salt
    • 1 cup (2 sticks / 226 g) cold unsalted butter
      • or ½ butter + ½ lard for extra flake
    • 6–8 tablespoons ice water
    • Optional: 1 teaspoon vinegar or lemon juice (helps prevent toughness)

    Instructions

    1. Mix dry ingredients.

    Whisk together flour and salt in a large mixing bowl.

    2. Cut in the fat.

    Add cold, cubed butter.
    Use a pastry cutter or your fingertips to blend until the mixture has pea-sized pieces with some larger flakes.
    Visible butter = flaky crust.

    3. Add water.

    Sprinkle in 4 tablespoons of ice water, tossing gently.
    Add more water, 1 tablespoon at a time, just until the dough holds together when squeezed.
    Do not overwork.

    4. Chill.

    Divide the dough into two discs, wrap tightly, and refrigerate for at least 1 hour (or up to 2 days).
    This rest time relaxes the dough and keeps the butter cold.

    5. Roll out.

    Roll the first disc on a lightly floured surface to about ⅛ inch thick.
    Transfer to a 9-inch pie dish. Add your filling or continue to the prebaking instructions below.


    When to Prebake (Blind Bake)

    Most pies do NOT need the crust baked ahead of time.
    Use the guide below to choose the right method:


    NO Prebake Needed

    Use a raw crust for:

    • Apple pie
    • Berry pies
    • Cherry, peach, rhubarb
    • Pumpkin pie
    • Pecan pie
    • Meat/vegetable pot pies

    Just fill the raw crust and bake according to your recipe.


    Partial Blind Bake (Quiche & Lightly-Baked Fillings)

    Needed for:

    • Quiche
    • Custard pies that bake at low heat
    • Some tarts

    How to Partial Bake:

    1. Chill rolled crust 10 minutes in freezer (prevents shrinking).
    2. Line with parchment + pie weights.
    3. Bake at 375°F (190°C) for 15 minutes.
    4. Remove weights.
    5. Bake 5 more minutes, until the bottom looks set but not browned.

    Full Blind Bake (Cream Pies & No-Bake Fillings)

    Needed for:

    • Banana cream
    • Chocolate cream
    • Coconut cream
    • French silk
    • Any pie where the crust must be fully cooked before filling

    How to Fully Blind Bake:

    1. Chill rolled crust 10 minutes.
    2. Line with parchment + pie weights.
    3. Bake at 375°F for 15 minutes.
    4. Remove weights.
    5. Bake 10–15 minutes more, until golden brown and crisp.

    Total time: about 25–30 minutes.


    Tips for Best Results

    • Keep ingredients cold for maximum flake.
    • If the dough softens while rolling, chill 10 minutes and resume.
    • For a glossy top crust, brush with an egg wash before baking (1 egg beaten with 1 tbsp milk).
    • Dough discs freeze well for up to 3 months.
  • Classic Cornbread Stuffing

    Classic Cornbread Stuffing

    a casserole dish of cornbread stuffing

    Serves: 8–10 | Prep Time: 20 min | Bake Time: 35–40 min


    🧂 Ingredients

    • 8 cups day-old cornbread, cubed (about one 9×13 pan)
    • 1 medium onion, finely chopped
    • 3 celery stalks, chopped
    • ½ cup (1 stick) butter
    • 1 tsp salt
    • ½ tsp black pepper
    • 1½ tsp dried sage
    • 1 tsp dried thyme
    • 1 tsp dried parsley
    • 2 cups chicken or turkey broth (more if you like it moister)
    • 2 large eggs, beaten

    🔪 Instructions

    1. Prep the cornbread.
      Cut your cornbread into cubes and let it dry overnight, or toast it in a 300°F oven for 15–20 minutes until lightly crisp.
    2. Sauté the vegetables.
      In a large skillet, melt butter over medium heat. Add onion and celery; cook until soft and fragrant, about 8–10 minutes.
    3. Combine.
      In a large bowl, gently toss cornbread with cooked vegetables, salt, pepper, and herbs.
    4. Add liquids.
      Pour in broth and beaten eggs, stirring gently until evenly moistened but not soggy.
    5. Bake.
      Transfer to a greased 9×13 baking dish. Bake uncovered at 350°F for 35–40 minutes, until the top is golden and slightly crisp.

    💡 Tips

    • Use homemade cornbread for best texture (not sweet or cakey).
    • For a heartier version, add ½ pound of cooked sausage or diced apples and cranberries.
    • If you like softer stuffing, cover it loosely with foil for the first 25 minutes.

    🕯️ Bringing Life Note

    Cornbread stuffing tastes like home — buttery edges, savory herbs, and that golden top that smells like Thanksgiving. Simple ingredients, no shortcuts, just good food the way it’s meant to be shared.

  • Best Ham Glaze Recipe

    Best Ham Glaze Recipe

    a sliced ham on a platter with herbs

    Prep Time: 10 min | Cook Time: 10–15 min | Makes: Enough for 1 large ham

    🧂 Ingredients

    • 1 cup brown sugar (light or dark)
    • ¼ cup honey
    • ¼ cup orange juice (or pineapple juice)
    • 2 Tbsp Dijon mustard
    • 1 Tbsp apple cider vinegar
    • ½ tsp ground cloves
    • ½ tsp cinnamon
    • ¼ tsp black pepper

    🔪 Directions

    1. Combine ingredients.
      In a small saucepan, whisk together all ingredients.
    2. Simmer.
      Cook over medium heat until the sugar dissolves and the glaze thickens slightly, about 10–15 minutes. Stir often to prevent burning.
    3. Glaze the ham.
      Brush half the glaze over your ham before baking. During the last 20 minutes of baking, brush with the remaining glaze every 5–7 minutes for that glossy, caramelized finish.
    4. Optional:
      Add 1–2 tablespoons of the pan drippings to the leftover glaze for extra flavor before serving.

    💡 Tips

    • If you prefer a lighter flavor, replace honey with maple syrup.
    • For a deeper glaze, use dark brown sugar and orange zest.
    • Works beautifully on spiral-cut, bone-in, or boneless hams.

    🕯️ Recipe Note

    There’s something special about that golden, sticky glaze bubbling in the oven — the smell alone feels like the holidays. Keep it simple, keep it sweet, and you’ll have a ham that shines as bright as your table.