Tag: garden

  • The Delights of Echinacea

    The Delights of Echinacea

    purple coneflowers or echinacea growing next to bright yellow flowers

    You’ve probably seen echinacea purpurea before—even if you didn’t realize it. With its drooping purple petals and bristly orange center, it looks like a daisy that tried hairspray. But don’t let the frilly look fool you—this plant has earned its place in herbal medicine cabinets for centuries. And like a lot of herbs, the more I learn about it, the more I find myself marveling at how God packed so much usefulness into a wildflower.

    I’ve been looking into echinacea more lately—what it does, how it works, and why people use it—and I thought I’d share some of what I found in case you’re curious too.

    What Is Echinacea Purpurea?


    Echinacea is a native North American plant, often called “purple coneflower.” The purpurea species is the one most commonly used for medicinal purposes, though there are a few other types as well. It’s been used traditionally by Indigenous peoples and adopted into folk remedies for everything from infections to snake bites.

    echinacea flowers, also known as purple coneflowers, growing in a field

    What Is It Used For?


    The most common reason people reach for echinacea is to support the immune system—especially when cold or flu season hits. But its uses go way further than that. Here’s a quick list of what echinacea is said to help with:

    • Immune support: May shorten the duration and lessen the severity of colds.
    • Anti-inflammatory: Can reduce swelling and irritation, helpful for sore throats or skin issues.
    • Wound healing: Used in salves or teas for cuts, burns, or skin infections.
    • Antibacterial/antiviral: Traditionally used for bacterial infections and to support the body during illness. It works better in larger doses, maybe 3x what you would normally use of dried herbs.
    • Venomous Bites: Stops the venom from snake or spider bites and helps the body heal.
    a bee sleeping on top an echinacea flower

    How Is It Taken?


    Echinacea is often taken as a tea, tincture, or capsule. Some folks also use it topically (like in a salve or poultice). Most herbalists recommend using it at the first sign of illness—not as a long-term supplement. That’s because it works best to ‘kick-start’ your immune system when it’s under attack. Long-term use might reduce its effectiveness and may even overstimulate your immune system if taken constantly Think of it like a herbal first responder: ready when needed, but not meant to be on duty 24/7.

    A Few Notes to Keep in Mind

    • Not recommended for people with autoimmune disorders unless you’ve done your research or talked to an herbalist. Echinacea stimulates the immune system which might not be something you want to do in this instance.
    • Some people may be allergic—especially if they’re sensitive to plants in the daisy family.
    • Pregnant or nursing? Best to double-check safety guidelines before using it. Though it is generally considered safe, doing your own research to see if something is right for you is always a good idea.
    a single purple coneflower head with drooping purple petals and a bristly brown and orange center

    Final Thoughts


    Echinacea isn’t magic. But it is a great example of how God designed plants with more than beauty in mind. I like knowing there are things growing in the world—and in some gardens—that can help strengthen the body instead of just masking symptoms. Even if I’m not using echinacea all the time, it’s one of those herbs I like having on hand. Kind of like that friend who shows up with chicken soup when you’re sick—only this one grows from seed and doesn’t need a nap afterward.
  • Digging For Yukon Gold

    Digging For Yukon Gold

    When you aim for a gold rush but come up with a souvenir nugget.

    Now, before you go scrambling to find your pickaxe and gold pan, the elusive nuggets I’ll be talking about here are potatoes.

    a basket of Yukon Gold potatoes

    This year, we tried a new method of growing potatoes. Well, new to us. We had seen multiple places on YouTube and other places where people used this idea with seemingly great results. So, since our family can go through 5 pounds of potatoes in one meal, we decided to give it a go.

    Step 1: buy seed potatoes.


    It seemed easy enough. We got Yukon Gold, as those are Tim’s favorite. Not that I have a problem with them, but with living in Idaho as a teenager, I had gotten used to Idaho® Russets and never really branched out much.

    Step 2: get a barrel.


    We found what looked to be the perfect barrel. It was sturdy, bright blue plastic, with a wide mouth, a drainage hole, and it could hold 50 gallons. Sounded like a great size for an epic potato harvest.

    Step 3: plant seed pieces.


    We cut the potatoes in pieces with healthy eyes on them and buried them waaaay at the bottom of the barrel.

    Step 4: wait.


    The waiting was probably easier than it might of been with everything else we had going on this spring, but that didn’t dampen the excitement when we saw the first green shoots sticking up through the dirt.

    Now, up to this point, we had done close to everything right. But, unfortunately for us and our potato harvest, there were a lot of things we didn’t know.

    • Yukon Golds are determinate potatoes. They only produce one round of potatoes and won’t produce more if you keep hilling them higher.
    • Potatoes need lots of drainage to keep the moisture from getting too high and rotting the potatoes. Apparently the one drainage hole wasn’t enough to handle all the rain we got this spring and early summer.
    • Potatoes need light fluffy soil and all we have here is clay and more clay.
    • Mixing half-composted wood shavings into the dirt to break up the clay isn’t a good idea, as it leaches the nitrogen from the soil.
    • There’s probably more that we just don’t realize we don’t know.

    To make matters worse, now that it’s all said and done, the potatoes grew beautifully.

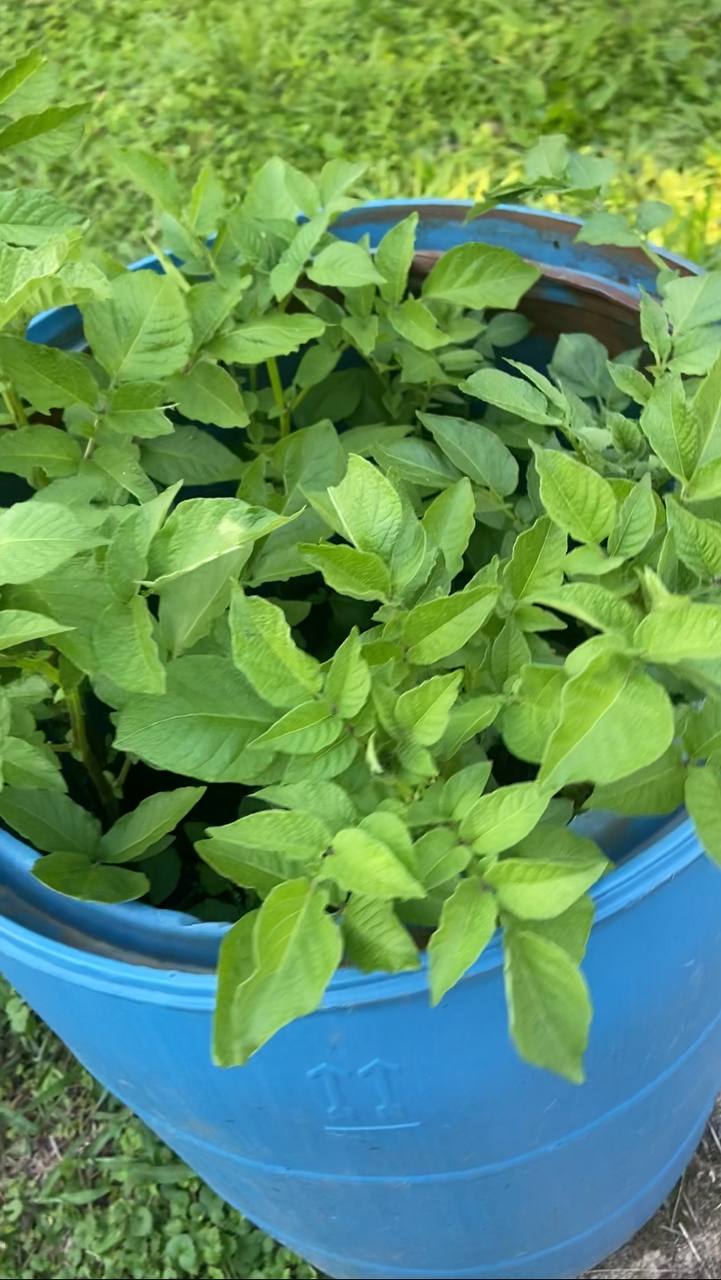
    Blue barrel with bright green potato stems coming out.

    This was how they looked when the barrel was about half full. We thought for sure they were doing great.

    potato flowers and ladybug larvae

    The flowers came on nicely and we even had several ladybug larvae to keep the aphids off.

    dying potato stems in blue barrel

    They look sad here, but this was not too long before we dumped the barrel. Harvest is supposed to wait until the stems have all died so we were excited to see what they had done.

    How much did we harvest, you may ask? One potato. One little round nugget slightly bigger than a golf ball. And a snail shell. Kaitlynn found a perfect snail shell almost as big as the potato. Oh, and one enormous nightcrawler. At least something liked the moisture. 🙂

    If only they had the decency to shrivel up right at the beginning, so we could have known something was wrong right off. Instead, they stayed green and healthy-looking the whole time while producing nothing.

    But, in all actuality, I think learning the lesson of how not to grow potatoes will stick with us longer this way. So, you win some, you lose some, but what counts is that you learn some and keep going.

  • This Isn’t the Garden I Imagined

    This Isn’t the Garden I Imagined

    I had big dreams for this year’s garden. Rows of thriving vegetables, plenty to can and freeze, a handful of Instagram-worthy harvest baskets, and maybe even one of those adorable pictures of a toddler holding a sunflower twice their height.

    Instead, I have crabgrass that’s warring with horseweed over prime acreage, tomatoes that can’t decide if they’re dying or just being dramatic, and pea plants that look like they got in a fight with a thunderstorm.

    Things started off so well. Tim and I were finally going to be able to work on the garden every day without spending 20 minutes loading kids in the van for a 7 minute drive. We had planned the work in detail and were all set to work the plan.

    A man using a yellow rototiller to prepare a garden bed along a fence line.

    And the plan took off beautifully. We got our seeds, starter trays, and starter soil mix ordered in plenty of time, and were ready to go. In one day, we planted 80 tomato seeds and when it came time for the first transplant, a whopping 75 tomato starts were healthy enough to move into something bigger. 

    Rows of young tomato seedlings growing in small white plastic cups on a wooden table.

    Things were looking so hopeful. We had a plant shelf set up with heat mats and grow lights and our peppers, tomatoes, and basil seemed to be taking off.

    That’s when things started to change. First it was too much water so I cut it back. Then things started wilting from drying out. To start hardening the stems off, I would carry all the trays outside to sit on the deck. Then one of my helpers tripped on the stairs and spilled a tray of tomatoes and the cat dug up our starter sweet potato. 

    Tiny tomato and pepper seedlings reaching up from soil blocks under indoor grow lights.

    Meanwhile, out in the garden, radishes, turnips, and beets were popping up like weeds. That alone was enough to keep us going. If we could just get these plants in the ground, surely that would fix a lot of the problems.

    Only nature had other plans. Rain set in like you wouldn’t believe, and before we knew it, the river had moved from a quarter of a mile away into our backyard. A new record for flood levels here. We literally had ducks swimming in our garden. Only they were wild ones, not ours.

    A wild duck swimming through floodwater in a backyard garden, with a road sign partially submerged.

    Finally, everything dried out enough to put plants in the ground outside. Our dirt here is terrible with high clay content, but we mixed in fertilizer and shredded cardboard. Things were looking hopeful. 

    Sadly, there weren’t 75 tomato plants to put outside by that point, but we planted what we had. Over the next several days, we planted 3 kinds of tomatoes and 5 kinds of peppers. We also slowly gave up on any kind of harvest from our beets, radishes, and turnips. I think the heat was too much for them this year.

     A single yellowing tomato seedling with damaged leaves struggling to grow in the dirt.

    The cucumbers seem to be thriving, but I haven’t even planted beans yet, and if weeds could run, I’d probably see some doing victory laps around the garden. It’s been humbling, honestly — all the things that didn’t go according to plan. The truth is…this isn’t the garden I imagined. But maybe that’s okay.

    Some things are growing. Some things are struggling. And so am I. At 40 weeks pregnant and counting, some days I feel wider than I am tall. (Thankfully, feelings can be deceiving.) But buried in the weeds and bug bites and lopsided rows, I’m starting to find a few quiet lessons — ones I didn’t plan to plant but probably needed anyway.

    I’m learning that just like in life, we don’t always get the season we planned for. Sometimes we plant in faith, water with tears, and wait — not sure what will come of it. But God isn’t just after straight rows and full baskets. Sometimes He’s growing patience, trust, and perseverance where we only see crabgrass and chaos.

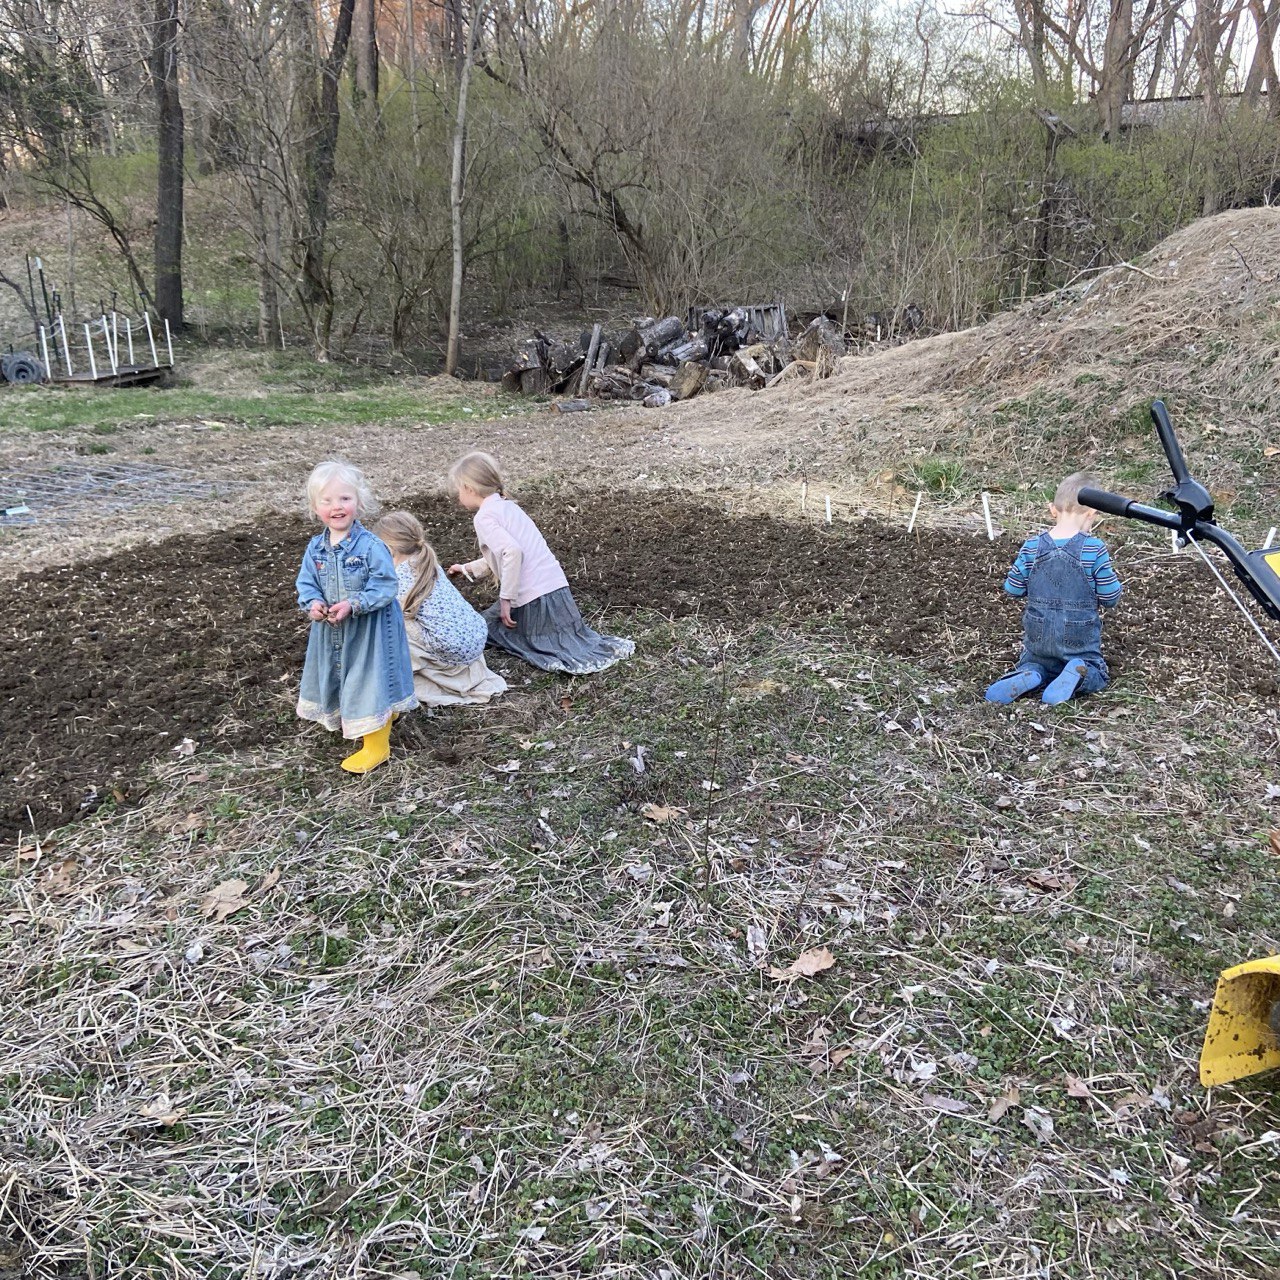
    Four small children planting seeds and digging in a garden bed on a spring day.

    Maybe the real harvest this year won’t be measured in jars or baskets, but in grace — grace for the process, for the setbacks, for myself. Every weed I pull and every crooked row reminds me that growth isn’t always pretty, but it’s still progress. This garden might not be picture-perfect, but it’s real, it’s ours, and it’s still doing its work — in the soil and in me.

    And thankfully, there’s always a fall garden — and next year.

  • A Glimmer of Dragonflies

    A Glimmer of Dragonflies

    Welcome back!

    I mentioned a few posts ago some of my ideas on decorating the house. Today, I thought I would tell you my plans for the garden adornment. After all, it wouldn’t do to neglect the garden. Once again, ceramics will play a big part in decorating the garden area. They will not all match, but each one is a piece that caught our eye and felt worth keeping.

    One piece is a large raccoon that Tim recently painted.

    Didn’t he do an excellent job? And it only took him a few hours, too. Since it is life-size, I’m sure it’ll look great tucked away somewhere out there and be sure to snag the attention of passers-by.

    I also have a fox figurine that looks pretty realistic. It’s curled up with its tail over its feet. After seeing how well the coon turned out, I told Tim he could paint the fox as well. It might go well in the orchard under a peach tree. Definitely not too close to either the rabbit hutches or duck coop, though.

    A sleeping bunny will be sure to find a cozy little spot to nestle. I’m not entirely sure where, though. Maybe in the carrots? Or the lettuce. We’ll have to see.

    Since we are starting ducks, and hopefully a few geese, we thought we should keep a pair of geese we came across while sorting ceramics. They aren’t really detailed, more country goose-style, but I think they’ll look really neat anyway if done right.

    A ceramic frog and turtle would make charming additions too, don’t you think? The frog was already nicely glazed when we got it. Actually, I have two large glazed frogs. One is tan with light green and orange spots, and I call him Puddleglum. The other is a mottled purple and cannot lay claim to any name.

    The turtle is rather large and detailed and I’m really looking forward to painting it. Alayna has painted a small snail, but we might not want it in the garden—I don’t want it to sneak off and nibble the tomatoes! If we still have any of the alligators we had listed at one point, I might keep one of them too. Thankfully, they aren’t life-size!

    We even found a squirrel willing to sit under our rambling rose bush and look cute. Maybe having a nut to hold makes him more docile, you think?

    Besides different animal figurines to work into our garden layout, I also plan on using some large planters, like the owl and raccoon ones I mentioned in the other post. They will have to be treated carefully to avoid breaking them, but I think it is doable. I can use them for herbs and such that have to be brought inside for the winter.

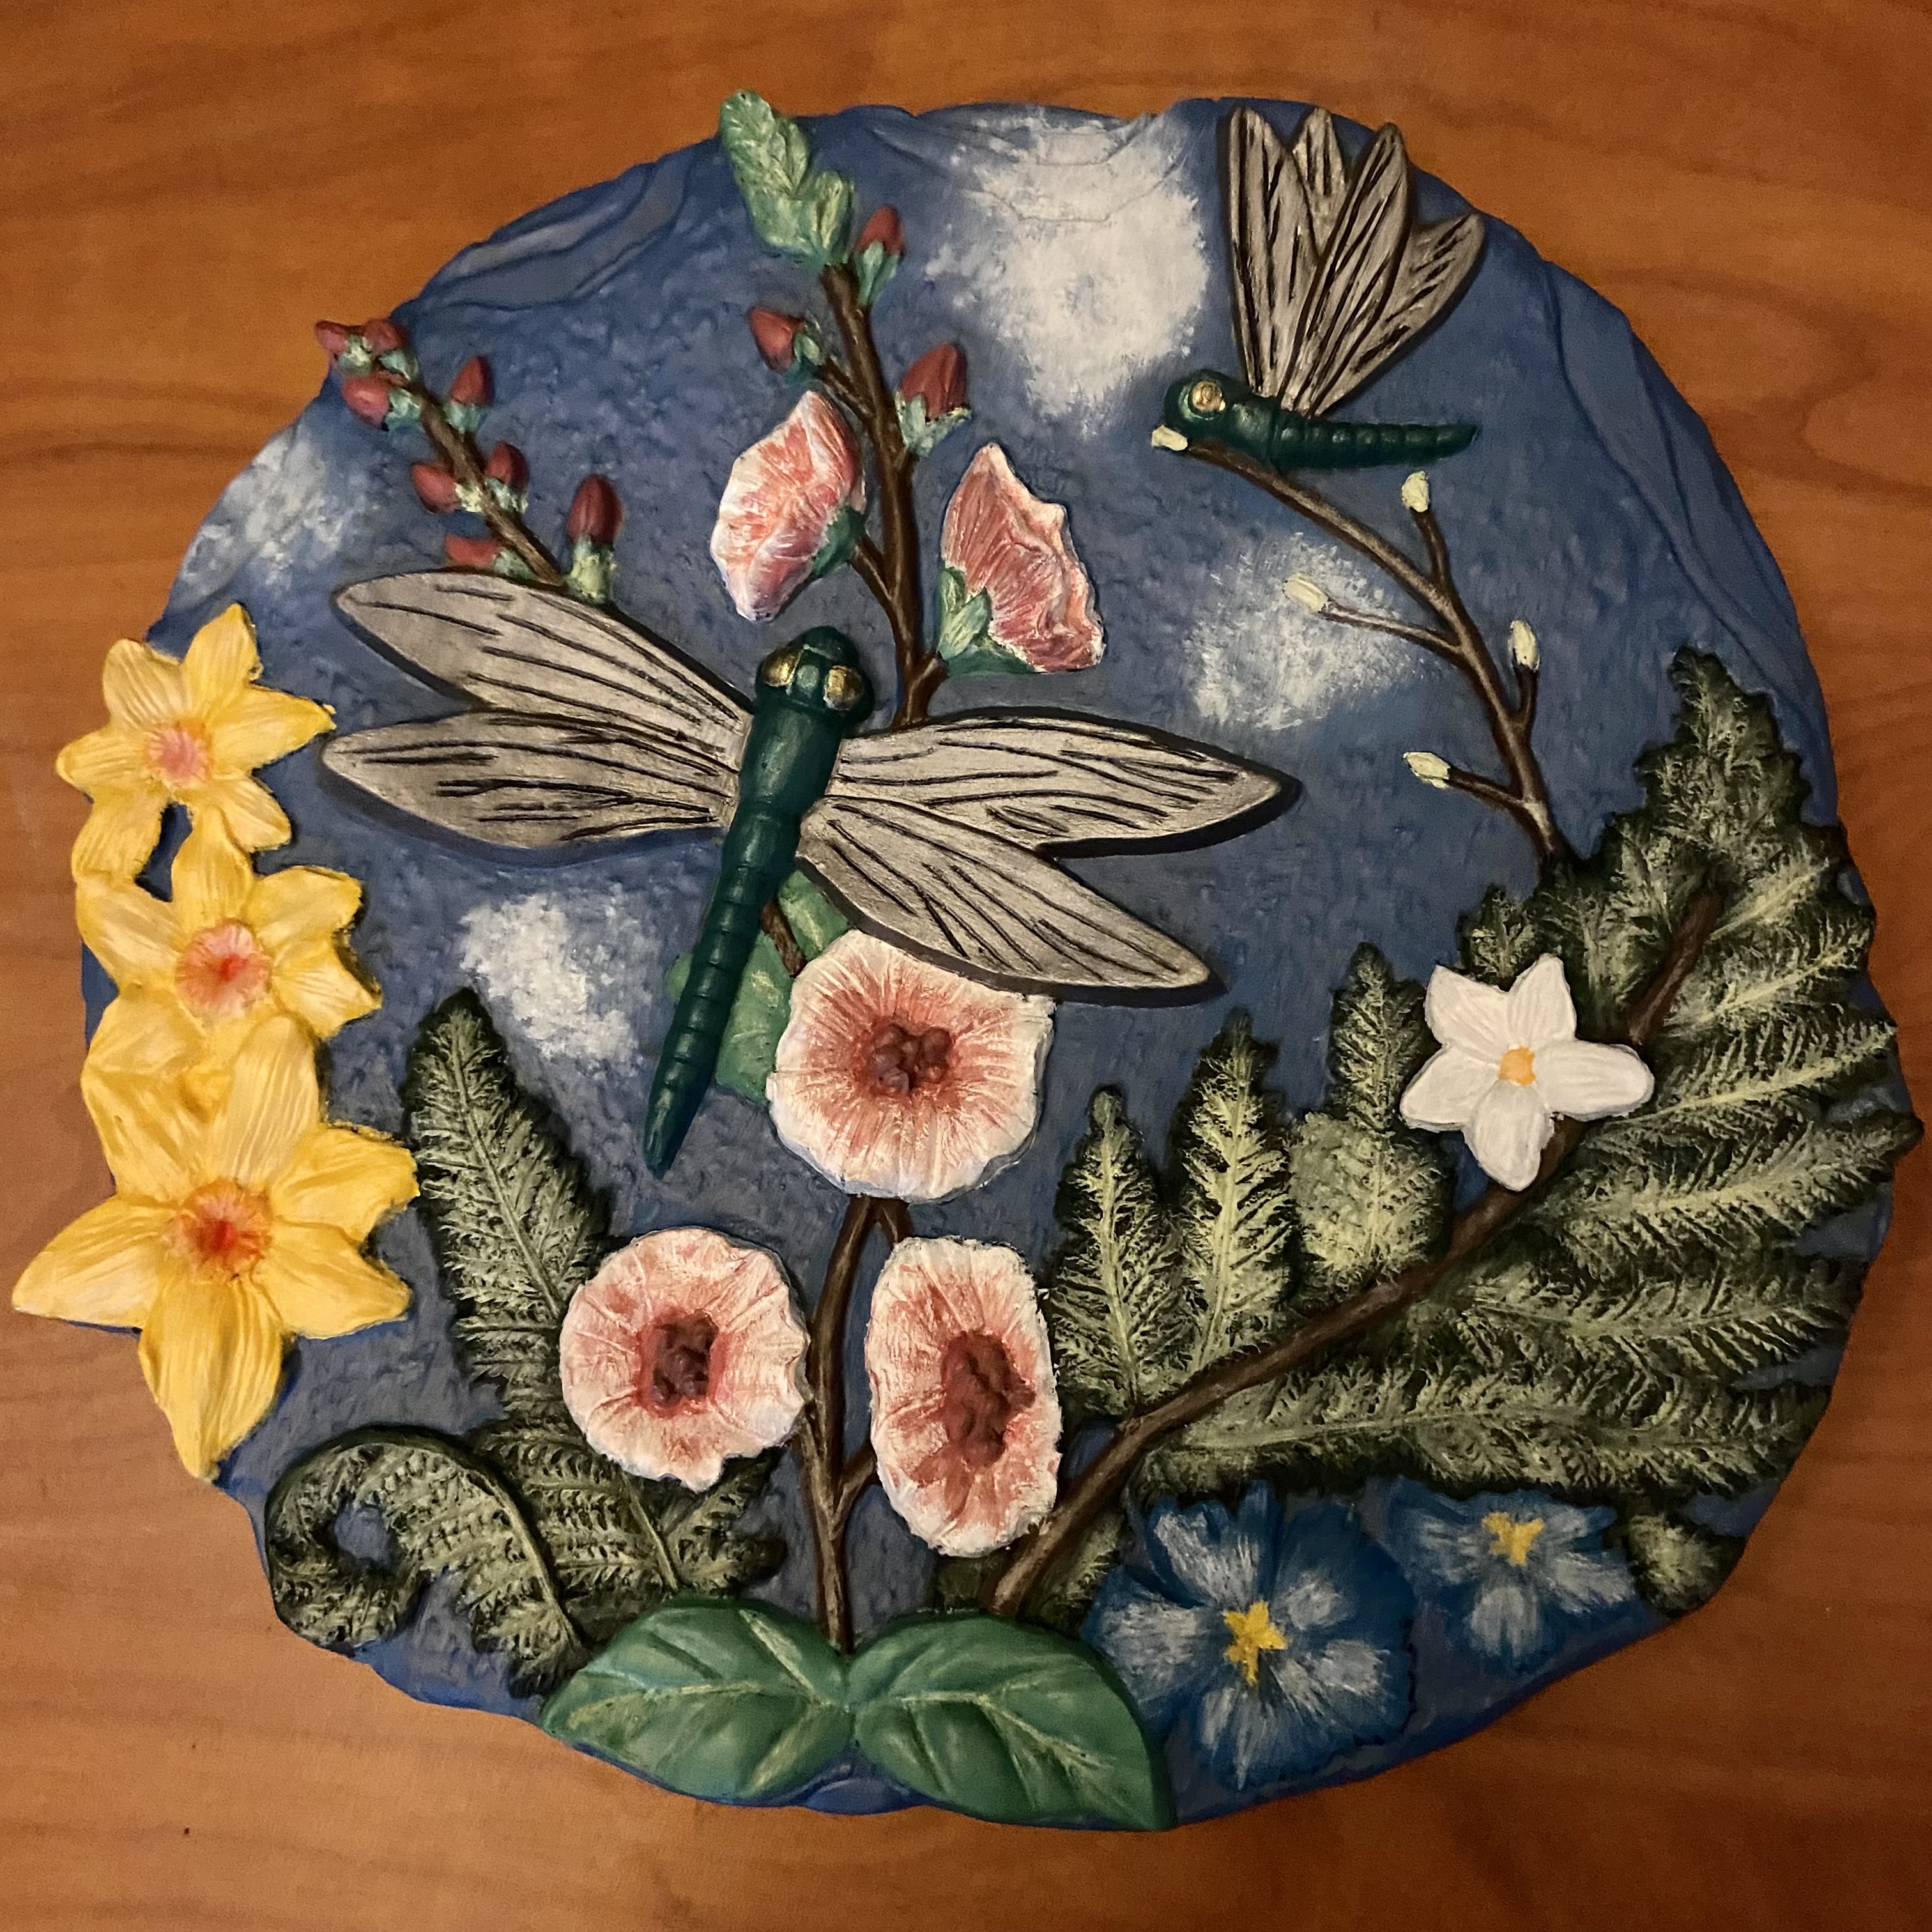
    Then I found this tile or stepping stone and just had to have it. I adore dragonflies and I am thrilled with how this turned out.

    It has four small holes in the back to allow for easier anchoring to a fence or something similar. I also have a small glimmer of individual dragonflies to place around it once they are painted.

    While it might seem silly or childish to some to take the time and effort to decorate a garden I see the garden as an extension of our house in some ways. It’s a place the whole family can spend time in and makes up an extremely vital part of our livelihood. I’m interested in having the garden be a fun place to work and not just a bunch of boring plants and pesky bugs like it was to me when I was little. So these are some of my plans to make the garden my own and give it some pep and character.

    These quirky little touches turn our garden into more than just a food source—they help make it a space where memories are made, laughs are shared, and beauty grows right alongside the veggies.

  • A Family Tomato Tale

    A Family Tomato Tale

    Welcome back!

    Transplanting makes for an exciting day! Several weeks ago, we started several trays of plants. One of those trays held 80 Napoli tomato seeds we bought from MIGardener (Napoli Tomato – MIgardener).

    We chose this variety for its usefulness in several different ways. It is advertised as an excellent sauce tomato which is pretty high on our list. Tim has a smidgen of Italian in him and it likes to come out in his cooking. So pasta sauce and pizza sauce are definitely on our canning agenda for this year. But Napoli tomatoes are also supposed to be good for slicing, so that means diced tomatoes and salsa as well as just eating in salads or on hamburgers. 

    Now, we weren’t expecting anywhere close to 80 starts from that tray. But, since we have lots of canning plans for our eventual tomato harvest, we were hoping for at least 40. Half is pretty good, right?

    Well, it was finally time to transplant all our Napoli seedlings. So Alayna and I pulled out small plastic cups, a box cutter, a bag of Burpee organic seed starting mix (Burpee Eco Friendly 8 Qt Seed Starting Mix 0.06-0.03-0.03 – Burpee), and of course our tomatoes.

    Alayna had the job of cutting three little 1-inch tall triangles around the base of each cup and then stacking them in another uncut cup. These triangles were for bottom watering so I didn’t have to pour water on the top and increase the chances of fungus. I started teasing the plants out of their cells, dividing all the ones I could, and filling the cups with starter mix.

    Once we got into the rhythm it was not a hard job by any means, but it was a time-consuming one. I had to be careful not to damage the roots and Alayna had to take care not to damage her fingers! One by one the cups started to fill up and orderly rows of amazing-smelling tomato starts began taking up more and more room on the table. Tim had some free time so he jumped in to help, carefully separating the seedlings into their cups. Between him and Alayna, I had to hustle and still ended up woefully behind. 

    When everything was said and done, or every last seedling separated and filled, we had an amazing total of… Drum roll… 75 tomato plants. 75! That means between the seeds that didn’t germinate and the ones that weren’t healthy enough to save, we only lost 5. Those are some amazing results! We have never had tomatoes grow this well. I’m not sure if it was the variety or the quality of seeds or that we started them in coconut coir instead of potting soil or a combination of everything, but we are thrilled.

    Watering them all was the next challenge. I did not water them the evening we transplanted them as they came out of the tray cells rather wet. But the next morning I knew they would be needing water. My options were as follows:

    1. Lift each interior cup, pour water into the outer cup, and replace the inside one.
    2. Find enough trays with rims to hold all the inside cups while I put water in the trays and let the cups soak.
    3.  Run a few inches of water in the bathtub and put all the cups in at once.

    I chose to go with Option 3 for several reasons. Less fuss and chance of mess than Option 1 and I didn’t have to find a place to store that many trays full of water where 6 children were unlikely to bump them.

    So into the tub they went and by the time I had finished getting them in there, the 5 minutes I had been planning to let them soak was up making it time to take them all right back out. 

    So far, none of them look to be in danger of wilting from the transplanting which is wonderful news. It’s moments like these that remind me how much growth—both plant and personal—can come from just a few tiny seeds. And this is only the beginning.

  • Decorating With Dreams And Dirt

    Decorating With Dreams And Dirt

    Hi!

    The thing with building a new house from the ground up is that you also have to decorate the entire house. This may seem strange, but up until now, I have never really had a whole house to decorate. As a result, I am still trying to piece together what styles and themes I like.

    Growing up, decorating always followed a theme. A style was chosen and then stuck with throughout the entire room if not the whole house. This technique is fine and I am not criticizing it. The only problem with it, at least in my case, is that I like too many styles. I like feminine and primitive, elegant and rustic, lace and cast iron.

    For a good while, I tried to wrangle my likes into a specific theme so I could be “normal” but finally I gave up and quit fighting myself. After all, normal is overrated. So I am working on a list of everything I like when it comes to decorating. It’s actually longer than I thought it would be and an interesting mixture of styles that may even fall under the definition of eclectic.

    While I won’t tire you out by including the entire list here, I would like to tell you about one specific part of it and especially the reason behind it.

    I have a collection of ceramic planters that I am in the process of painting. They came from a couple of ceramic businesses that Tim and I cleaned out after they closed.

    So far I only have two painted, but I have several more to go. They range from small to large, from simple to more ornate. I even have two that are owl-themed and one that has raccoons on it. They are fairly good-sized and will probably spend most of their time outside.

    Painting always interested me but seemed too daunting and above my skill level. Tim started painting first

    and pushed me to try it and now here we are! I found that not only do I thoroughly enjoy painting, but it is far easier than I expected. You never know until you try, do you?

    Anyway, all of that brings me to the main point. One thing I want in my house, one thing I am very adamant about having in my house, is an herb corner. Well, it doesn’t have to be a corner, but I want fresh herbs growing inside. I want the freedom to pick a few leaves of thyme for a marinade, a mint leaf for nausea, or fresh basil for a cucumber tomato salad. I want the look and smell of rosemary and lavender and sage growing here and there. I want to have bunches of herbs hanging to dry along the walls or in the kitchen.

    While I cannot lay claim to having the best of green thumbs, I am determined to do my best to keep my herb garden flourishing. Both indoors and outdoors.

    To me, herbs are a vital part of a homestead. There is just so much you can do with them! Each one has its own unique spot in cooking and in homemade medicine.

    When I think of what herbs I want to plant, lavender is usually one of the first that comes to mind. While not often used in cooking (although I have had lavender ice cream, yogurt, and coffee), its many medicinal benefits are amazing. Lavender tea is calming and helps with mild insomnia since it promotes relaxation and encourages restful sleep. It also may ease stomach issues. The scent of lavender can help with tension headaches and is a general mood booster. A lavender wash made from steeping the fresh flowers and then letting the water cool is wonderful for bug bites, bee stings, scrapes, minor cuts, bruises, and more as it is anti-inflammatory and a pain reliever. The plants are also supposed to repel mosquitos. Sounds like a winner to me!

    Thyme is pretty high on the list too. Wonderful on baked chicken, I also like to mix it with rosemary and parsley to make a delicious herb bread. Thyme is another powerhouse herb to have on hand in a home apothecary. Excellent for respiratory and digestive health, it can be used to open sinus passages and soothe coughs. It relaxes the GI tract and is known to help with intestinal parasites. But it doesn’t just kill internal bugs. Thyme is a strong antibacterial and antifungal herb making it great to use in homemade cleaners.

    Honestly, my list of “favorite” herbs is probably too long to talk in detail about them all. Others of note are mint for tea and nausea, rosemary for cooking and headaches, oregano for pasta sauce and immune boosts, and the list goes on and on.

    Needless to say, I have great plans for my herb corner, and I can’t wait to see them play out.

    I may not have it all figured out yet, but piece by piece—style by style and herb by herb—this house is becoming home.