Prep Time: 10 min | Cook Time: 10–15 min | Makes: Enough for 1 large ham
🧂 Ingredients
1 cup brown sugar (light or dark)
¼ cup honey
¼ cup orange juice (or pineapple juice)
2 Tbsp Dijon mustard
1 Tbsp apple cider vinegar
½ tsp ground cloves
½ tsp cinnamon
¼ tsp black pepper
🔪 Directions
Combine ingredients. In a small saucepan, whisk together all ingredients.
Simmer. Cook over medium heat until the sugar dissolves and the glaze thickens slightly, about 10–15 minutes. Stir often to prevent burning.
Glaze the ham. Brush half the glaze over your ham before baking. During the last 20 minutes of baking, brush with the remaining glaze every 5–7 minutes for that glossy, caramelized finish.
Optional: Add 1–2 tablespoons of the pan drippings to the leftover glaze for extra flavor before serving.
💡 Tips
If you prefer a lighter flavor, replace honey with maple syrup.
For a deeper glaze, use dark brown sugar and orange zest.
Works beautifully on spiral-cut, bone-in, or boneless hams.
🕯️ Recipe Note
There’s something special about that golden, sticky glaze bubbling in the oven — the smell alone feels like the holidays. Keep it simple, keep it sweet, and you’ll have a ham that shines as bright as your table.
Homemade yogurt isn’t just about saving money—it’s about freshness, control, and nutrition. When you make it yourself:
Cost savings: A single gallon of milk can yield 8 cups of yogurt for less than store-bought tubs.
Customization: You choose the milk type (whole, skim, goat, raw, organic, etc.), thickness (Greek-style or regular), and flavors.
Fewer additives: No thickeners, stabilizers, or hidden sugars—just milk and live cultures.
Sustainability: Making yogurt at home cuts down on packaging waste.
How Yogurt Works: The Science Behind It
Yogurt is created by fermenting milk with beneficial bacteria. The two classic starter strains are:
Lactobacillus bulgaricus
Streptococcus thermophilus
Together, they convert lactose (milk sugar) into lactic acid. This acid lowers the pH, thickening the milk proteins and giving yogurt its tangy flavor. Many store-bought starters also include additional strains like Lactobacillus acidophilus or Bifidobacterium lactis, which may aid digestion.
The fermentation process not only preserves milk but also boosts probiotic content, supporting gut health.
Ingredients
1 quart (4 cups) milk – whole milk makes creamier yogurt, but any type works
2 tablespoons plain yogurt with live, active cultures (store-bought or from a previous batch)
Equipment
Saucepan
Thermometer (optional but helpful)
Whisk
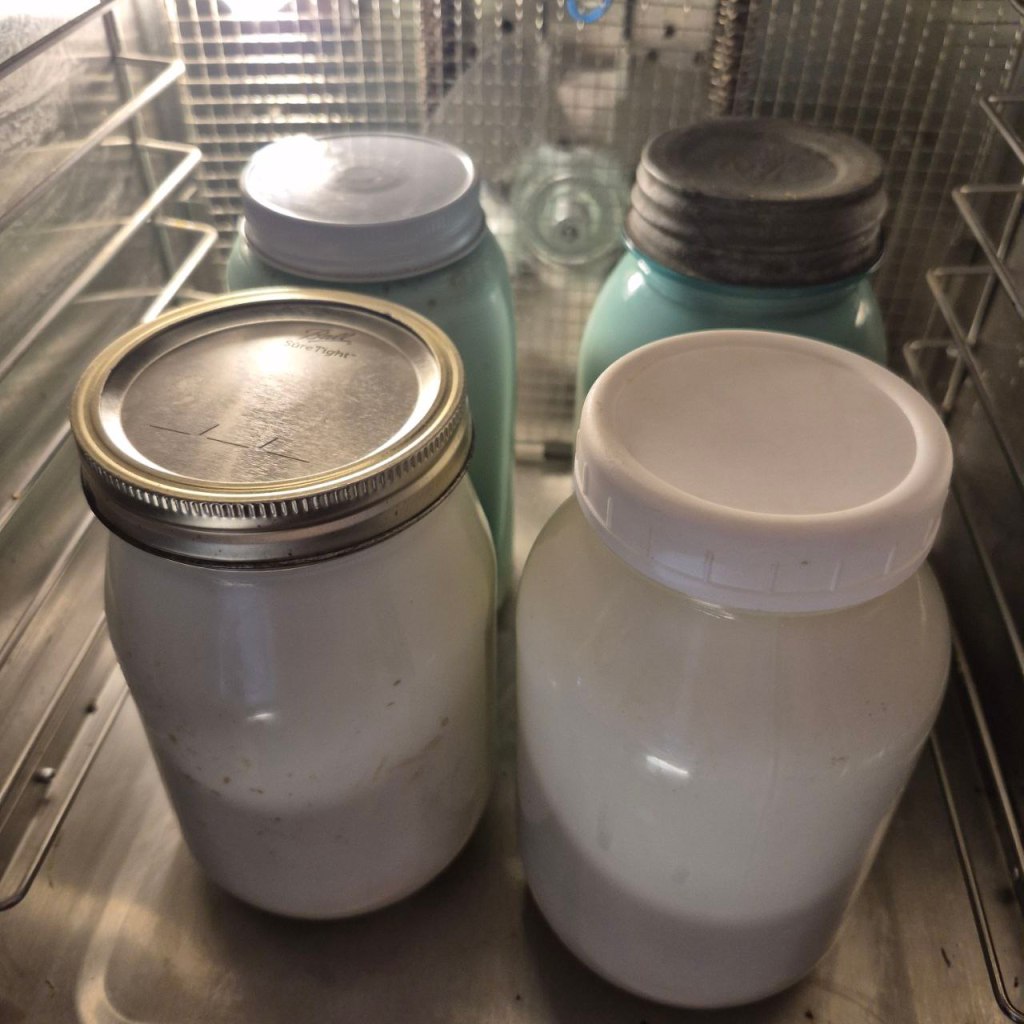
Clean glass jar or container with lid
Towel or blanket for insulation
Step-by-Step Instructions
Heat the milk Pour milk into a saucepan and gently heat to 180°F (82°C). This denatures proteins so the yogurt sets thicker.
Cool the milk Remove from heat and let it cool to 110°F–115°F (43–46°C). This is the ideal range for the cultures.
Add starter Whisk 2 tablespoons of yogurt into a small bowl with a bit of the cooled milk. Then stir this mixture back into the pot.
Incubate Pour into a clean jar, cover, and keep warm (around 110°F) for 6–12 hours.
For thinner, milder yogurt: check at 6 hours.
For thicker, tangier yogurt: let it go longer. You can wrap the jar in a towel, place it in an oven with the light on, use an Instant Pot’s yogurt setting, or a dehydrator set to 110°F.
Chill and enjoy Once it’s set, refrigerate for at least 2 hours. The yogurt will thicken further as it cools.
Variations
Greek Yogurt: Strain finished yogurt through a cheesecloth or coffee filter for 2–4 hours to remove whey.
Flavored Yogurt: Stir in honey, fruit purée, vanilla, or jam just before eating.
Storage
Homemade yogurt keeps for about 2 weeks in the refrigerator. Save 2–3 tablespoons from each batch to use as the starter for the next one.
If you would like a video on the process, check out this one on our YouTube channel!
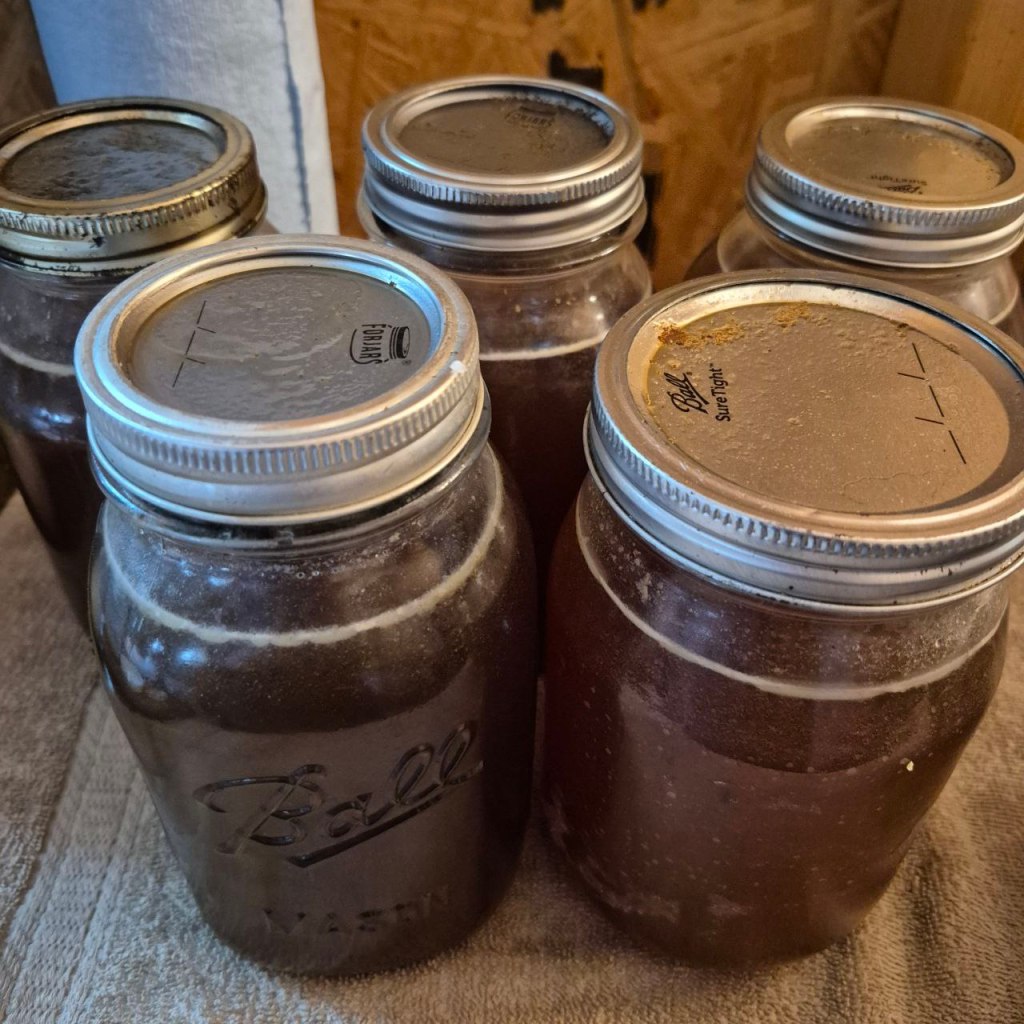
Bone broth is one of the most nutrient-dense foods you can preserve for your pantry shelves. When made with venison bones, it brings a deep flavor and is full of collagen, minerals, and marrow. Pressure canning makes it shelf-stable and ready to use anytime for soups, gravies, or sipping on its own.
This is not a recipe that has to be followed exactly, but simply what we did this time. Last time was different and next time will probably be different again. We ended up with enough broth to can 7 quarts, but obviously that depends on the amount of bones you start with and how strong you want it.
Ingredients
Deer bones, cut into smaller pieces (helps release marrow and collagen)
Water (enough to cover bones in stockpot, refill as needed)
1–2 garlic cloves
1 onion, quartered
A handful of carrot tops
A handful of radish tops
Fresh rosemary sprigs
Salt, to taste
A splash of vinegar (helps pull nutrients and minerals from the bones)
Instructions
Step 1: Prepare the Broth
Place cut deer bones in a large stockpot.
Add garlic, onion, carrot, radish tops, rosemary, salt, and vinegar.
Cover with water.
Bring to a boil, then reduce to a simmer. Let it cook long enough for the bones to release nutrients and flavor (at least 24 hours is ideal).
Step 2: Strain and Fill Jars
Strain broth through a fine strainer or cheesecloth to remove solids.
Ladle hot broth into clean, hot quart jars, leaving 1 inch headspace.
Step 3: Pressure Can
Wipe rims, apply lids and bands.
Place jars in pressure canner with 2–3 inches of simmering water. A splash of vinegar in the canner keeps hard water stains from forming.
Process at 10 pounds pressure (adjust for altitude if needed):
Quarts: 25 minutes
If you don’t have enough jars of broth to fill the canner, put some jars of water in to keep everything from rattling around.
Step 4: Cool and Store
Allow canner to depressurize naturally.
Remove jars and let them cool 24 hours without touching.
Check seals before storing. Keep in a cool, dark place.
Using Your Deer Bone Broth
This broth is versatile—use it as a base for venison stew, wild rice soup, or simply heat it with a little extra seasoning, if needed, and sip it warm.
Like maybe some of you, I used to enjoy meandering down the candle aisle in Walmart and smelling every one that sounded interesting. And I’d check every single bottle of soap or shampoo to make sure I bought the one I liked the best.
Now, I find myself preferring, by far, natural scents over commercial ones. In fact, just one sniff of one candle or bottle of soap is often enough to bring on a headache.
Add to that kids who break out from harsh chemicals in most laundry detergents, and we aren’t the easiest people to buy laundry soap for.
So, the other day, I thought, why buy it?
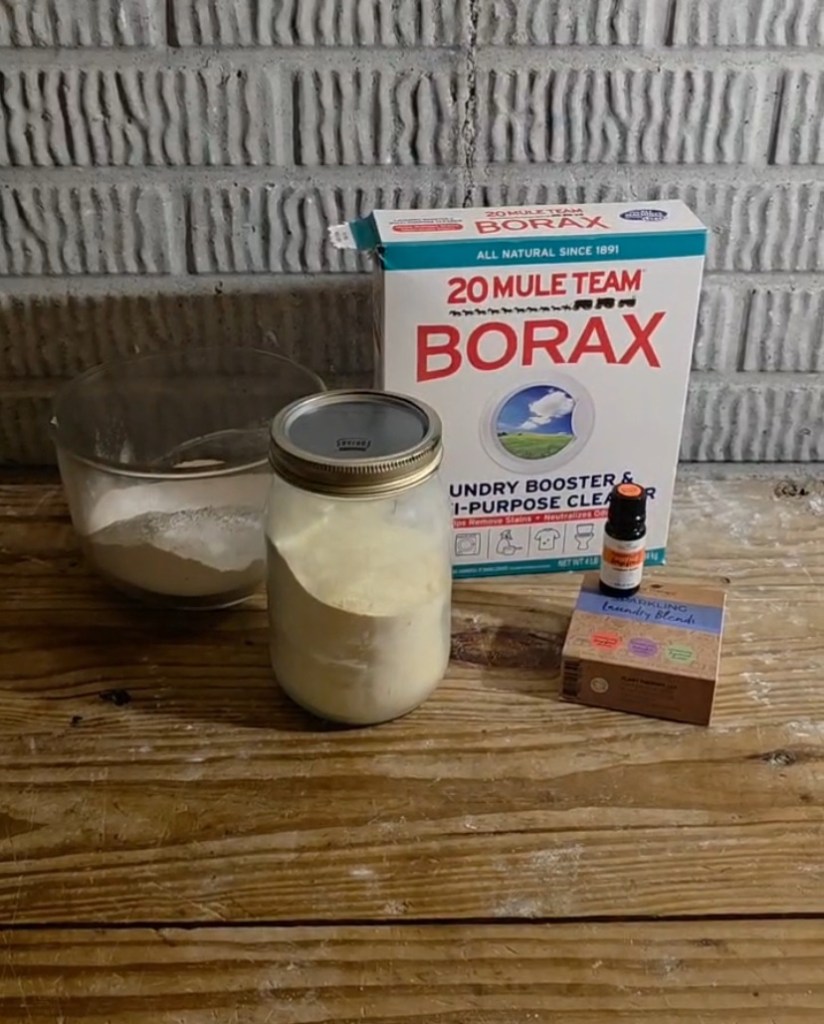
I started checking and soon found a recipe for laundry detergent powder with only 4 clean natural ingredients, one of them being fragrance of my choice. It sounded great to me and we even had most of the ingredients on hand.
Borax for odor control, stain removal, and general whitening. I used 20 Mule Team brand.
Fels-Naptha for cleaning and stain removal. I used Purex brand
Washing Soda for more cleaning power and odor control. I used Arm and Hammer brand.
Essential Oils for a great natural smell. I used one of Plant Therapy laundry blends.
I didn’t have Borax or Washing soda, but a quick trip to our little local store provided Borax and we found a way to make our own Washing soda.
It turns out, if you put regular baking soda on a cookie sheet in the oven at 400 degrees for an hour, you have Washing Soda!
Homemade Laundry Detergent
1 cup Borax Powder
1 cup Washing Soda
1 cup Fels-Naptha, grated (about 1 bar)
15-20 drops of essential oil, your choice
If you have Washing Soda, put it and the Borax in a jar or container. You will want to use a mask or something to cover your face to keep you from breathing in the fine powders. If you don’t have Washing Soda, you can make your own by putting a cup of baking soda on a cookie sheet in a 400 degree oven for an hour. This changes the chemical formula and makes Washing Soda.
Take the bar of Fels-Naptha and grate it. You can use the fine side of a cheese grater or your food processor shredder disc on the small side. Again, the powder is very fine and not something you want to breathe so wear something over your mouth and nose. Let it settle before you open the food processor.
Put all three dry ingredients in a container or jar. I used a jar so I could just put a lid on and shake it to mix it.
Let the mixture settle and then open and add 15-20 drops of essential oils for scent.
Shake to mix in the oils and let sit overnight.
Use 2 tablespoons for a regular load and 3 tablespoons for a heavy load.
I also have a video showing the process on YouTube at Bringing Life Homestead.
This week started out much like normal. Tim has his photography and devotional walks every while I get the kids up and start on breakfast.
Then, the scramble to get breakfast cleaned up, dishes done, and kids sat down to school.
This year we have four in school. Micah and Alayna are in fifth grade and Kaitlynn and Harold have started first grade. They’re enjoying learning how to read. Soon they won’t have to ask anyone else to read to them. 🙂
In the course of the day, the garden gets checked. Cucumbers and peppers are still growing, okra has started, and tomatoes are ripening.
There’s laundry to do, floors to sweep, weeds to pull, and naps to take.
Judah is growing as fast as he can and loves smiling and kicking for his siblings. And sleeping. He definitely enjoys sleeping.
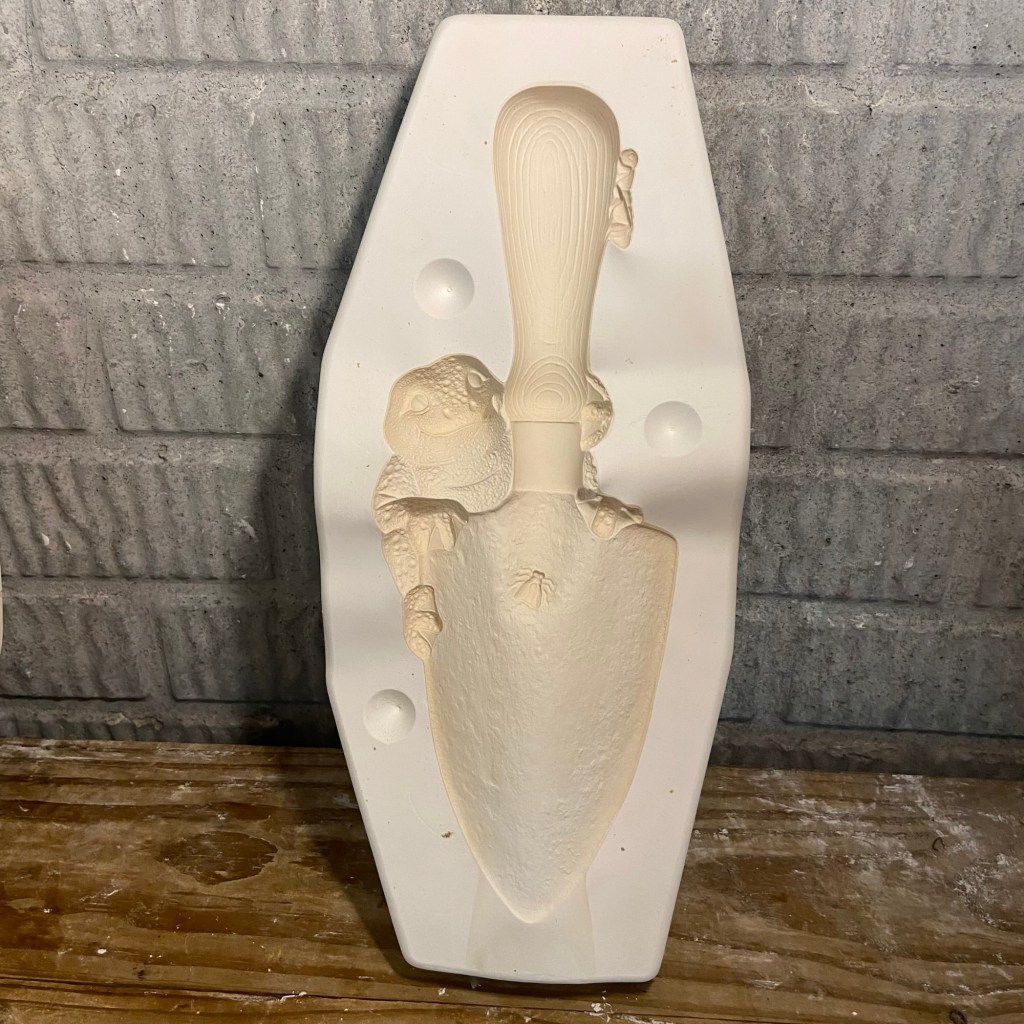
Even with trying to get the homestead side of things going better, we can’t ignore the business that pays the bills. We try to list to eBay every week day and there’s usually shipping to keep up with. These are a few of the molds we’ve listed recently.
A frog on a garden trowel. A large rose and cross candleholder. These “people watchers” are always comical.
And as you can see, we still have a ways to go.
This is just a portion of what’s left to list.
But, this is where God has lead us and we are extremely grateful for all He’s done. We know He’s going to continue to guide and there’s no place we’d rather be than right in His Will.
Lately, I’ve been seeing and reading lots of things about people’s plans for their fall garden. What seeds they’ll be planting and where they’ll be putting what starts. It’s a whole new chance to get more out of your garden, especially with how lots of gardens seemed to have struggled this year.
Well, we have plans too, but they aren’t like those. I’m afraid that if we planted anything, we’d just be setting ourselves up for lots of the same problems we’ve been having.
Our dirt is a stubborn mess of clay that retains water and refuses to let roots do their thing. It needs lots of amending for nutrients and something to break up the clay.
Generated for illustrative purposes only.
Our plan starts here. Someone gave us rabbit hutches and once they have a base to sit on to keep them off the ground, we can put them to use. We’ve looked into several different breeds of rabbits, particularly New Zealand’s and California White’s. But any breed of rabbit would work.
Rabbit manure is one the best things you can use to fertilize your garden for several reasons.
It is a “cold” fertilizer as it is not high in nitrogen. This means you can put it directly into the garden without having to let it sit and age first.
It is nutritionally rich. It contains a fairly balanced amount of nitrogen, phosphorus, and potassium, as well as calcium, zinc, copper, magnesium, and boron.
It is high-fiber due to the rabbit’s plant based diet. This means it improves soil texture. It helps sandy soil hold water better, but also helps break up clay soil.
It is good for soil life. Earthworms and beneficial microbes love it and multiply well, creating a healthy, balanced soil ecosystem.
It is easy to work with. Since it comes in dry pellets it is easy to spread over the garden or work into the dirt.
It has a gradual nutrient release. This cuts down on the risk of rain washing away most of the benefits at once and lets the plants feed over time rather than just a nutrient dump.
It is a great compost booster. If you do decide to compost it, it works as a powerful nitrogen “green” to balance out carbon-heavy “browns” like leaves or straw. It also helps heat the compost pile up to destroy harmful bacteria.
All in all, it sounds like a great addition, and we can hardly wait to see the changes it makes in our garden.
Generated for illustrative purposes only.
Another step in our plans is worms. While rabbit manure will encourage worm production, we also want to start a worm farm. Not only will it supply plenty of worms for the garden, but also worm castings, which are great sources of nutrients as well. A worm farm also has the added benefit of making the hunt for fishing bait a whole lot easier. 🙂
Generated for illustrative purposes only.
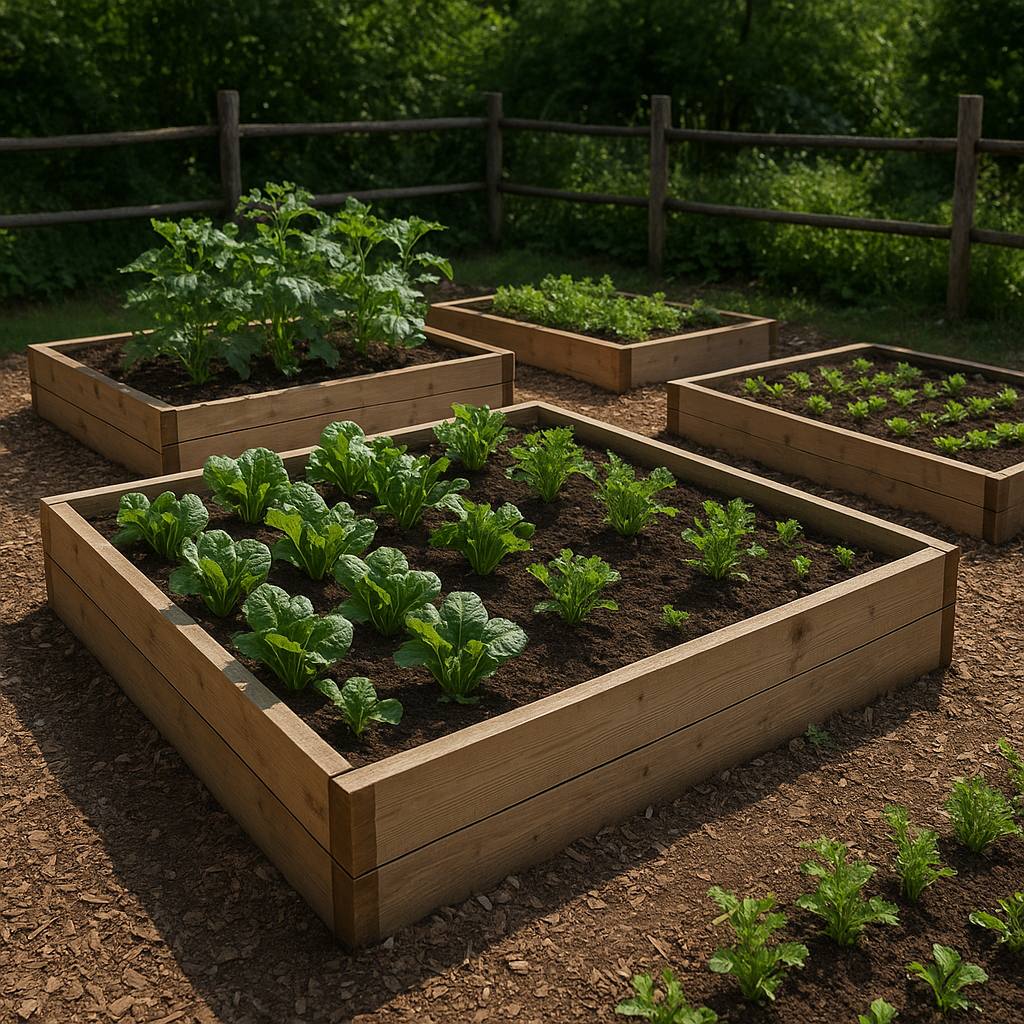
We also hope to start building our own raised beds. This would cut down on the amount of space we would need to amend, allow us to tweak certain beds for certain crops (more sand for carrots, etc.) and give plant roots more space to grow before they hit our high water table.
The beds would be 4′ wide and a mix of 12′ and 8′ feet long. We have lots of old, punky wood that has laid around for years. We would put that in the bottom of the beds before filling with dirt. The wood pieces would break down over time continuing to add to the soil and let us use less fill dirt.
Tim drew up these plans and I like how the finished product looks in my head. We would put a gate at the entrance and then we would be able to let the rabbits or ducks/chickens loose in the walkway without worried about them getting out. This layout also maximizes the space we have while still allowing access to both sides of the beds.
I know it is still a ways out before we will have this all finished. But it gives us a starting point and some basic steps to get us where we want to be. I can’t wait until our garden looks somewhat like this.
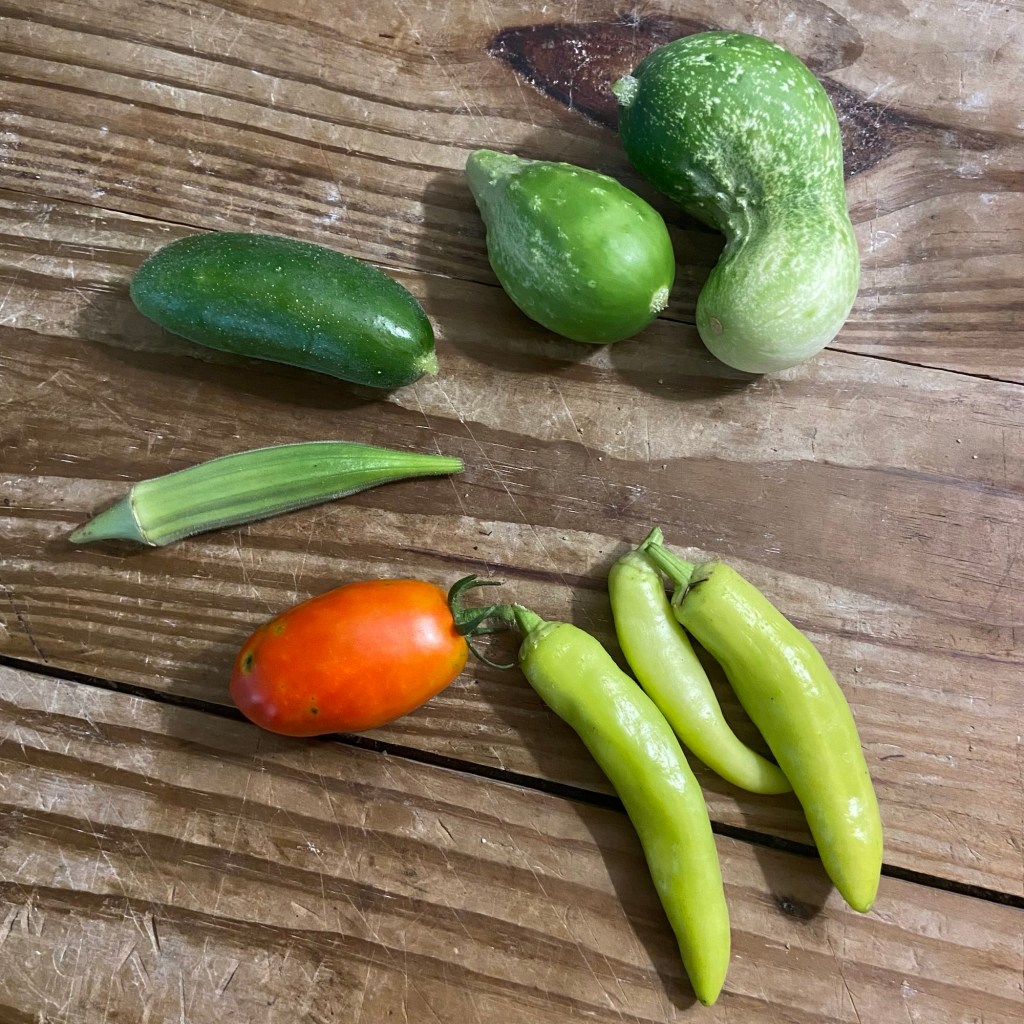
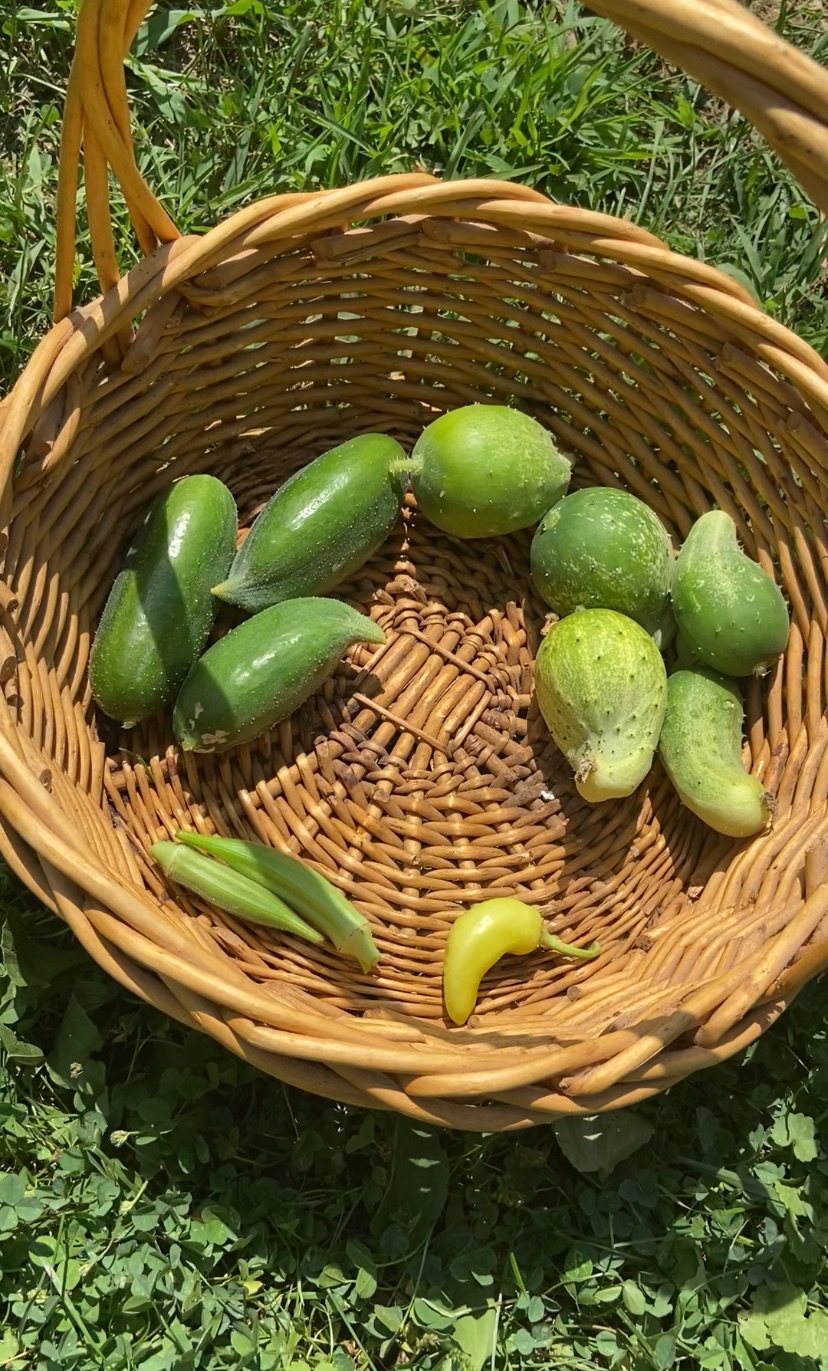
This will probably not be a long post, but I thought I’d share what we’ve been picking in the garden.
While nothing has exploded, we have been getting harvests that are small but consistent.
We planted two different kinds of cucumbers this year. A slicing and a pickling variety. Both are doing pretty well, and we are happy with them. The slicing kind is one of the best cucumbers I think I’ve ever eaten and definitely passed the “Will We Plant This Again” test.
We tried several different kinds of tomatoes as well. One, called Napoli, is doing fairly well considering the struggle they had with weather this year. We’ve gotten several tomatoes off them and they are putting on green ones like crazy right now.
A tomato hornworm got into one of my other varieties and did a good bit of damage to a couple of the plants, but thankfully, they seem to be recovering.
We’ve been getting cayenne and hot banana peppers for a while. The plants are staying small for some reason, but they are putting on more flowers so I’m looking forward to more peppers.
Our jalapeno plants finally have tiny peppers forming. I’d just about given up on them producing anything, but they decided to surprise me.
We also have two melons growing. I believe they’re cantaloupe. None of us really care for melons all that much, but I also don’t remember when the last time I had a homegrown melon. We’re expecting that to make at least some difference and will see if these pass the test or not.
Lastly, we have another plant we’re trying out. They’re called garden huckleberries and are in the same family as tomatoes. Only three plants survived to plant outside and so far only one has any berries on it. But that should be enough to try at least.
We’re working on garden plans for fall this year, and if they work, next year should be a whole lot better. But those plans will have to wait until the next post. Thanks for dropping by and I hope to see you next time!
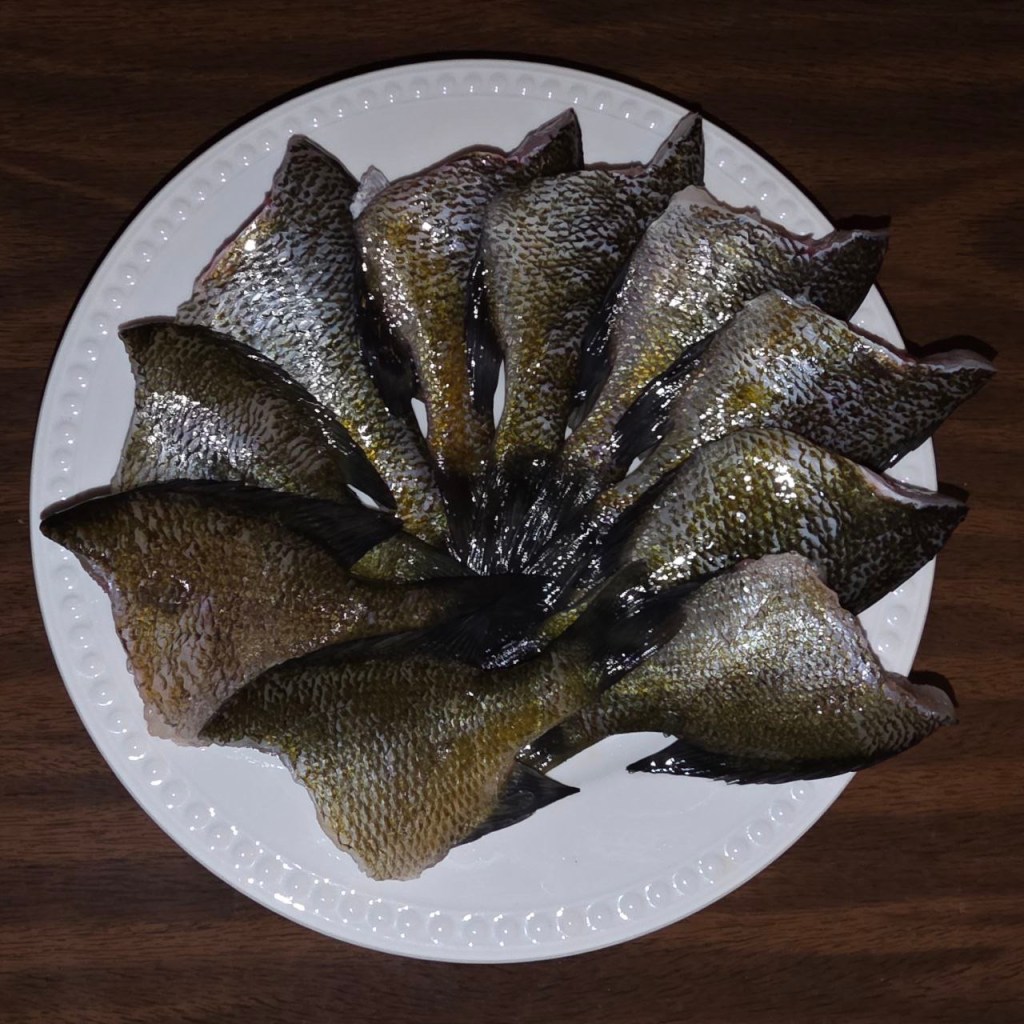
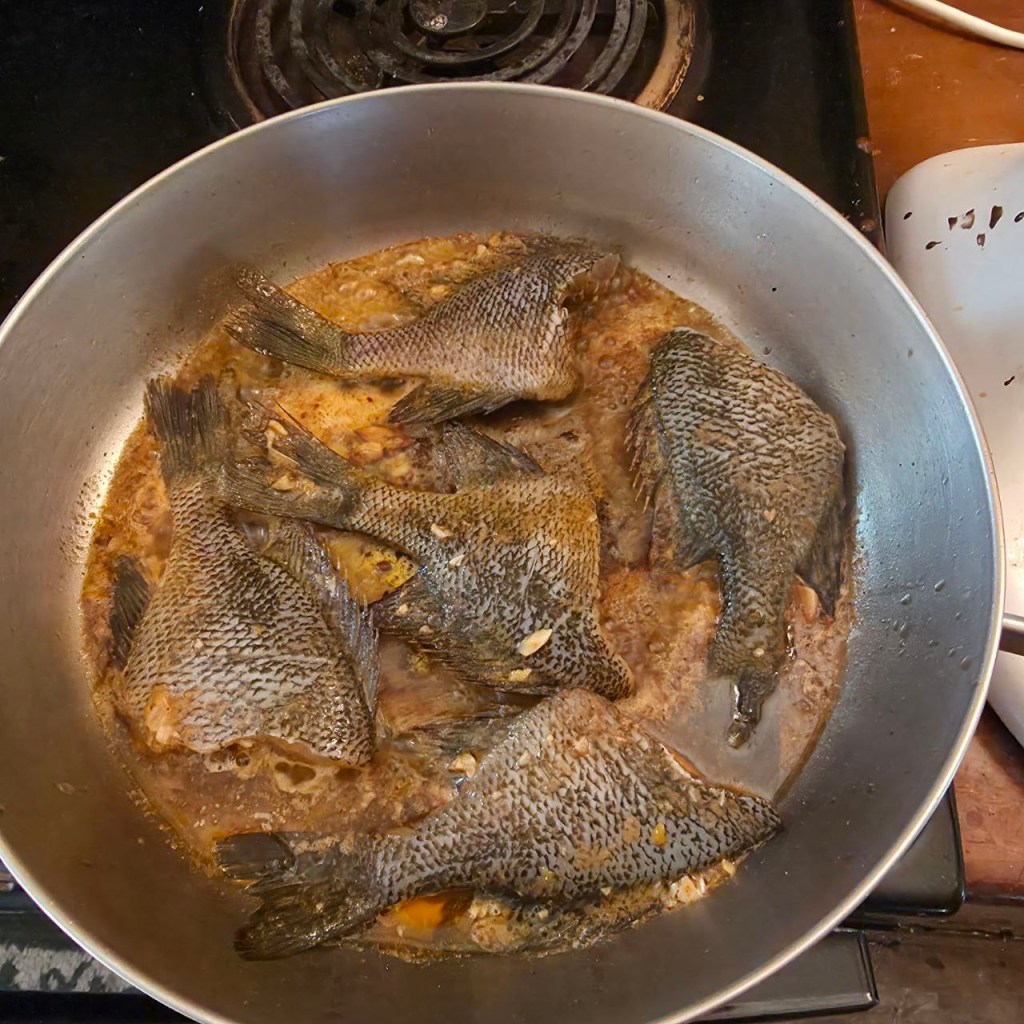
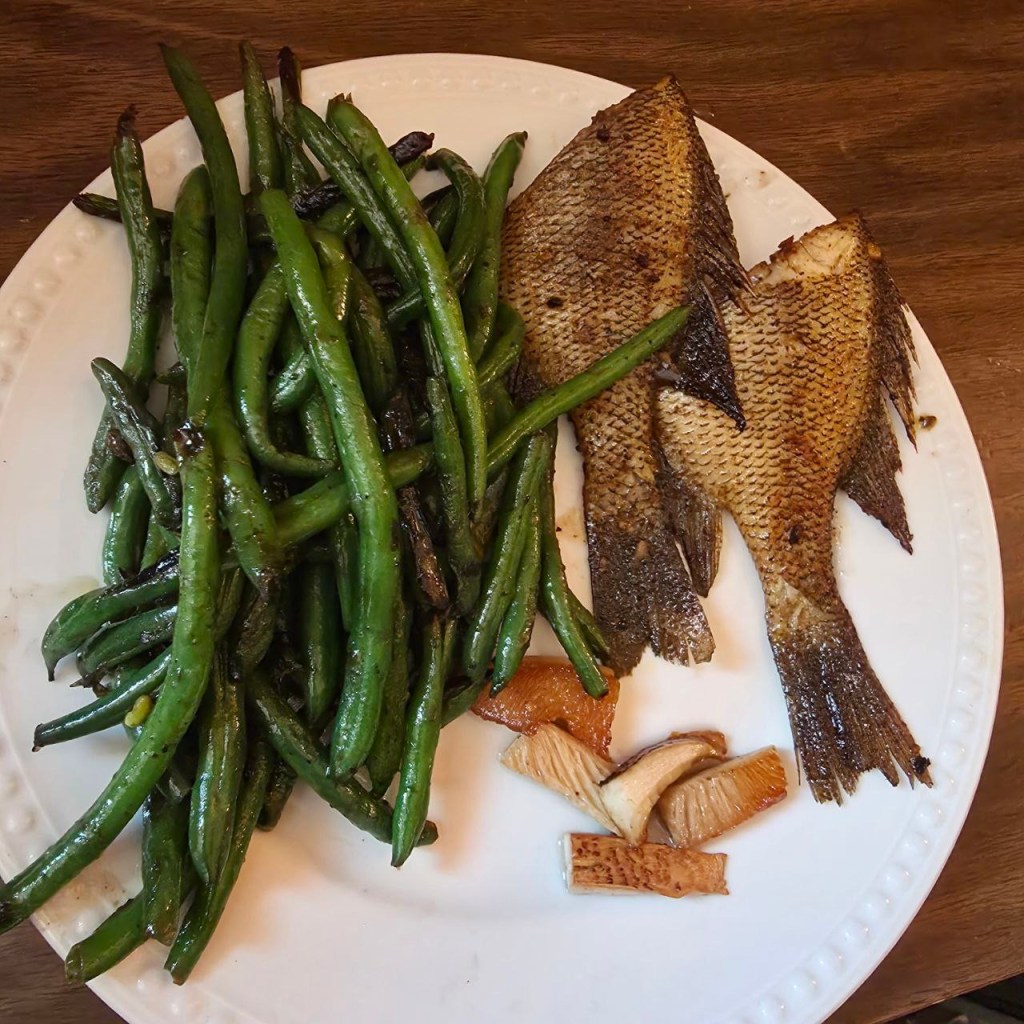
Some of y’all might disagree, but nothing tastes quite like fried bluegill that you caught yourself. Especially when it’s pan fried so nicely and combined with foraged Train Wrecker mushrooms and sautéed green beans.
Tim brought in most of the fish, but Micah managed to land one too.
I cleaned them the night we caught them while Tim made the marinade for them.
Once all 10 were ready to go, Tim placed them in the marinade and we put them in the fridge overnight.
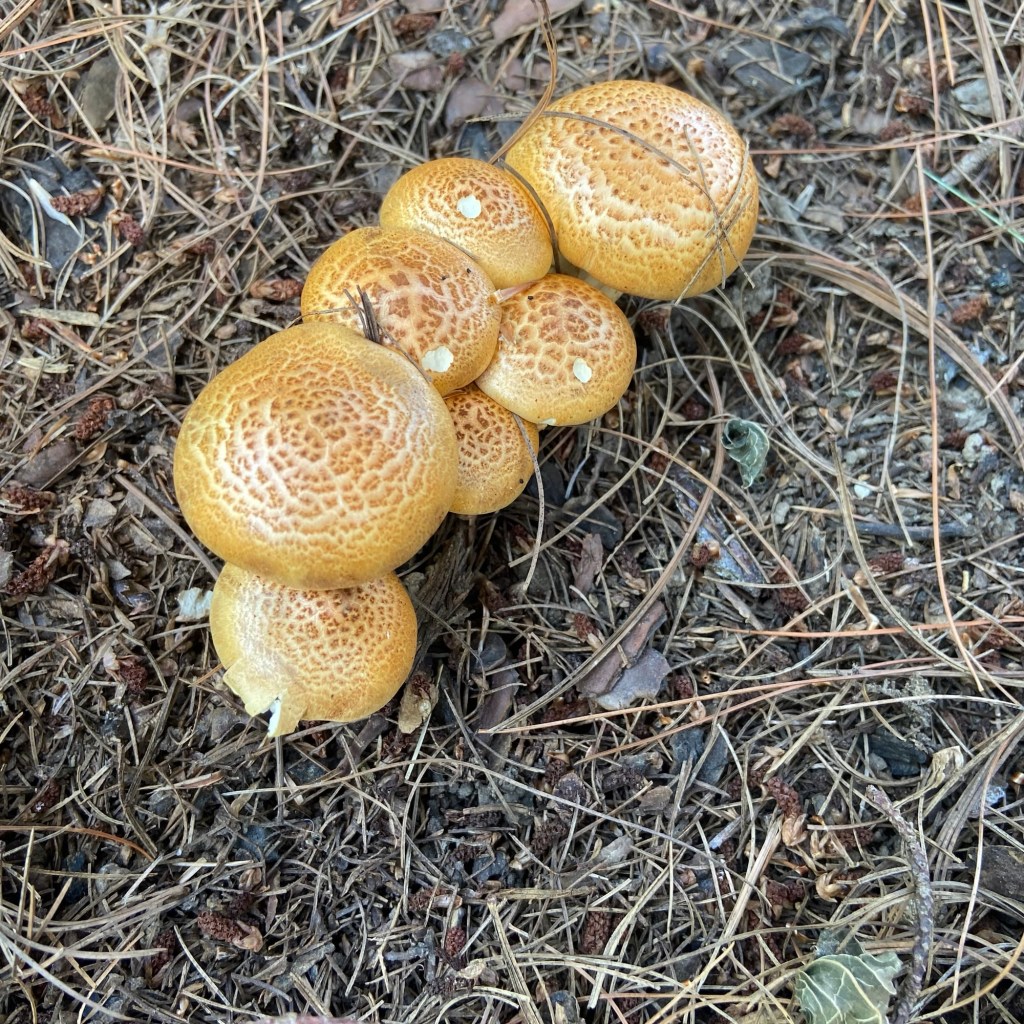
Then, the next afternoon I went looking for mushrooms. We had seen a cluster of them, so I knew where to go.
Train Wreckers, or Neolentinus lepideus, earned the name by their ability to grow on highly treated railroad ties. If they’re ignored, the tie would eventually disintegrate and could cause a train wreck. Thankfully for us, these mushrooms were growing on a pine root which meant they were safe to eat.
They do have some look-alikes, some of which are poisonous, so a positive ID is essential before they go in the skillet.
Fresh green beans were in the fridge just waiting to be used. And so the meal came together.
The results were delicious and filling. We’re already planning our next fish meal. 😊
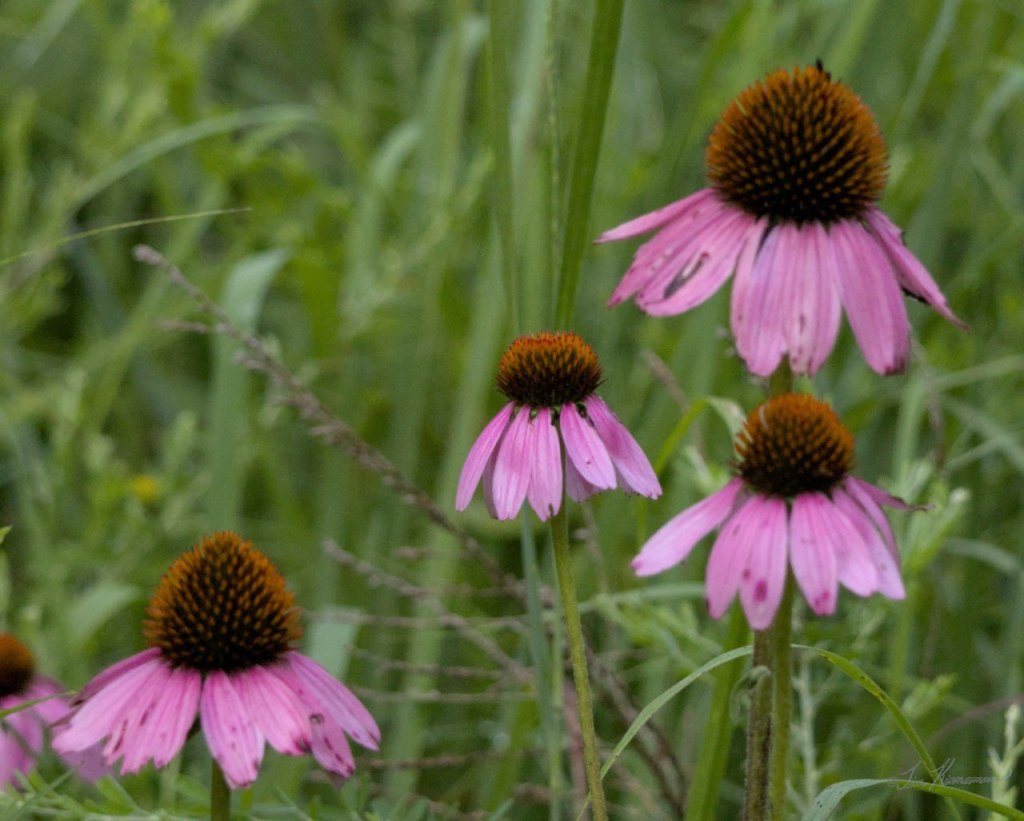
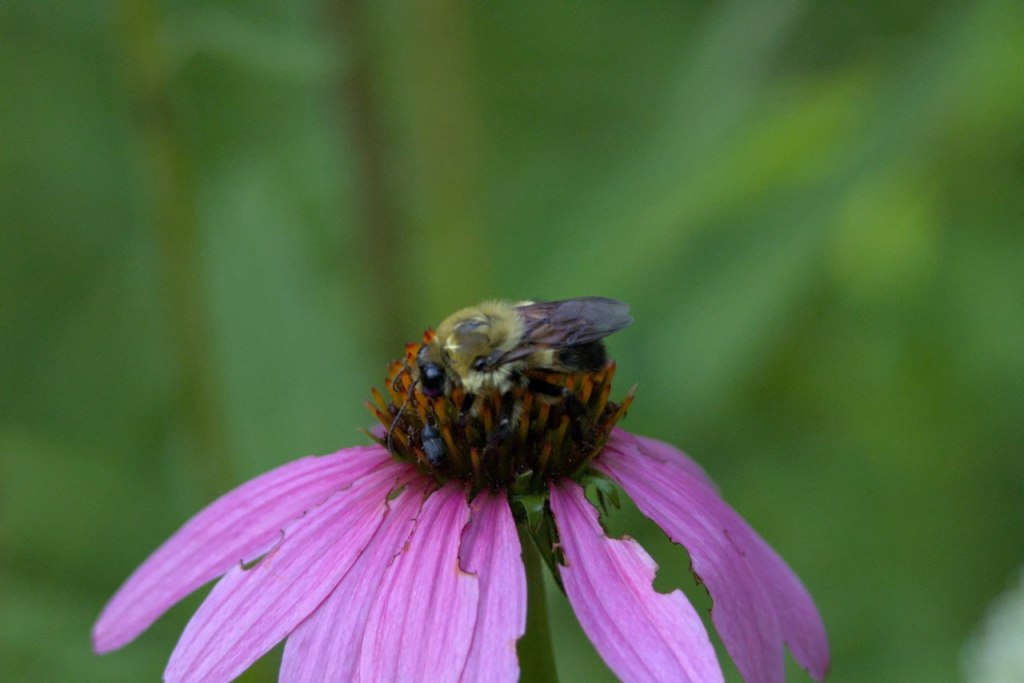
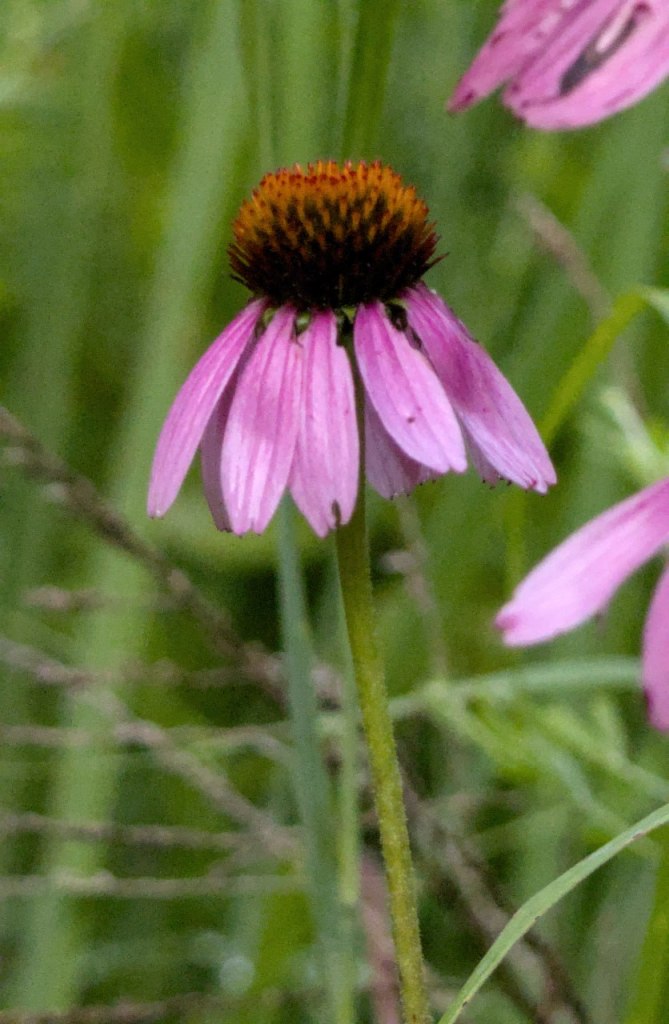
You’ve probably seen echinacea purpurea before—even if you didn’t realize it. With its drooping purple petals and bristly orange center, it looks like a daisy that tried hairspray. But don’t let the frilly look fool you—this plant has earned its place in herbal medicine cabinets for centuries. And like a lot of herbs, the more I learn about it, the more I find myself marveling at how God packed so much usefulness into a wildflower.
I’ve been looking into echinacea more lately—what it does, how it works, and why people use it—and I thought I’d share some of what I found in case you’re curious too.
What Is Echinacea Purpurea?
Echinacea is a native North American plant, often called “purple coneflower.” The purpurea species is the one most commonly used for medicinal purposes, though there are a few other types as well. It’s been used traditionally by Indigenous peoples and adopted into folk remedies for everything from infections to snake bites.
What Is It Used For?
The most common reason people reach for echinacea is to support the immune system—especially when cold or flu season hits. But its uses go way further than that. Here’s a quick list of what echinacea is said to help with:
Immune support: May shorten the duration and lessen the severity of colds.
Anti-inflammatory: Can reduce swelling and irritation, helpful for sore throats or skin issues.
Wound healing: Used in salves or teas for cuts, burns, or skin infections.
Antibacterial/antiviral: Traditionally used for bacterial infections and to support the body during illness. It works better in larger doses, maybe 3x what you would normally use of dried herbs.
Venomous Bites: Stops the venom from snake or spider bites and helps the body heal.
How Is It Taken?
Echinacea is often taken as a tea, tincture, or capsule. Some folks also use it topically (like in a salve or poultice). Most herbalists recommend using it at the first sign of illness—not as a long-term supplement. That’s because it works best to ‘kick-start’ your immune system when it’s under attack. Long-term use might reduce its effectiveness and may even overstimulate your immune system if taken constantly Think of it like a herbal first responder: ready when needed, but not meant to be on duty 24/7.
A Few Notes to Keep in Mind
Not recommended for people with autoimmune disorders unless you’ve done your research or talked to an herbalist. Echinacea stimulates the immune system which might not be something you want to do in this instance.
Some people may be allergic—especially if they’re sensitive to plants in the daisy family.
Pregnant or nursing? Best to double-check safety guidelines before using it. Though it is generally considered safe, doing your own research to see if something is right for you is always a good idea.
Final Thoughts
Echinacea isn’t magic. But it is a great example of how God designed plants with more than beauty in mind. I like knowing there are things growing in the world—and in some gardens—that can help strengthen the body instead of just masking symptoms. Even if I’m not using echinacea all the time, it’s one of those herbs I like having on hand. Kind of like that friend who shows up with chicken soup when you’re sick—only this one grows from seed and doesn’t need a nap afterward.
When you aim for a gold rush but come up with a souvenir nugget.
Now, before you go scrambling to find your pickaxe and gold pan, the elusive nuggets I’ll be talking about here are potatoes.
This year, we tried a new method of growing potatoes. Well, new to us. We had seen multiple places on YouTube and other places where people used this idea with seemingly great results. So, since our family can go through 5 pounds of potatoes in one meal, we decided to give it a go.
Step 1: buy seed potatoes.
It seemed easy enough. We got Yukon Gold, as those are Tim’s favorite. Not that I have a problem with them, but with living in Idaho as a teenager, I had gotten used to Idaho® Russets and never really branched out much.
Step 2: get a barrel.
We found what looked to be the perfect barrel. It was sturdy, bright blue plastic, with a wide mouth, a drainage hole, and it could hold 50 gallons. Sounded like a great size for an epic potato harvest.
Step 3: plant seed pieces.
We cut the potatoes in pieces with healthy eyes on them and buried them waaaay at the bottom of the barrel.
Step 4: wait.
The waiting was probably easier than it might of been with everything else we had going on this spring, but that didn’t dampen the excitement when we saw the first green shoots sticking up through the dirt.
Now, up to this point, we had done close to everything right. But, unfortunately for us and our potato harvest, there were a lot of things we didn’t know.
Yukon Golds are determinate potatoes. They only produce one round of potatoes and won’t produce more if you keep hilling them higher.
Potatoes need lots of drainage to keep the moisture from getting too high and rotting the potatoes. Apparently the one drainage hole wasn’t enough to handle all the rain we got this spring and early summer.
Potatoes need light fluffy soil and all we have here is clay and more clay.
Mixing half-composted wood shavings into the dirt to break up the clay isn’t a good idea, as it leaches the nitrogen from the soil.
There’s probably more that we just don’t realize we don’t know.
To make matters worse, now that it’s all said and done, the potatoes grew beautifully.
This was how they looked when the barrel was about half full. We thought for sure they were doing great.
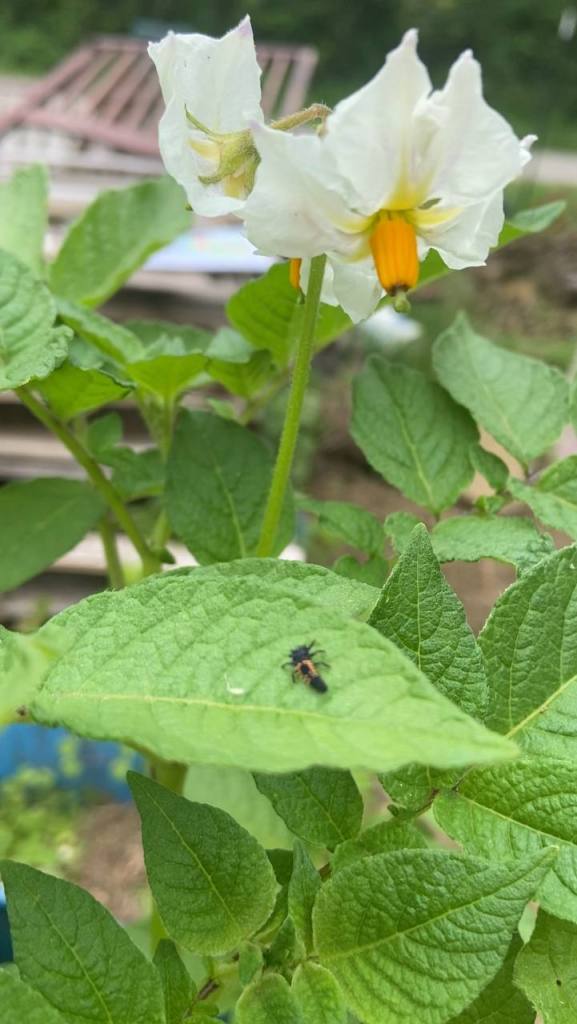
The flowers came on nicely and we even had several ladybug larvae to keep the aphids off.
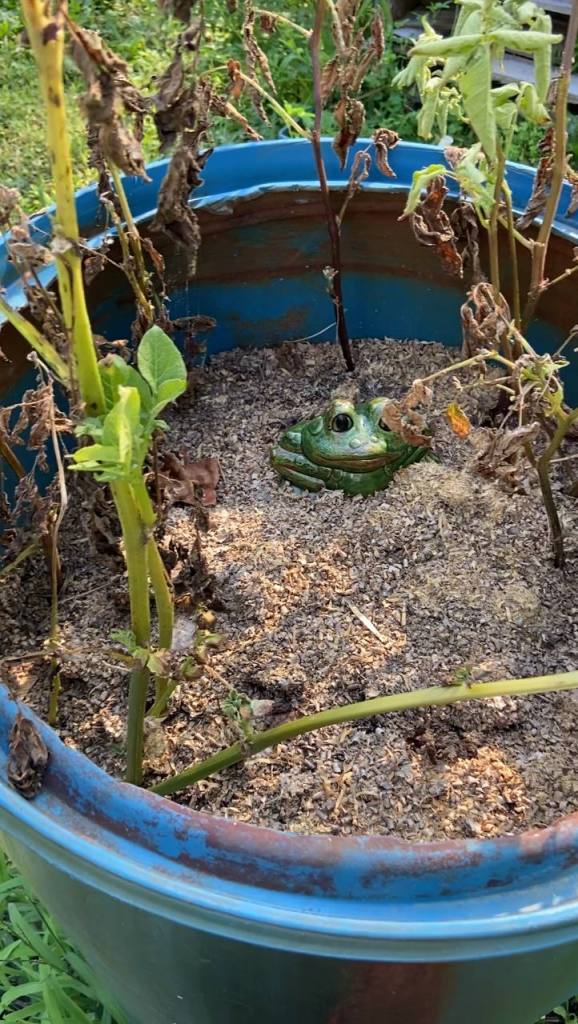
They look sad here, but this was not too long before we dumped the barrel. Harvest is supposed to wait until the stems have all died so we were excited to see what they had done.
How much did we harvest, you may ask? One potato. One little round nugget slightly bigger than a golf ball. And a snail shell. Kaitlynn found a perfect snail shell almost as big as the potato. Oh, and one enormous nightcrawler. At least something liked the moisture. 🙂
If only they had the decency to shrivel up right at the beginning, so we could have known something was wrong right off. Instead, they stayed green and healthy-looking the whole time while producing nothing.
But, in all actuality, I think learning the lesson of how not to grow potatoes will stick with us longer this way. So, you win some, you lose some, but what counts is that you learn some and keep going.