Tag: recipes

  • Our Favorite Buttermilk Pancakes (Make-Ahead & Fluffy!)

    Our Favorite Buttermilk Pancakes (Make-Ahead & Fluffy!)

    If you are like me, then from time to time, you have children—or even a spouse—who ask for pancakes. While I’m thankful it doesn’t lead to a situation like If You Give a Pig a Pancake, it still sparks some familiar questions: Do I want classic or fluffy? More ingredients or fewer? Regular or buttermilk?

    For years, I wrestled with that dilemma. We don’t buy pancake mix, so every time I needed to make some from scratch, my mind would start scrambling. What recipe did I use last time? Was that the favorite or just another okay one?

    Over time, I started narrowing down the options. I discovered that my family’s favorite pancakes were fluffy, a bit more complex in ingredients, and made with buttermilk. That helped—sort of. It still left a lot of recipes to sift through. Pun intended. 🙂

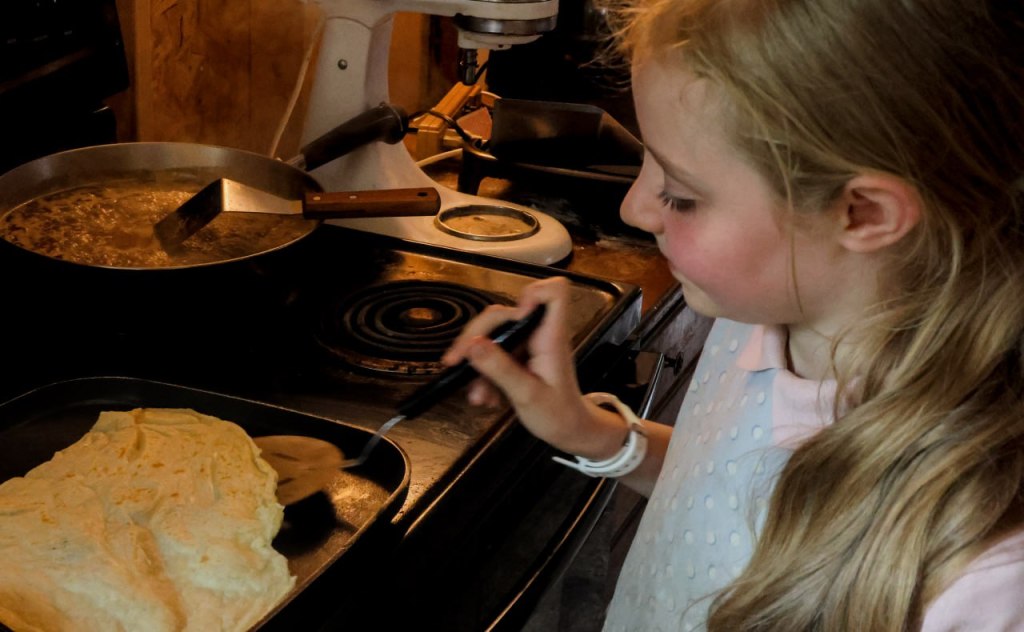
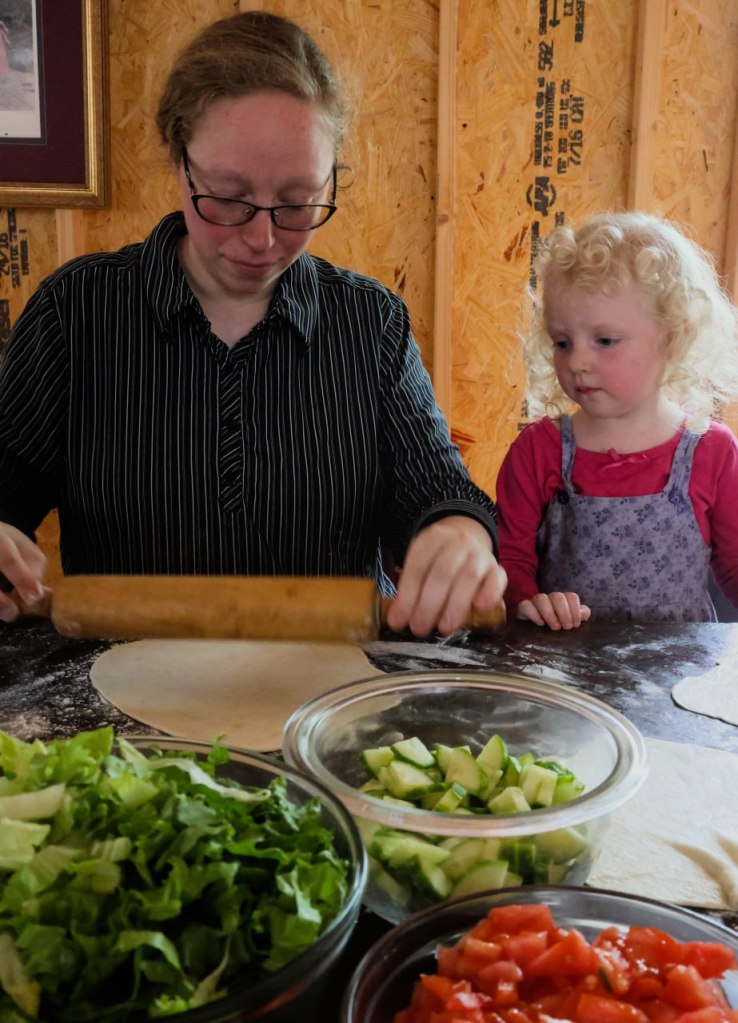
    And then, there was the timing. If I got up and started mixing the batter, I had maybe 5–10 minutes before my “Kitchen Crew” showed up to help. Some would come in jabbering a mile a minute, eager to grab something—anything—and get to work. Others would stumble in, rubbing eyes and stifling yawns, but still determined to be part of the process. While not a problem, it did highlight another preference. Pancake batter that could be made ahead. 

    If I could mix up the batter the night before and only have to flip them the morning of, that would save a ton of time. Especially with the size of my family and their colossal appetites. A batch of pancakes that made 8-10 2″ pancakes just didn’t cut it. 

    So you can imagine my relief when I found a recipe that checked all the boxes. It made fluffy pancakes that were easy to mix up without skimping on the ingredients and called for buttermilk. It had yeast in it so it could be made ahead and put in the fridge overnight to fluff. And it even came with some bonuses. It wasn’t too sweet and it didn’t even have to be doubled. That’s what I call a winner! 

    It took all of one time to know we had finally found our favorite pancake recipe. This time, I ignored the voice that said I’d for sure remember which recipe we liked, and wrote it down on a recipe card. Not going to lose that one!

    I wish I could remember where I originally found the recipe—I’m pretty sure it was Pinterest, but the exact source is lost to time. If you recognize it, let me know so I can give credit where it’s due!

    INGREDIENTS

    4 Cups Flour

    1 Tablespoon Yeast*

    1 Tablespoon Baking Powder

    2 Tablespoons Sugar

    2 Teaspoons Baking Soda

    1 Teaspoon Salt

    4 Eggs, Lightly Beaten

    4 Cups Buttermilk

    1/4 Cup Oil

    INSTRUCTIONS

    In a large bowl or the bowl of your stand mixer, whisk all the dry ingredients. Add wet ingredients and mix until just combined. Cover and refrigerate 8-24 hours. Stir before cooking. 

    Makes about 20-24 3″ pancakes. 

    *If you use active dry yeast, activate it in a 1/4 cup warm water or buttermilk and let sit for 5-10 minutes, while it blooms. If you use instant yeast, just follow the recipe as given.

    So whether you’re flipping for a crowd or just need a little breakfast win, I hope this recipe brings as many smiles to your table as it has to ours. And if your Kitchen Crew shows up to help… pour them a little extra syrup for me.

    Just don’t blame me if giving your kid a pancake leads to building a treehouse and finding a harmonica. 😉

  • Family of Tortilla Fans

    Family of Tortilla Fans

    Tortillas, Anyone?

    I don’t know about you and yours, but in this house, we like tortillas. And I mean like tortillas.

    If I want kids jumping up and down while screeching in delight, all I have to do is casually mention that we’ll need tortillas made for supper. Whether it’s tacos, fajitas, enchiladas, or burritos, those tortillas are always a big hit.

    In fact, with how much Tim and the kids (and I) love tortilla-based meals, you’d think he had Spanish roots instead of Italian.


    We started out always buying our tortillas, because making them seemed too daunting. While we really enjoyed fresh tortillas when we went out for Mexican food, it made my eyes cross and my brain itch to even think about making them.

    Then, health problems started pushing us to switch from buying everything to trying to make more food from scratch—especially things like bread and tortillas.

    Bread felt like the easier place to start, but one can only go so long without tacos or fajitas. Right?

    So I went hunting and digging and found a tortilla recipe that I decided I’d try. I gathered the ingredients—and my courage—and dove in.

    While the recipe wasn’t difficult, I worried the whole time that it wouldn’t work. And talk about time-consuming!

    Mixing the dough was easy; separating it into portions was trickier. Letting them sit, covered, for an hour or so was simple, but I stressed about them the whole time.

    The hardest part by far was rolling them out and frying them up. That first batch took over an hour—maybe two—before they were even ready to eat!


    Were they worth the hassle?
    Yes, definitely.

    One thing I struggle with is the temptation to balk at trying anything new. And for whatever reason, tortillas just seemed like one of those things.

    Now? Tortillas feel like one of the easiest things to make. Funny how it works like that, isn’t it?

    Except… I hardly ever have to make them anymore.


    Alayna, our oldest daughter, has done her best to establish herself as the “bread-maker” of the family. Whether it’s sandwich bread, hamburger buns, or tortillas, she practically begs to be the one to make them.

    She’s pretty pleased with herself for being able to make tortillas from memory now—and I’d say that’s not bad at all for an 8-year-old!

    I still do all the rolling myself. Micah and Alayna have both tried, but between not enough height and not enough upper arm strength, it just works better if I handle that part for now.

    They do, however, claim the job of frying the tortillas—and they do a pretty good job of turning out lightly browned deliciousness every time.


    What happens to leftover tortillas, you ask?
    Well, they rarely get left. But when they do, one of two things happens:

    Either the kids decide they want a snack and clamor to eat them plain, or Tim gleefully makes himself a cheesy quesadilla.

    Either way, tortillas around here have a short life—but one joyfully dedicated to making our family happy and full.

    Our Go-To Tortilla Recipe

    I don’t remember where I found this recipe, but it’s become a staple in our home. One batch never cuts it for us, but it’s a great place to start!

    Ingredients:

    • 3 cups flour
    • 1 teaspoon salt
    • 1 teaspoon baking powder
    • 1 cup warm water
    • 1/3 cup lard (or oil or butter)

    Instructions:

    1. Mix the dry ingredients in the bowl of a stand mixer or by hand.
    2. Add the water and lard, and mix until well combined.
    3. Knead (in the mixer or by hand) for at least 5–7 minutes—longer kneading makes better tortillas.
    4. Divide dough into 8 equal pieces. Flatten slightly on a lightly floured surface.
    5. Cover and let rest at least 15 minutes or up to 2 hours.
    6. Roll out each piece on a floured surface.
    7. Fry in a dry skillet on medium to medium-high heat until bubbles form and the underside has golden-brown spots. Flip and cook the second side (it takes less time than the first—usually about 30 seconds).
    8. Keep warm in a low oven (we use the “Warm” setting) on a cookie sheet until ready to eat.
  • Fifty-Three Pounds Of Chicken

    Fifty-Three Pounds Of Chicken

    Hey there! Welcome back.

    What is your favorite way to process fifty-three pounds of frozen chicken if it suddenly landed on your counter? Probably like you, I had never thought of what I would do with that much chicken at once. But then a friend showed up with a large box of chicken pieces just hoping we would be willing to take it off their hands. How could I say no? It may have also been that saying no never even crossed my mind. I mean, this was fifty-three pounds of free chicken for me to put up. That sounded like a home canner’s dream come true. So I quickly decided that this much chicken just had to be canned, as that opened up practically endless possibilities for how it could be used later.

    Since the chicken was still frozen solid, I let it sit out to thaw, aiming to start processing once it was thawed enough to separate. After getting a “good” start, I saw that despite all the chicken baking and boiling and cooling I had gone through less than half the box. It was quickly becoming obvious that this was just the beginning of a full-blown chicken canning marathon.

    So, more chicken went into the oven, stockpan, and even my crockpot in a seemingly endless procession until all 120+ pieces were cooked and ready to be picked off the bones. 

    That was a whole process in itself and for a while I wasn’t sure if I was going to run out of chicken first, or fingers. Micah and Alayna both wanted to help, but as they struggle to detect all the bones, I stuck it out myself.

    Once the meat was all ready, I pulled out my jars, filled them with steaming meat, topped them off with broth and a little salt, and prepared my pressure canner. Only to find that the weight was missing. That sent me into researching and digging until I found out how to water bath chicken. Since my water bath canner was also missing in action I made do with a large stock pan. Now, before anyone gets worried, I know pressure canning is the standard for meat, but since water bath canning used to be all anyone did, I decided to give it a try.

    I have to admit, waiting the entire 180 minutes while the jars canned was definitely not my favorite part of it all. Since I was using a substitute pot, it was not tall enough to put as much water in as was needed. Instead, I had another pan of water going and kept topping off the “canner” when it got a little low.

    After removing all the bones for bone meal, the scraps for dog food, and enough meat to make four meals for ten people, I was able to put up five quarts of chicken. Not a huge amount, but I was happy.

    By the time I was done, it was 11 PM and I was rather tired but satisfied. Seeing those jars lined up on the counter, knowing they’d be feeding my family in the months to come, made all the effort feel worthwhile. It’s funny how something as simple as preserving food can feel like such an accomplishment, but every time I do it, I’m reminded why I love it.

    And now, if fifty-three pounds of chicken shows up at my door again, I will know what to do with it!

  • Amazing Soft and Chewy Chocolate Chip Cookies

    Amazing Soft and Chewy Chocolate Chip Cookies

    Great to Have You Back!

    If any of y’all are like us, you have a go-to dessert recipe for when the sugar cravings hit or you want to relax with a favorite snack. For us, it’s chocolate chip cookies. But, these aren’t just any chocolate chip cookies. When we got married, Tim was very much NOT a fan of chocolate chip cookies. But sometimes I’d try different recipes to see if I could find one he did like. Because, Hello… Chocolate!

    A couple of years ago, I found a recipe that sounded promising and decided to give it another try. Now, when I make something, it is pretty rare for me to follow the recipe exactly. So I did my usual and tweaked these. The original recipe called for nuts, and while I don’t have any problems with nuts, I don’t often use them in cookies. Instead, I increased the amount of flour.

    I mixed up all of the ingredients, placed the cookies on the sheet, and baked them for two minutes less than the recipe said. With bated breath, I pulled the finished cookies out of the oven and watched as Tim sampled one. And something wonderful and new happened!

    Alright, I may have gotten a little dramatic there, but something exciting did happen. Tim quickly proclaimed them the best chocolate chip cookies he had ever eaten, and the rest of the batch quickly followed the first as he and the kids (and me, too) basically inhaled them.

    You might now be curious about what makes this recipe so special—why these cookies stand out from the rest. Well, there are a couple things that I think really made the difference for us.

    1. Dark Chocolate

    I might be stepping into a controversial subject (I don’t know), but my family is of the firm opinion that dark chocolate is VASTLY superior to milk chocolate or even semi-sweet chocolate. It keeps the rich decadent taste of chocolate without overloading on the sweet taste.

    1. Firm Dough

    Again, each to their own, but I like my cookie dough firm enough that it doesn’t spread all out in the oven. That way, the cookies come out thick enough to have soft chewy centers instead of being flat and crispy.

    1. Shorter Bake Time

    I pull these cookies out of the oven before the centers look completely set and dry. It keeps some of the moisture in them so they stay soft and moist for several days. Tim actually likes them best a day or two after baking, when the flavors have had plenty of time to blend.

    So what’s in these cookies? It’s pretty much what you would expect.

    • Butter – I have used both salted and unsalted butter in this recipe and both work. I normally use salted without having to adjust the salt amount.
    • Sugar – I use raw natural sugar, but plain white sugar works too. I also cut the sugar amount as we don’t like them really sweet, but if you prefer a sweeter cookie increase the sugar by a 1/4 cup.
    • Brown Sugar – My preference is dark brown sugar as it adds a deeper taste, almost a caramel-ly taste. Light brown sugar works great too, though. I have even made my own brown sugar by adding molasses to raw sugar.
    • Vanilla – I use real vanilla extract, but imitation vanilla would probably work as well.
    • Eggs – I have only ever used chicken egg for this recipe. Hopefully, one of these days I can let you know how it works with duck eggs! I have never used an egg substitute.
    • Salt – My normal is pink Himalayan salt, but white table salt is fine too.
    • Baking Soda – Pretty basic, I think.
    • Flour – I use organic white flour. I don’t have any experience with whole wheat flour or nut flours in this recipe.
    • Dark Chocolate Chips – And last, but not least, the star of the show! I have used milk chocolate mini chips and semi-sweet chocolate morsels, but my definite favorite is dark chocolate chips. The darker the better. You can use a bit more than the recipe calls for with no problem or can cut it down and use less. I often use less as Tim really likes the taste of the actual cookie dough with only occasional chocolate chips.

    Our Family-Favorite Soft & Chewy Chocolate Chip Cookies

    • 1 Cup of Butter, Softened
    • 1/2 Cup Sugar
    • 3/4 Cup Brown Sugar
    • 1 Teaspoon Vanilla
    • 2 Eggs
    • 1 Teaspoon Salt
    • 1 Teaspoon Baking Soda
    • 3 Cups Flour
    • 1 1/2 Cups Dark Chocolate Chips

    Instructions:

    1. Preheat oven to 375 degrees.
    2. Cream the butter, sugars, and vanilla together in a stand mixer until creamy.
    1. Add the eggs one at a time, beating after each one.
    1. Switch to dough hook and mix in salt, baking soda, and flour. The dough may look crumbly but usually fixes itself once the flour is all mixed in.
    1. Mix in chocolate chips.
    1. Place thick rounds of dough about 2 inches apart on ungreased cookie sheets.
    1. Bake for 8 minutes for soft and chewy cookies. 10 minutes if you want a crispier cookie.
    1. Let them cool—if you can resist! At our house, they rarely last that long.
  • “Spring Cleaning” Tea

    “Spring Cleaning” Tea

    Happy Spring!

    When flowers start blooming, and trees start budding, I start looking for the ingredients to make one of my favorite wildcrafted spring teas. There is something so rewarding about heading outside with a basket and a pair of scissors to harvest the different herbs to wildcraft some tea.

    Wildcrafting is the practice of responsibly harvesting wild plants for food, medicine, or other uses. It encourages sustainability, deepens your understanding of local plant life, and results in fresh, chemical-free ingredients that store-bought teas simply can’t match. Plus, there’s something deeply satisfying about brewing a cup of tea from herbs you’ve gathered yourself!

    I use this tea early in the spring to naturally clean out all the accumulated junk that tends to build up internally over the winter. These herbs are created to have the vitamins and minerals needed to do a gentle but deep spring cleaning on our bodies. It helps that they taste great, too! The ingredients in this recipe are simple but may not be naturally available everywhere. 

    1. Dandelions. These bright yellow flowers are among the first to pop up in spring and may bring dismay to some. But to wildcrafters, they are a treasure trove! Not only do they amend the soil wherever they grow, but the flowers are full of vitamins, minerals, and antioxidants. They work to regulate blood sugar, detox the liver, and in general clean you out after a long winter. The leaves can act as a diuretic, lowering blood pressure and aiding in digestion. So the next time a dandelion shows its golden face, don’t try to dig it up (it’ll just come back anyway), instead look for a way to incorporate it into a tea, salad, or bread recipe.
    1. Cleavers. This sticky plant may not grow everywhere, but if it grows near you consider yourself blessed. Even if it does seem to be trying to take over the whole yard. Cleavers are one of the strongest lymphatic system cleansers in nature. While more potent than over-the-counter medicine, this herb is very gentle with no bad side effects, unless you are a rare creature with an allergy to cleavers. An immune system booster, this funny-looking “weed” is also anti-inflammatory and there is even research to explore its use as a cancer treatment.
    1. Purple Dead Nettle. How often have you driven past an empty field and seen a thick carpet of light purple flowers? Those were likely Purple Dead Nettle, which tends to grow in dense clumps and patches. This edible green belongs to the mint family, contains more nutrients than spinach, and is justly considered a superfood. Amazing! Packed full of Vitamins A, C, K, iron, and fiber, this little plant also holds antioxidants that support a healthy gut and heart. It boosts the immune system and reduces allergy symptoms. I could go on and on, but I think it’s easy to see how this herb earned its place in my recipe.
    2. Organic Orange Peel. I include orange peel in this recipe for an added dose of Vitamin C and flavor. 
    3. Organic Pure Unfiltered Honey. This tea does not have to be sweetened, but I prefer it with a swirl of honey. It brings out the other flavors, tones down the “green” taste, and comes with its own impressive array of benefits.

    When you go to harvest your herbs, be sure to verify what you are picking before you put it in a tea. All of these plants are easy to identify with a little looking online or in an herb book. You also want to pay attention to where you harvest from. You don’t want to use anything that has been sprayed with pesticides, or herbicides or is growing near a busy road or pet areas. No dog tea for me, please!

    Once you have successfully identified your plants the best time to pick them is in the morning before the sun gets hot. This is when they are the most potent. You can dry them if desired by hanging little bunches of them upside down somewhere dark, dry, and well-ventilated or you can use a drying rack or dehydrator for faster drying. Store the dried herbs in airtight glass containers, like a quart jar, away from direct sunlight and label them to avoid later confusion. Whenever possible, I prefer using fresh herbs, as drying reduces their potency.

    Brewing The Tea

    I do not have amounts for this recipe as I always go by what feels/looks right. Something around equal parts of each herb. I do use significantly more dandelion flowers than leaves as the leaves can get bitter quickly. But some might like more and some less, so feel free to adjust. Experiment and find your favorite blend! 

    Brewing the tea is very easy. If you are using fresh ingredients, put water in a saucepan, add the orange peel, anywhere from a few strips up to the whole peel, and bring to a boil. Once it boils, remove from heat, add the herbs, cover, and let steep for 5 minutes. You can let it go longer if you like it stronger, but the longer it sits the more the bitter green taste comes out. Once it reaches the desired strength, strain it into your mug, stir in some honey, and enjoy a mug of delicious wildcrafted tea!

    Wildcrafted tea is a simple yet meaningful way to bring nature into your daily routine. Not only does it offer delicious flavors and health benefits, but it also fosters a deeper appreciation for the plants growing around you. Try this blend or experiment with your own combinations, and let me know what you discover!

    Happy foraging and sipping!