Tag: self-sufficiency

  • Homemade Yogurt from Scratch

    Homemade Yogurt from Scratch

    Why Make Yogurt at Home?

    Homemade yogurt isn’t just about saving money—it’s about freshness, control, and nutrition. When you make it yourself:

    • Cost savings: A single gallon of milk can yield 8 cups of yogurt for less than store-bought tubs.
    • Customization: You choose the milk type (whole, skim, goat, raw, organic, etc.), thickness (Greek-style or regular), and flavors.
    • Fewer additives: No thickeners, stabilizers, or hidden sugars—just milk and live cultures.
    • Sustainability: Making yogurt at home cuts down on packaging waste.

    How Yogurt Works: The Science Behind It

    Yogurt is created by fermenting milk with beneficial bacteria. The two classic starter strains are:

    • Lactobacillus bulgaricus
    • Streptococcus thermophilus

    Together, they convert lactose (milk sugar) into lactic acid. This acid lowers the pH, thickening the milk proteins and giving yogurt its tangy flavor. Many store-bought starters also include additional strains like Lactobacillus acidophilus or Bifidobacterium lactis, which may aid digestion.

    The fermentation process not only preserves milk but also boosts probiotic content, supporting gut health.

    four quart jars of homemade yogurt in a dehydrator

    Ingredients

    • 1 quart (4 cups) milk – whole milk makes creamier yogurt, but any type works
    • 2 tablespoons plain yogurt with live, active cultures (store-bought or from a previous batch)

    Equipment

    • Saucepan
    • Thermometer (optional but helpful)
    • Whisk
    • Clean glass jar or container with lid
    • Towel or blanket for insulation

    Step-by-Step Instructions

    1. Heat the milk
      Pour milk into a saucepan and gently heat to 180°F (82°C). This denatures proteins so the yogurt sets thicker.
    2. Cool the milk
      Remove from heat and let it cool to 110°F–115°F (43–46°C). This is the ideal range for the cultures.
    3. Add starter
      Whisk 2 tablespoons of yogurt into a small bowl with a bit of the cooled milk. Then stir this mixture back into the pot.
    4. Incubate
      Pour into a clean jar, cover, and keep warm (around 110°F) for 6–12 hours.
      • For thinner, milder yogurt: check at 6 hours.
      • For thicker, tangier yogurt: let it go longer.
        You can wrap the jar in a towel, place it in an oven with the light on, use an Instant Pot’s yogurt setting, or a dehydrator set to 110°F.
    5. Chill and enjoy
      Once it’s set, refrigerate for at least 2 hours. The yogurt will thicken further as it cools.

    Variations

    • Greek Yogurt: Strain finished yogurt through a cheesecloth or coffee filter for 2–4 hours to remove whey.
    • Flavored Yogurt: Stir in honey, fruit purée, vanilla, or jam just before eating.

    Storage

    Homemade yogurt keeps for about 2 weeks in the refrigerator. Save 2–3 tablespoons from each batch to use as the starter for the next one.

    If you would like a video on the process, check out this one on our YouTube channel!

  • Pumpkin Spice Streusel Muffins

    Pumpkin Spice Streusel Muffins

    A plate of pumpkin spice muffins with streusel topping with mug of coffee,  three whole nutmeg,  and a plaque that says "Then sings my soul".

    Maybe the cool weather is getting to me. Maybe I like pumpkin spice more than I thought. Whichever is the case, here’s a recipe I had to share. These muffins turned out so delicious I couldn’t keep them to myself.

    Pumpkin Spice Muffins (24 muffins)

    Ingredients

    Dry:

    • 3 ½ cups all-purpose flour
    • 2 tsp baking soda
    • 2 tsp baking powder
    • 1 tsp salt
    • 2 tsp cinnamon
    • 2 tsp nutmeg
    • 1/2 tsp ground ginger
    • 1/2 tsp ground cloves

    Wet:

    • 2 cups canned pumpkin purée (NOT pumpkin pie filling)
    • 1 cup granulated sugar
    • 1 cup brown sugar, packed
    • 1 cup sour cream
    • 1 cup melted butter
    • 4 large eggs
    • 2 tsp vanilla extract

    Streusel Topping

    • 1 cup all-purpose flour
    • ¾ cup granulated sugar (or half brown sugar, half white for deeper flavor)
    • 1 tsp cinnamon
    • ½ tsp nutmeg
    • ½ cup cold unsalted butter, cubed

    Instructions

    1. Preheat oven to 350°F (175°C). Line 24 muffin cups with paper liners (or grease).
    2. Make the streusel:
      In a bowl, whisk flour, sugar, and spices. Cut in butter with a pastry cutter or your fingers until mixture looks like coarse crumbs. Chill while you prepare the batter.
    3. Mix dry ingredients:
      In a large bowl, whisk flour, baking soda, baking powder, salt, and spices.
    4. Mix wet ingredients:
      In another large bowl, whisk together pumpkin, both sugars, sour cream, oil, eggs, and vanilla until smooth.
    5. Combine:
      Add dry ingredients to wet and stir just until combined (don’t overmix).
    6. Fill muffin tins:
      Divide batter evenly among 24 cups (about ⅔ full).
    7. Top:
      Sprinkle each muffin generously with streusel.
    8. Bake:
      Bake 20–24 minutes, until a toothpick inserted in the center comes out clean.
    9. Cool slightly before serving.

    These muffins are great the next day as well.

  • Homemade Laundry Detergent

    For Pennies A Load!

    Like maybe some of you, I used to enjoy meandering down the candle aisle in Walmart and smelling every one that sounded interesting. And I’d check every single bottle of soap or shampoo to make sure I bought the one I liked the best.

    Now, I find myself preferring, by far, natural scents over commercial ones. In fact, just one sniff of one candle or bottle of soap is often enough to bring on a headache.

    Add to that kids who break out from harsh chemicals in most laundry detergents, and we aren’t the easiest people to buy laundry soap for.

    So, the other day, I thought, why buy it?

    I started checking and soon found a recipe for laundry detergent powder with only 4 clean natural ingredients, one of them being fragrance of my choice. It sounded great to me and we even had most of the ingredients on hand.

    • Borax for odor control, stain removal, and general whitening. I used 20 Mule Team brand.
    • Fels-Naptha for cleaning and stain removal. I used Purex brand
    • Washing Soda for more cleaning power and odor control. I used Arm and Hammer brand.
    • Essential Oils for a great natural smell. I used one of Plant Therapy laundry blends.

    I didn’t have Borax or Washing soda, but a quick trip to our little local store provided Borax and we found a way to make our own Washing soda.

    It turns out, if you put regular baking soda on a cookie sheet in the oven at 400 degrees for an hour, you have Washing Soda!

    A box of Borax, a bar of Fels-Naptha, a box of essential oils, a bowl of washing soda, and a jar of laundry detergent powder.

    Homemade Laundry Detergent


    1 cup Borax Powder

    1 cup Washing Soda

    1 cup Fels-Naptha, grated (about 1 bar)

    15-20 drops of essential oil, your choice

    If you have Washing Soda, put it and the Borax in a jar or container. You will want to use a mask or something to cover your face to keep you from breathing in the fine powders. If you don’t have Washing Soda, you can make your own by putting a cup of baking soda on a cookie sheet in a 400 degree oven for an hour. This changes the chemical formula and makes Washing Soda.

    Take the bar of Fels-Naptha and grate it. You can use the fine side of a cheese grater or your food processor shredder disc on the small side. Again, the powder is very fine and not something you want to breathe so wear something over your mouth and nose. Let it settle before you open the food processor.

    Put all three dry ingredients in a container or jar. I used a jar so I could just put a lid on and shake it to mix it.

    Let the mixture settle and then open and add 15-20 drops of essential oils for scent.

    Shake to mix in the oils and let sit overnight.

    Use 2 tablespoons for a regular load and 3 tablespoons for a heavy load.

    I also have a video showing the process on YouTube at Bringing Life Homestead.

  • Bluegill Supper

    Bluegill Supper

    Some of y’all might disagree, but nothing tastes quite like fried bluegill that you caught yourself. Especially when it’s pan fried so nicely and combined with foraged Train Wrecker mushrooms and sautéed green beans.

    Tim brought in most of the fish, but Micah managed to land one too.

    I cleaned them the night we caught them while Tim made the marinade for them.

    Once all 10 were ready to go, Tim placed them in the marinade and we put them in the fridge overnight.

    Then, the next afternoon I went looking for mushrooms. We had seen a cluster of them, so I knew where to go.

    Train Wreckers, or Neolentinus lepideus, earned the name by their ability to grow on highly treated railroad ties. If they’re ignored, the tie would eventually disintegrate and could cause a train wreck. Thankfully for us, these mushrooms were growing on a pine root which meant they were safe to eat.

    They do have some look-alikes, some of which are poisonous, so a positive ID is essential before they go in the skillet.

    Fresh green beans were in the fridge just waiting to be used. And so the meal came together.

    The results were delicious and filling. We’re already planning our next fish meal. 😊

  • Best Buttermilk Biscuits

    Best Buttermilk Biscuits

    Hello again!

    Around here, we usually keep breakfasts pretty simple. Bacon and eggs, eggs and bacon, that sort of thing. Sometimes, for variety, we add cottage cheese, veggies, or fruit to the menu.

    And then, other times, we feel like splurging a bit. Usually in those cases, our minds (Tim’s for sure!) turn to biscuits.

    Finding the perfect recipe was a bit of a journey. Especially since we started with store-bought biscuits out of a can. I still shudder sometimes to think of it.

    This recipe is not original to me. I found it online at bakerbettie.com

    The enjoyment we get from eating these flaky rounds of yummyness is ours, though. They are amazing with butter and honey or jam, with Tim’s delicious sausage gravy, or as breakfast sandwiches. Or even reheated with a little butter.

    biscuit bacon egg and cheese sandwiches

    OLD FASHIONED LARD BISCUITS


    Ingredients

    • 2 c Flour
    • 1 T Baking Powder
    • 1/4 t Baking Soda
    • 1 1/4 t Salt
    • 6 T Leaf Lard, cold *
    • 1 c Buttermilk, cold

    Instructions

    Preheat oven to 450 degrees and make sure an oven rack is in the center of the oven.

    Grease a cake pan or cookie sheet or line with parchment paper or a silicone baking mat, if desired. I never grease my pan for biscuits and they seldom stick more than a little bit. If you use a cookie sheet, make sure it has a rim to keep any melted lard from running off.

    Keep lard and buttermilk in the refrigerator until needed.

    In a large mixing bowl, combine the dry ingredients and whisk. *

    flour mixture in a mixer bowl

    Add in the cold lard and cut into the flour mixture using a pastry blender or fork. You want the lard to be mostly in pea-sized pieces with a few larger.

    pieces of butter in flour mixture in a mixer bowl
    butter pieces in flour mixture

    Add the cold buttermilk and stir with a spoon or spatula until just combined. This will not take long and you don’t want to overmix as the biscuits will be tough. The batter/dough will be pretty wet and sticky.

    buttermilk in flour mixture

    Turn the mixture out onto a floured table or countertop. Dust flour over the top. With floured hands, bring the dough into one mass.

    flour on a table

    Pat the dough out and then fold in half. Turn 90 degrees and pat out again. Repeat this 5-6 times. The folds help the biscuits end up flakier.

    patting out biscuit dough

    Press the layered dough out until it’s about an inch thick and use a round cutter that has been dipped in flour to cut the biscuits. Press straight down with the cutter and do not twist. Pat the scraps back together and cut again. Or you can pat the dough into a rectangle and use a sharp knife to divide into 8 biscuits.

    a cut biscuit round
    cutting out biscuits

    Place the biscuits in the prepared pan, making sure the edges are touching to help the biscuits rise.

    unbaked biscuits on a cookie sheet

    Bake for 13-15 minutes until golden brown. Do not open the door for at least the first half of the bake time. Keeping the steam trapped inside the oven helps with the rise.

    golden brown biscuits on a cookie sheet

    Let cool, if possible, and then enjoy however you choose.

    Notes

    * I have substituted butter, tallow, and bacon grease for the lard with no problems. You just want it cold when it goes in.

    *I make mine in my stand mixer and it works just great. Just don’t overmix.

  • The Delights of Echinacea

    The Delights of Echinacea

    purple coneflowers or echinacea growing next to bright yellow flowers

    You’ve probably seen echinacea purpurea before—even if you didn’t realize it. With its drooping purple petals and bristly orange center, it looks like a daisy that tried hairspray. But don’t let the frilly look fool you—this plant has earned its place in herbal medicine cabinets for centuries. And like a lot of herbs, the more I learn about it, the more I find myself marveling at how God packed so much usefulness into a wildflower.

    I’ve been looking into echinacea more lately—what it does, how it works, and why people use it—and I thought I’d share some of what I found in case you’re curious too.

    What Is Echinacea Purpurea?


    Echinacea is a native North American plant, often called “purple coneflower.” The purpurea species is the one most commonly used for medicinal purposes, though there are a few other types as well. It’s been used traditionally by Indigenous peoples and adopted into folk remedies for everything from infections to snake bites.

    echinacea flowers, also known as purple coneflowers, growing in a field

    What Is It Used For?


    The most common reason people reach for echinacea is to support the immune system—especially when cold or flu season hits. But its uses go way further than that. Here’s a quick list of what echinacea is said to help with:

    • Immune support: May shorten the duration and lessen the severity of colds.
    • Anti-inflammatory: Can reduce swelling and irritation, helpful for sore throats or skin issues.
    • Wound healing: Used in salves or teas for cuts, burns, or skin infections.
    • Antibacterial/antiviral: Traditionally used for bacterial infections and to support the body during illness. It works better in larger doses, maybe 3x what you would normally use of dried herbs.
    • Venomous Bites: Stops the venom from snake or spider bites and helps the body heal.
    a bee sleeping on top an echinacea flower

    How Is It Taken?


    Echinacea is often taken as a tea, tincture, or capsule. Some folks also use it topically (like in a salve or poultice). Most herbalists recommend using it at the first sign of illness—not as a long-term supplement. That’s because it works best to ‘kick-start’ your immune system when it’s under attack. Long-term use might reduce its effectiveness and may even overstimulate your immune system if taken constantly Think of it like a herbal first responder: ready when needed, but not meant to be on duty 24/7.

    A Few Notes to Keep in Mind

    • Not recommended for people with autoimmune disorders unless you’ve done your research or talked to an herbalist. Echinacea stimulates the immune system which might not be something you want to do in this instance.
    • Some people may be allergic—especially if they’re sensitive to plants in the daisy family.
    • Pregnant or nursing? Best to double-check safety guidelines before using it. Though it is generally considered safe, doing your own research to see if something is right for you is always a good idea.
    a single purple coneflower head with drooping purple petals and a bristly brown and orange center

    Final Thoughts


    Echinacea isn’t magic. But it is a great example of how God designed plants with more than beauty in mind. I like knowing there are things growing in the world—and in some gardens—that can help strengthen the body instead of just masking symptoms. Even if I’m not using echinacea all the time, it’s one of those herbs I like having on hand. Kind of like that friend who shows up with chicken soup when you’re sick—only this one grows from seed and doesn’t need a nap afterward.

  • Digging For Yukon Gold

    Digging For Yukon Gold

    When you aim for a gold rush but come up with a souvenir nugget.

    Now, before you go scrambling to find your pickaxe and gold pan, the elusive nuggets I’ll be talking about here are potatoes.

    a basket of Yukon Gold potatoes

    This year, we tried a new method of growing potatoes. Well, new to us. We had seen multiple places on YouTube and other places where people used this idea with seemingly great results. So, since our family can go through 5 pounds of potatoes in one meal, we decided to give it a go.

    Step 1: buy seed potatoes.


    It seemed easy enough. We got Yukon Gold, as those are Tim’s favorite. Not that I have a problem with them, but with living in Idaho as a teenager, I had gotten used to Idaho® Russets and never really branched out much.

    Step 2: get a barrel.


    We found what looked to be the perfect barrel. It was sturdy, bright blue plastic, with a wide mouth, a drainage hole, and it could hold 50 gallons. Sounded like a great size for an epic potato harvest.

    Step 3: plant seed pieces.


    We cut the potatoes in pieces with healthy eyes on them and buried them waaaay at the bottom of the barrel.

    Step 4: wait.


    The waiting was probably easier than it might of been with everything else we had going on this spring, but that didn’t dampen the excitement when we saw the first green shoots sticking up through the dirt.

    Now, up to this point, we had done close to everything right. But, unfortunately for us and our potato harvest, there were a lot of things we didn’t know.

    • Yukon Golds are determinate potatoes. They only produce one round of potatoes and won’t produce more if you keep hilling them higher.
    • Potatoes need lots of drainage to keep the moisture from getting too high and rotting the potatoes. Apparently the one drainage hole wasn’t enough to handle all the rain we got this spring and early summer.
    • Potatoes need light fluffy soil and all we have here is clay and more clay.
    • Mixing half-composted wood shavings into the dirt to break up the clay isn’t a good idea, as it leaches the nitrogen from the soil.
    • There’s probably more that we just don’t realize we don’t know.

    To make matters worse, now that it’s all said and done, the potatoes grew beautifully.

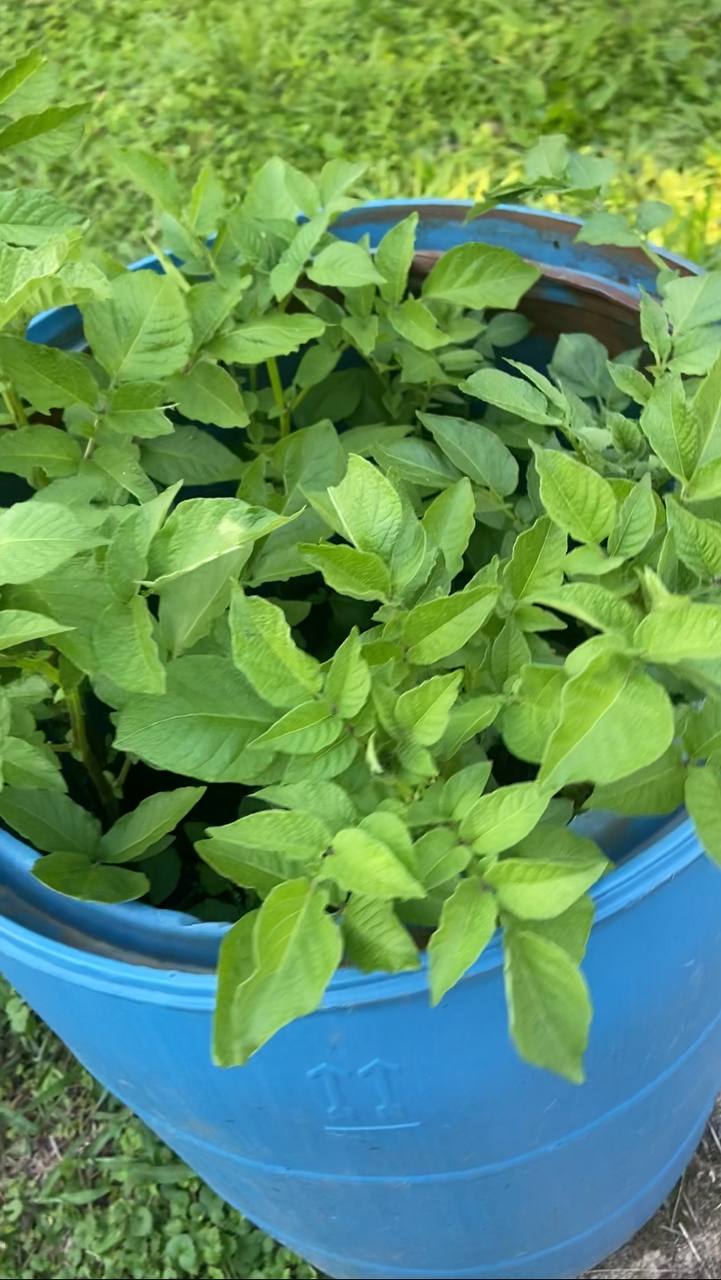
    Blue barrel with bright green potato stems coming out.

    This was how they looked when the barrel was about half full. We thought for sure they were doing great.

    potato flowers and ladybug larvae

    The flowers came on nicely and we even had several ladybug larvae to keep the aphids off.

    dying potato stems in blue barrel

    They look sad here, but this was not too long before we dumped the barrel. Harvest is supposed to wait until the stems have all died so we were excited to see what they had done.

    How much did we harvest, you may ask? One potato. One little round nugget slightly bigger than a golf ball. And a snail shell. Kaitlynn found a perfect snail shell almost as big as the potato. Oh, and one enormous nightcrawler. At least something liked the moisture. 🙂

    If only they had the decency to shrivel up right at the beginning, so we could have known something was wrong right off. Instead, they stayed green and healthy-looking the whole time while producing nothing.

    But, in all actuality, I think learning the lesson of how not to grow potatoes will stick with us longer this way. So, you win some, you lose some, but what counts is that you learn some and keep going.

  • No Thyme For Bugs?

    No Thyme For Bugs?

    If there is one thing about warm weather that I dislike and makes me start itching for the cold, it’s mosquitoes. With a pond nearby, a stream on the property, and a wetland down the road, we can get more mosquitoes than you can shake a stick at. Or your hand.

    After our flood earlier this year, we had clouds of biting pests so thick that someone actually put their vehicle into the ditch trying to swat them out of their face.

    Needless to say, bug repellent became a top priority. No one enjoyed being a buffet for bugs while feeding the dog or working in the garden or checking the mail.

    So I did what I do. I started researching and experimenting. I found the essential oils that are supposed to repel mosquitoes and went to work. I diluted them with carrier oils and water and added some vanilla to emulsify them or help them all mix together. Then we sprayed it on and ventured into the fray. 

    A vicious fight ensued in which we came out the losers. Maybe even sore losers. We retreated indoors to apply lavender to our wounds and discuss strategies.

    Now, if there’s one thing I’m good at, it’s coming up with ideas. I don’t guarantee them all as good ideas, but they are ideas, nonetheless. So, a few days later, after the itching calmed down some, I tried again. 

    This time I took three of the essential oils most known for repelling mosquitoes, mixed them with non-scented lotion, and applied the concoction liberally. The kids and I noticed a definite difference. We could now boldly leave the house and work outside while the mosquitoes kept a respectful distance of 6 inches or so. This blissful triumph lasted about 15 minutes. Once the lotion was all absorbed, we were right back to square 1. 

    So far, it was Mosquitoes 2; Rachel 0.

    Then, to add insult to insect injury, Tim noticed a definite difference, too. Everywhere he used the anti-bug lotion, he had broken out in a rash. Apparently, he can’t handle essential oils on his skin unless they are extremely diluted. This brought the score to a lovely Mosquitoes 2; Rachel -1.

    That put an effective stop to my experiments with bug repellent for a while. And thankfully, the majority of the flying hordes moved off or disappeared, making life much more manageable. 

    But then, Tim started taking walks almost every morning and night. He’s been given permission to even do some off-road exploring in the wetland, which opened up a slew of new opportunities for him and his camera. This brought insect repellent right back to the forefront though, since he and sometimes the kids were tramping through brush and weeds. So something had to be done for the bugs. 

    I tiptoed back to my research, unsure if I could find anything that would help without causing side effects. Finally, I found a recipe that looked promising. It called for beef tallow as the main part of the base since that stays on the skin longer than lotion or water. It also didn’t rely on just essential oils for its potency.

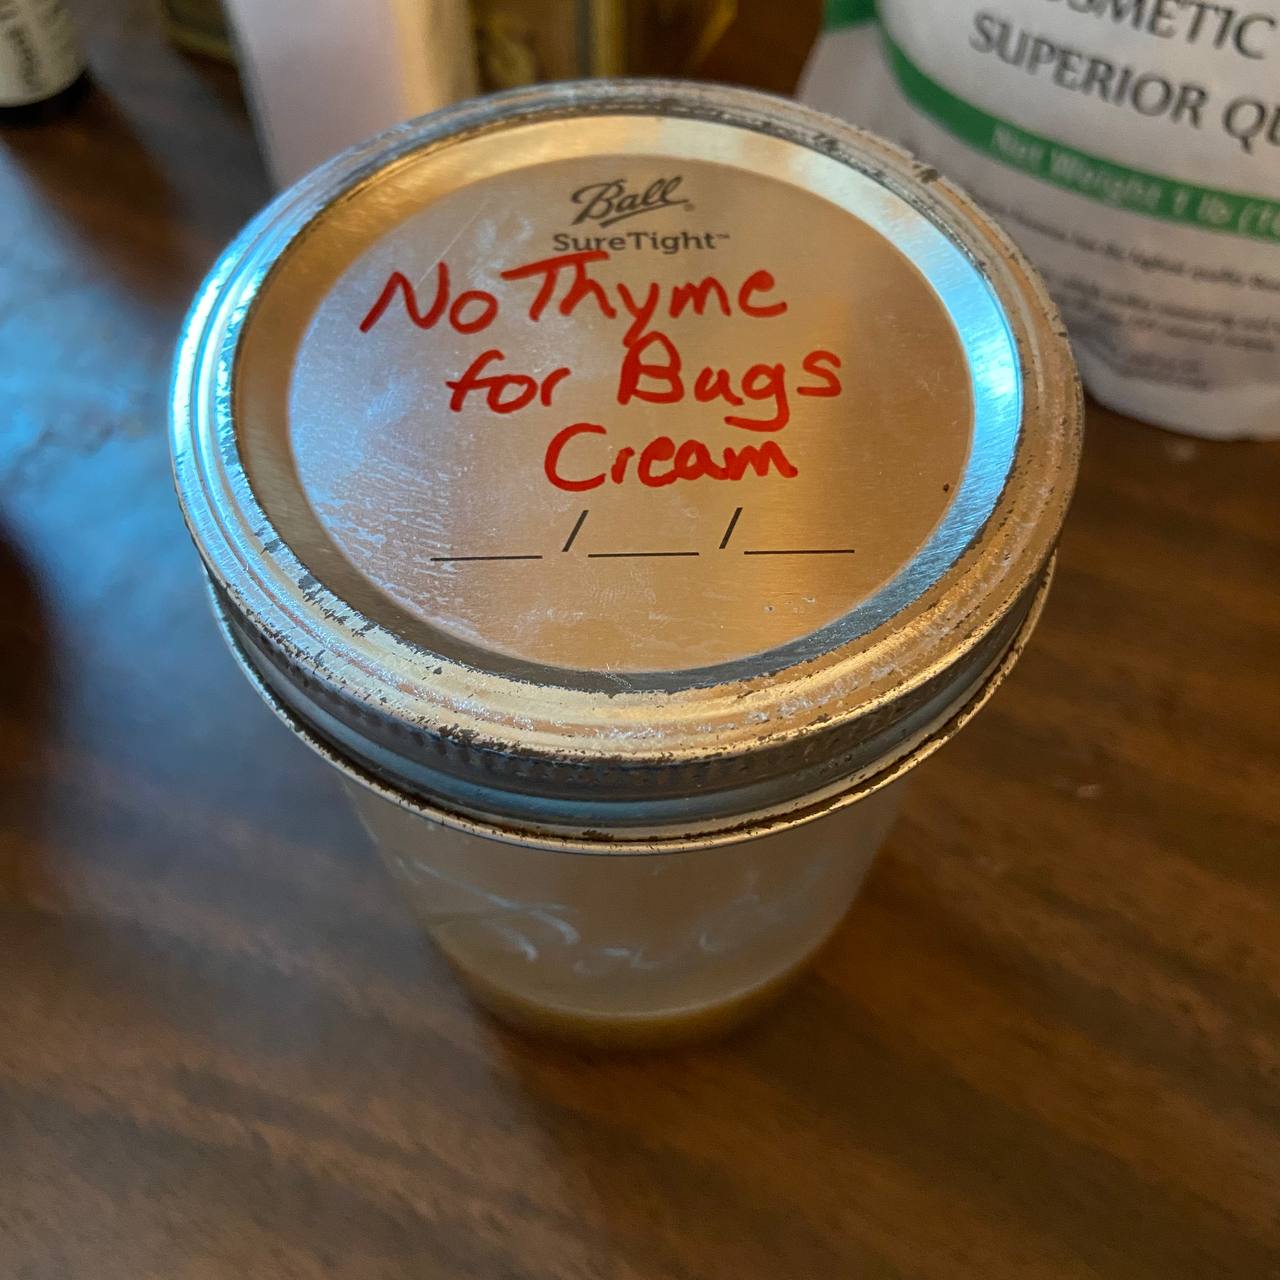
    No Thyme For Bugs Cream


    2 T Tallow

    1 t Beeswax

    1 T Vinegar (White or ACV)

    1 T Thyme Tea*

    10-15 Drops Lavender Essential Oil

    1/4 t Ground Clove

    Melt the tallow and beeswax in a double boiler or heat-safe bowl over simmering water. Once it is all melted, remove from heat and let cool 2-3 minutes.

    Stir in remaining ingredients and pour into a jar or sealable container. 

    Shelf life at room temperature should be 6-9 months.

    *To make the thyme tea, put 1 t of dried thyme in 1 c of boiling water, and let steep at least 5 minutes. The longer it steeps, the more potent the tea.


    Now, I know I said Tim cannot have essential oils on his skin, but that does not apply to lavender, which is how it made it into this recipe. If you know you’re sensitive to oils, feel free to test this on just a small patch of skin to see if it’s safe for you.

    I’m sure there will be more posts in the future about the efficacy of this anti-bug cream and any tweaks I make. But, I’d love to hear what worked for you and, as always, thanks for stopping by.

  • Homemade Beard Balm

    Homemade Beard Balm

    Tim has had a beard for over five years now, and it has been a surprising learning curve — for both of us. Apparently, the right way to grow a beard is not to simply quit shaving and hope for the best. It seems there are techniques and right and wrong ways to do it. Who knew growing hair could be complicated? 🙂

    For a while, he would just trim off all the tangly bits and edges and move on. But then disaster struck, the clippers clipped too much, and the whole thing had to be trimmed nearly off.

    To avoid ever doing that again, improve the overall health of his beard, and not need to worry with trimming, Tim started looking into different beard care products. But just take a wild guess how much that adds up to be in expenses over time! And the ingredients couldn’t always be vouched for either.

    So, since we were already moving away from buying things so much, beard balm joined the growing list of “Things To Make Ourselves”. Thankfully, finding a recipe wasn’t difficult and neither was mixing it up.

    Obviously, there are many recipes for beard balm. Probably as many recipes as there are men with beards, but anyway. This one uses what I had on hand, and according to Tim, works great.

    Homemade Beard Balm


    Ingredients


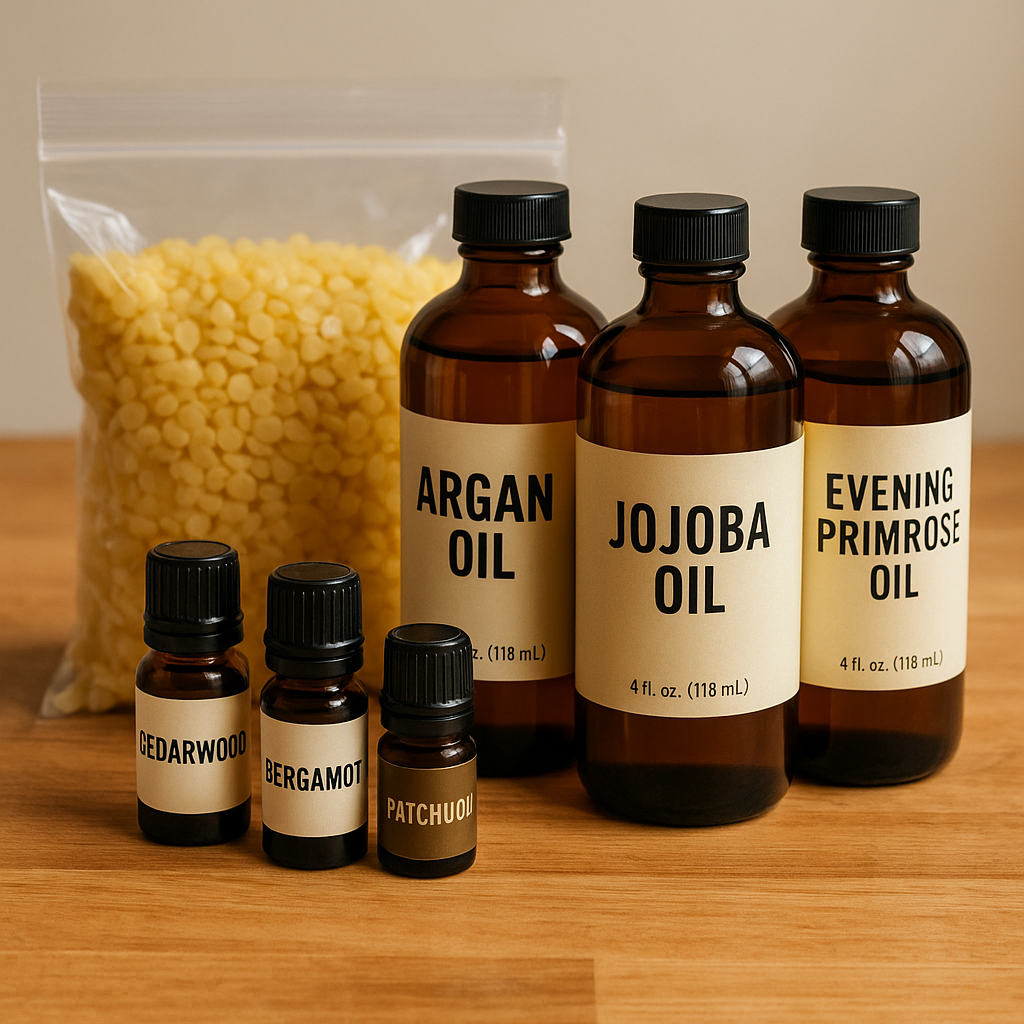
    1 Tablespoon Beeswax Pellets (Firmness and Hold)

    1 Tablespoon Jojoba Oil (Lightweight and Hydration)

    1 Tablespoon Argan Oil (Deep Conditioning)

    1 Tablespoon Evening Primrose Oil (Soothing and Anti-Inflammatory)

    Essential Oils (Optional, Your Choice, 10-12 Drops)


    4 Drops Cedarwood

    4 Drops Patchouli

    2-4 Drops Bergamot

    Instructions


    Melt the beeswax and carrier oils in a double boiler or a heat-safe bowl or jar over simmering water.

    Stir gently until everything is fully liquid.

    Remove from heat and let cool 2-3 minutes so it won’t scorch the essential oils.

    Add the essential oils of your choice and stir thoroughly.

    Pour into a 2 oz tin or small jar and let it harden uncovered. Then cover and store.

    This balm might not harden as much as some you might be used to as it does not have shea butter in it. If you would like it more firm, remelt, but only just as to not damage the essential oils, and add a little more beeswax.

    Also, be sure to buy only high-quality organic oils from sources you trust. According to my research, food-grade beeswax and carrier oils is best, and therapeutic-grade essential oils. I got my beeswax and carrier oils on Amazon, and I will do my best to add links as soon as possible. But, obviously, do your own research and make your own educated choices.

    While helping make this, a worried Micah handed me the Evening Primrose oil and half whispered, “Daddy can’t use this. Men can’t smell like roses.”

  • Family of Tortilla Fans

    Family of Tortilla Fans

    Tortillas, Anyone?

    I don’t know about you and yours, but in this house, we like tortillas. And I mean like tortillas.

    If I want kids jumping up and down while screeching in delight, all I have to do is casually mention that we’ll need tortillas made for supper. Whether it’s tacos, fajitas, enchiladas, or burritos, those tortillas are always a big hit.

    In fact, with how much Tim and the kids (and I) love tortilla-based meals, you’d think he had Spanish roots instead of Italian.


    We started out always buying our tortillas, because making them seemed too daunting. While we really enjoyed fresh tortillas when we went out for Mexican food, it made my eyes cross and my brain itch to even think about making them.

    Then, health problems started pushing us to switch from buying everything to trying to make more food from scratch—especially things like bread and tortillas.

    Bread felt like the easier place to start, but one can only go so long without tacos or fajitas. Right?

    So I went hunting and digging and found a tortilla recipe that I decided I’d try. I gathered the ingredients—and my courage—and dove in.

    While the recipe wasn’t difficult, I worried the whole time that it wouldn’t work. And talk about time-consuming!

    Mixing the dough was easy; separating it into portions was trickier. Letting them sit, covered, for an hour or so was simple, but I stressed about them the whole time.

    The hardest part by far was rolling them out and frying them up. That first batch took over an hour—maybe two—before they were even ready to eat!


    Were they worth the hassle?
    Yes, definitely.

    One thing I struggle with is the temptation to balk at trying anything new. And for whatever reason, tortillas just seemed like one of those things.

    Now? Tortillas feel like one of the easiest things to make. Funny how it works like that, isn’t it?

    Except… I hardly ever have to make them anymore.


    Alayna, our oldest daughter, has done her best to establish herself as the “bread-maker” of the family. Whether it’s sandwich bread, hamburger buns, or tortillas, she practically begs to be the one to make them.

    She’s pretty pleased with herself for being able to make tortillas from memory now—and I’d say that’s not bad at all for an 8-year-old!

    I still do all the rolling myself. Micah and Alayna have both tried, but between not enough height and not enough upper arm strength, it just works better if I handle that part for now.

    They do, however, claim the job of frying the tortillas—and they do a pretty good job of turning out lightly browned deliciousness every time.


    What happens to leftover tortillas, you ask?
    Well, they rarely get left. But when they do, one of two things happens:

    Either the kids decide they want a snack and clamor to eat them plain, or Tim gleefully makes himself a cheesy quesadilla.

    Either way, tortillas around here have a short life—but one joyfully dedicated to making our family happy and full.

    Our Go-To Tortilla Recipe

    I don’t remember where I found this recipe, but it’s become a staple in our home. One batch never cuts it for us, but it’s a great place to start!

    Ingredients:

    • 3 cups flour
    • 1 teaspoon salt
    • 1 teaspoon baking powder
    • 1 cup warm water
    • 1/3 cup lard (or oil or butter)

    Instructions:

    1. Mix the dry ingredients in the bowl of a stand mixer or by hand.
    2. Add the water and lard, and mix until well combined.
    3. Knead (in the mixer or by hand) for at least 5–7 minutes—longer kneading makes better tortillas.
    4. Divide dough into 8 equal pieces. Flatten slightly on a lightly floured surface.
    5. Cover and let rest at least 15 minutes or up to 2 hours.
    6. Roll out each piece on a floured surface.
    7. Fry in a dry skillet on medium to medium-high heat until bubbles form and the underside has golden-brown spots. Flip and cook the second side (it takes less time than the first—usually about 30 seconds).
    8. Keep warm in a low oven (we use the “Warm” setting) on a cookie sheet until ready to eat.