Category: Uncategorized

  • Best Buttermilk Biscuits

    Best Buttermilk Biscuits

    Hello again!

    Around here, we usually keep breakfasts pretty simple. Bacon and eggs, eggs and bacon, that sort of thing. Sometimes, for variety, we add cottage cheese, veggies, or fruit to the menu.

    And then, other times, we feel like splurging a bit. Usually in those cases, our minds (Tim’s for sure!) turn to biscuits.

    Finding the perfect recipe was a bit of a journey. Especially since we started with store-bought biscuits out of a can. I still shudder sometimes to think of it.

    This recipe is not original to me. I found it online at bakerbettie.com

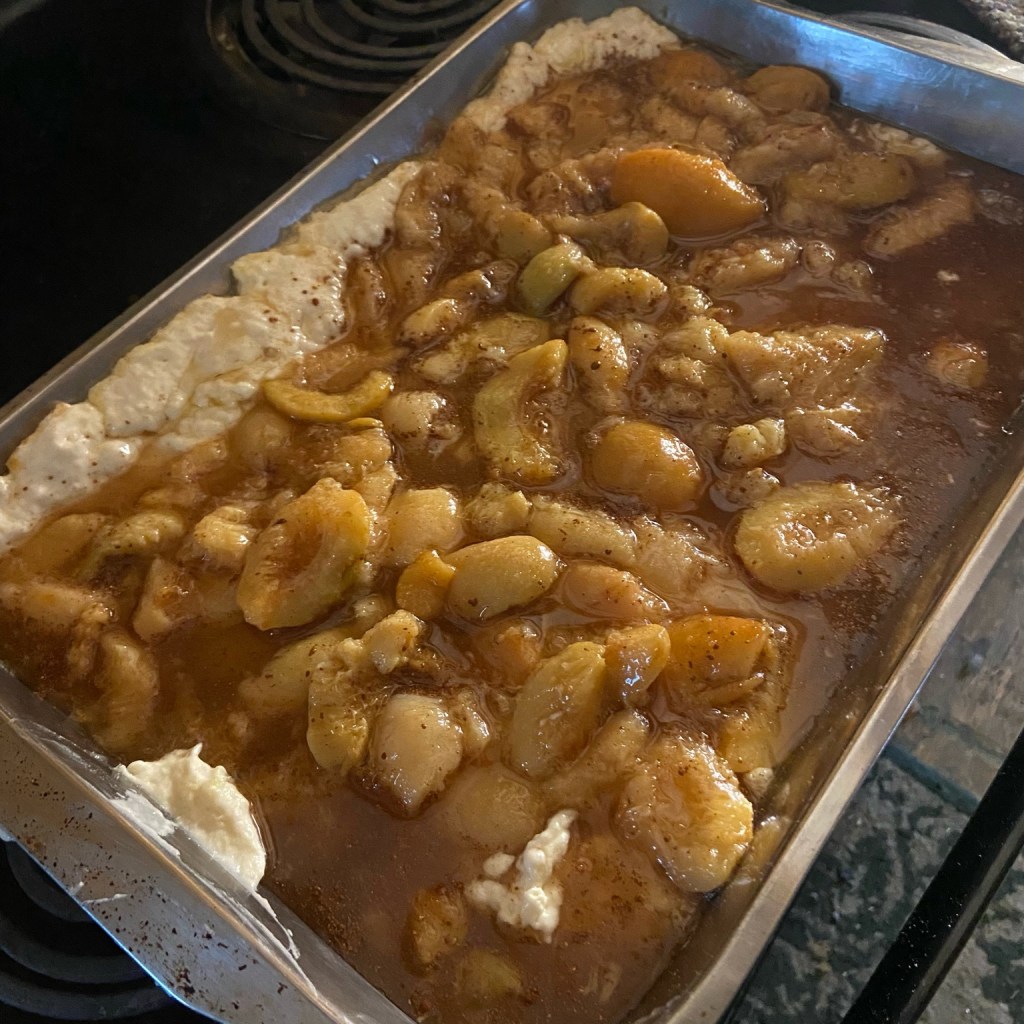
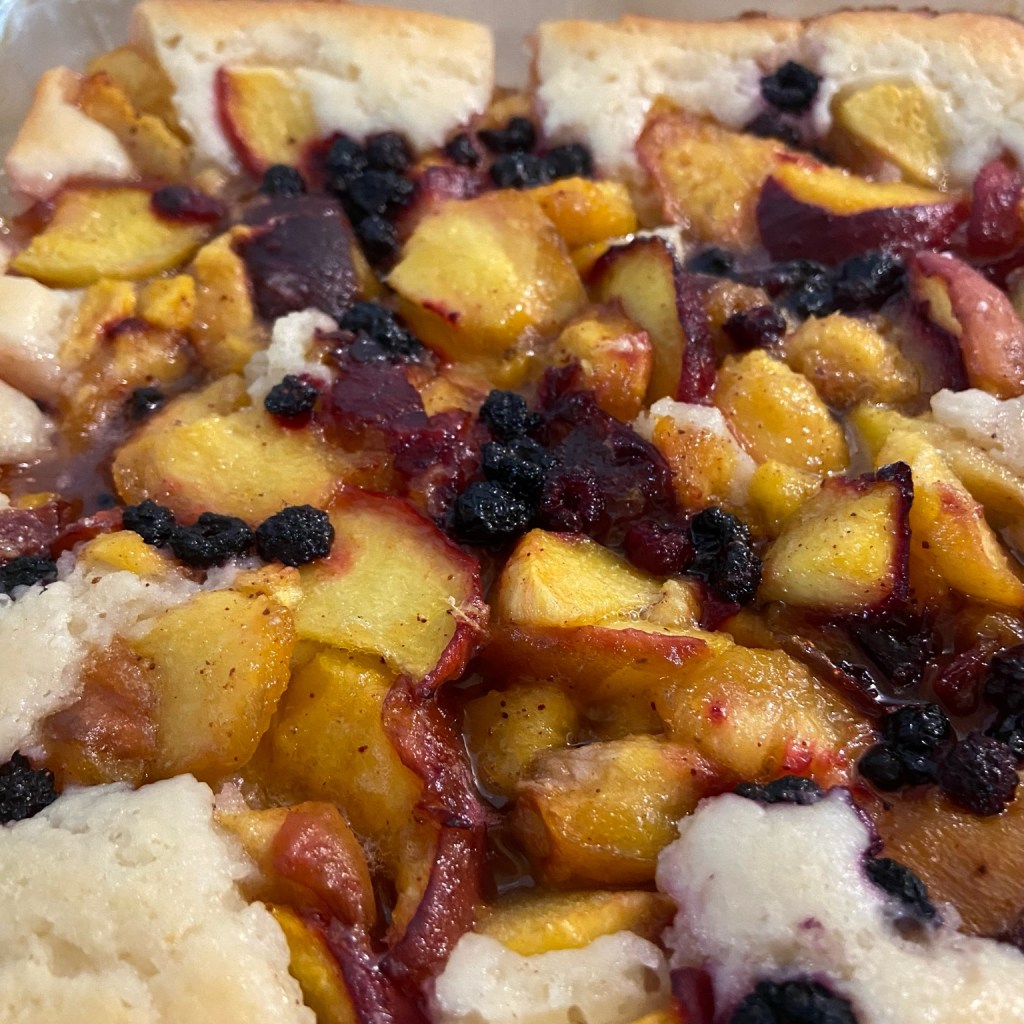
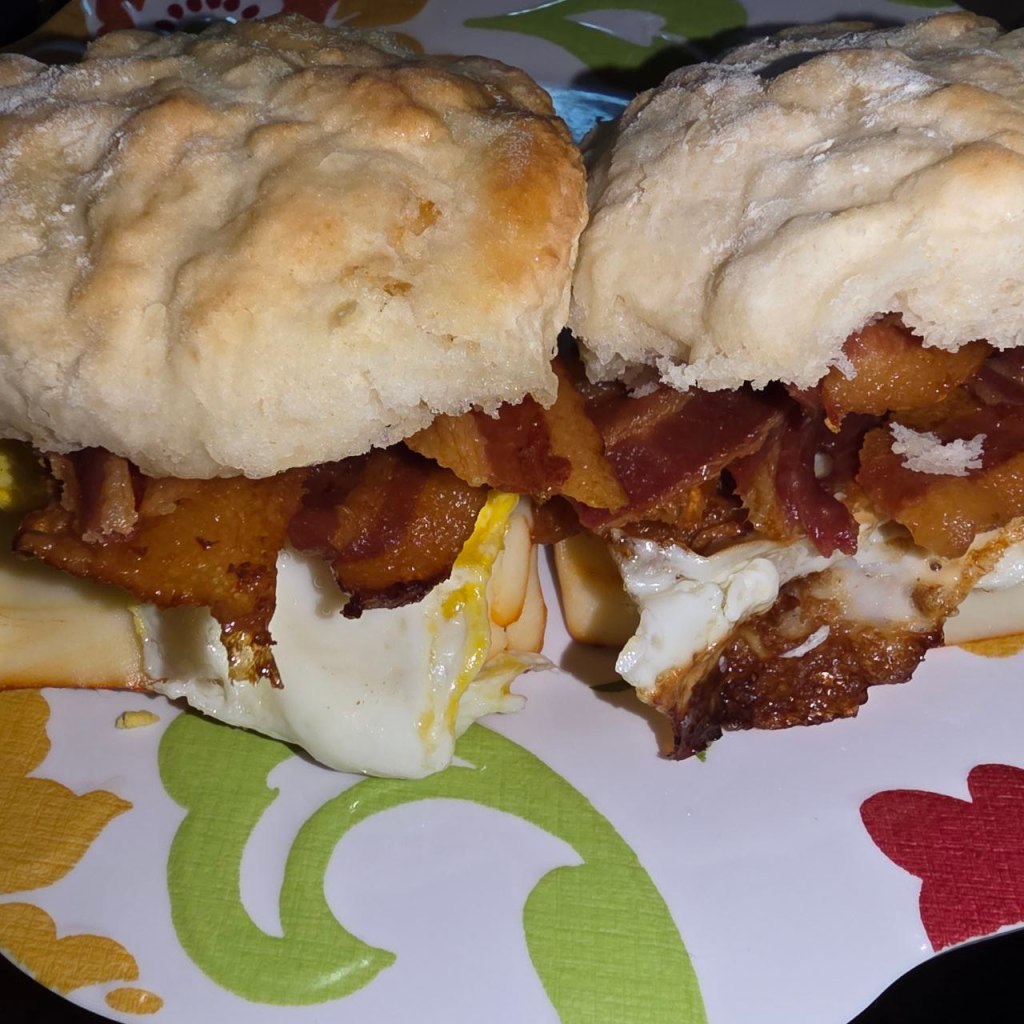
    The enjoyment we get from eating these flaky rounds of yummyness is ours, though. They are amazing with butter and honey or jam, with Tim’s delicious sausage gravy, or as breakfast sandwiches. Or even reheated with a little butter.

    biscuit bacon egg and cheese sandwiches

    OLD FASHIONED LARD BISCUITS


    Ingredients

    • 2 c Flour
    • 1 T Baking Powder
    • 1/4 t Baking Soda
    • 1 1/4 t Salt
    • 6 T Leaf Lard, cold *
    • 1 c Buttermilk, cold

    Instructions

    Preheat oven to 450 degrees and make sure an oven rack is in the center of the oven.

    Grease a cake pan or cookie sheet or line with parchment paper or a silicone baking mat, if desired. I never grease my pan for biscuits and they seldom stick more than a little bit. If you use a cookie sheet, make sure it has a rim to keep any melted lard from running off.

    Keep lard and buttermilk in the refrigerator until needed.

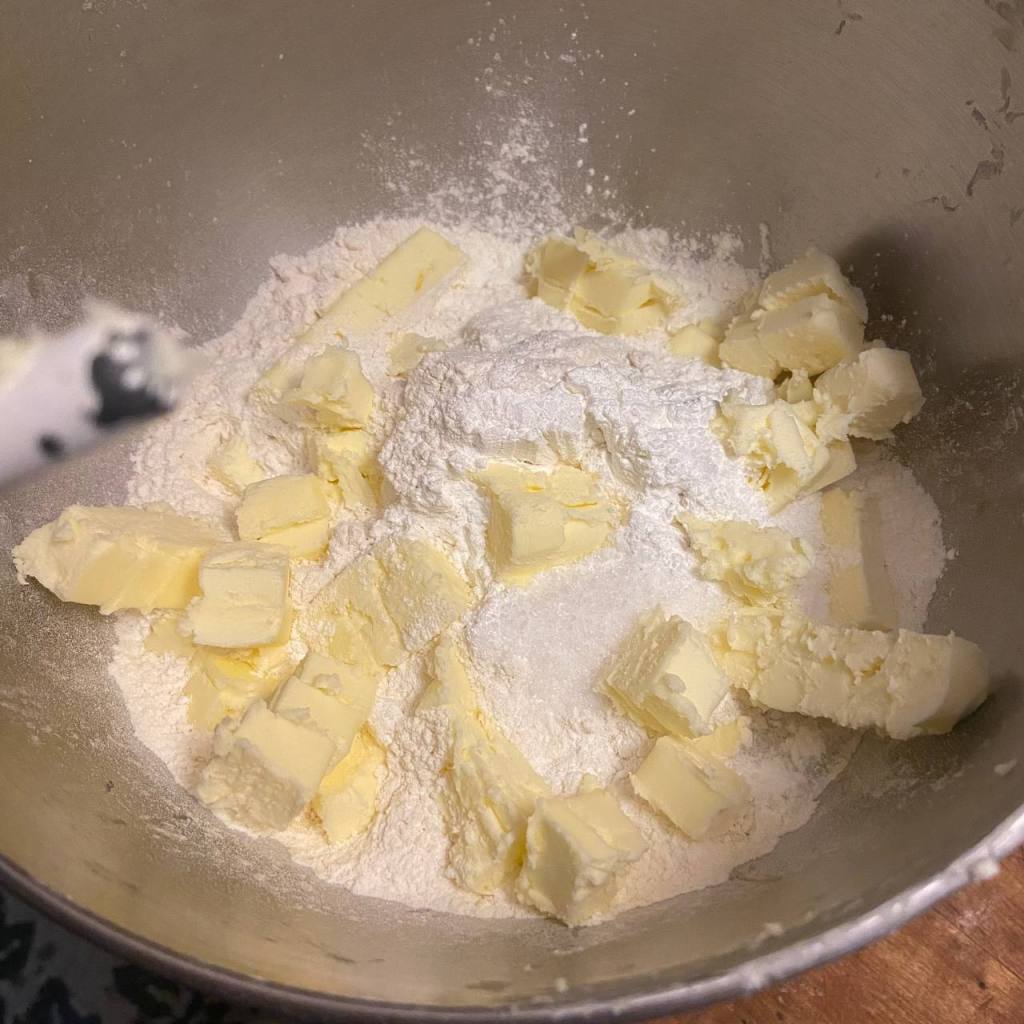
    In a large mixing bowl, combine the dry ingredients and whisk. *

    flour mixture in a mixer bowl

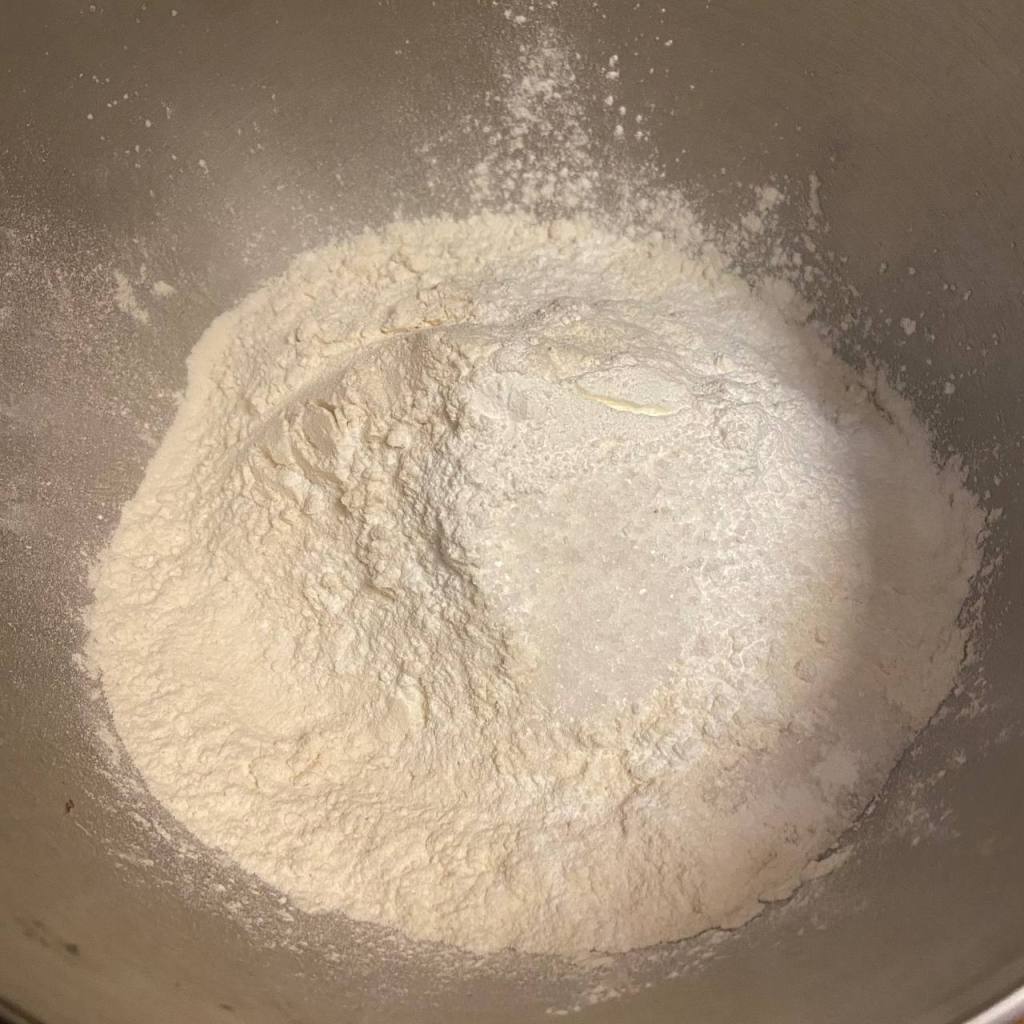
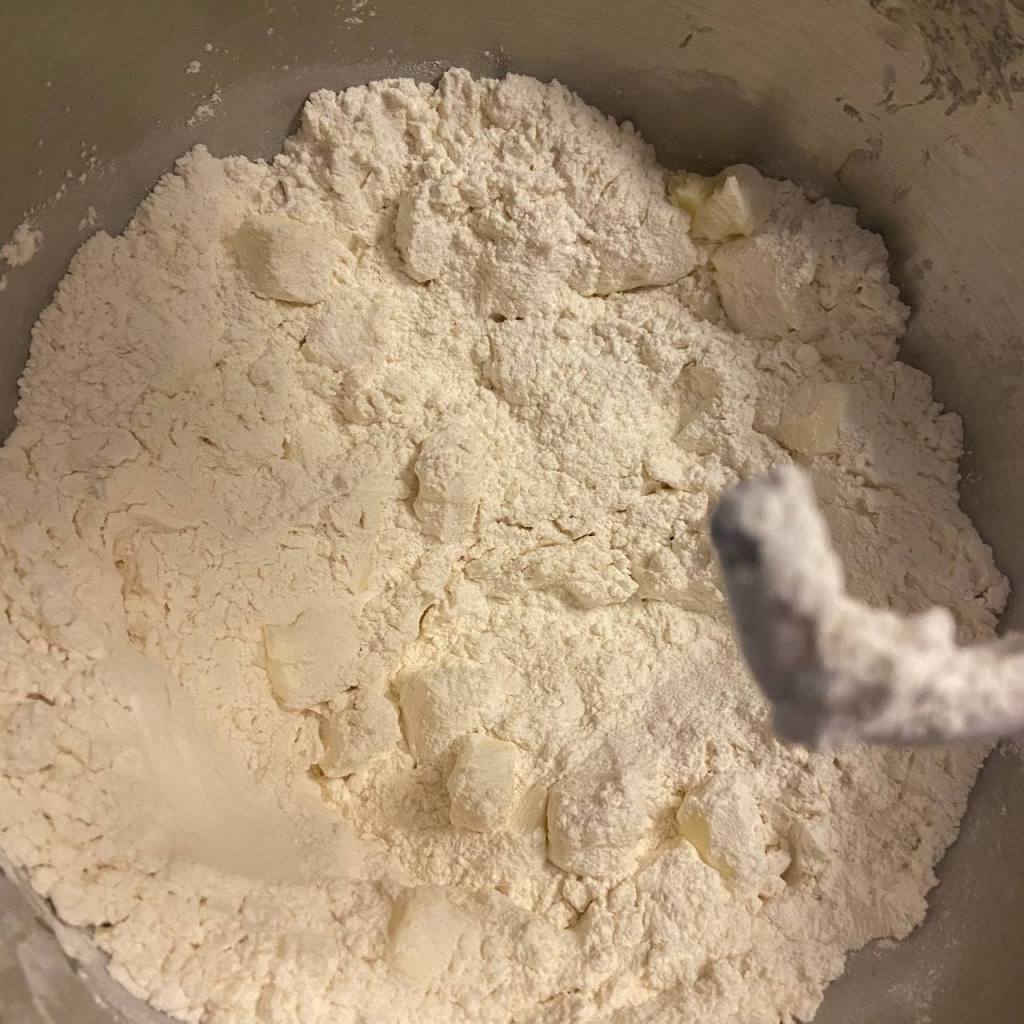
    Add in the cold lard and cut into the flour mixture using a pastry blender or fork. You want the lard to be mostly in pea-sized pieces with a few larger.

    pieces of butter in flour mixture in a mixer bowl
    butter pieces in flour mixture

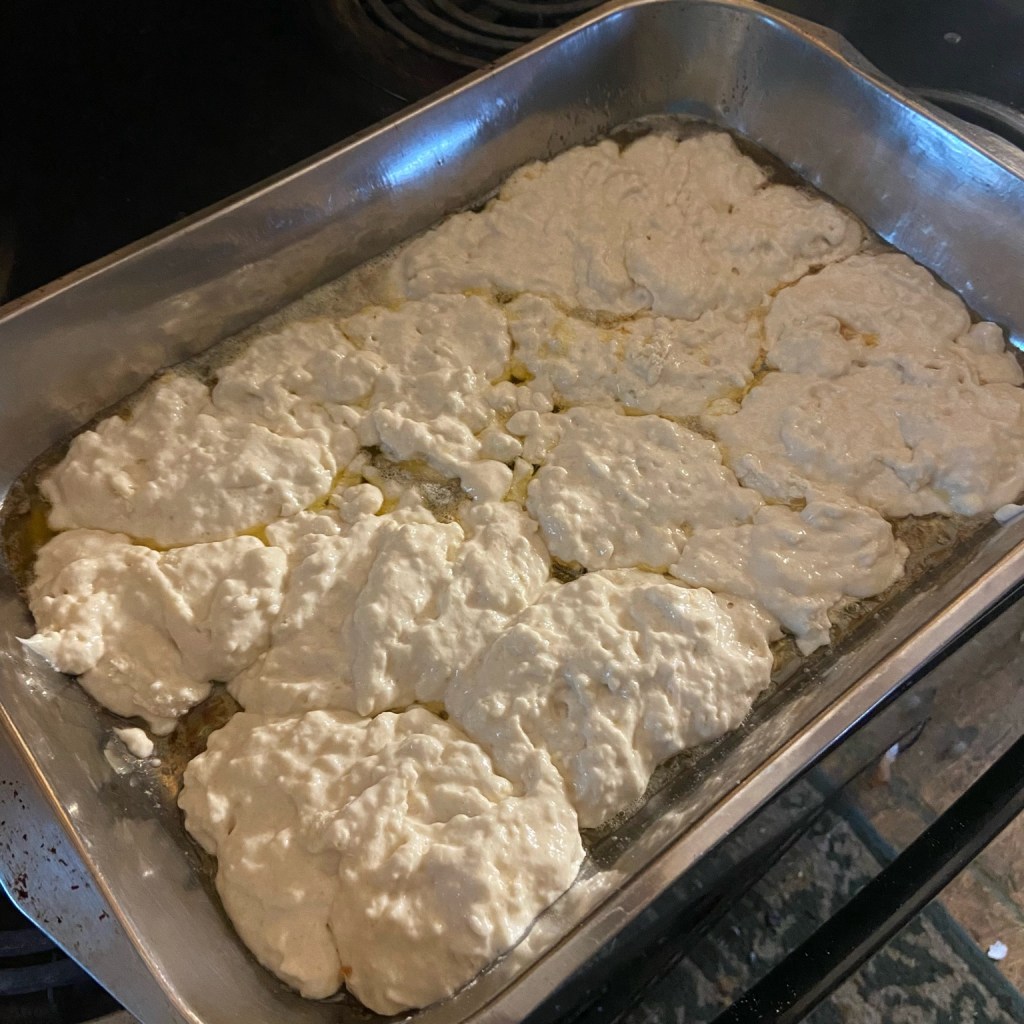
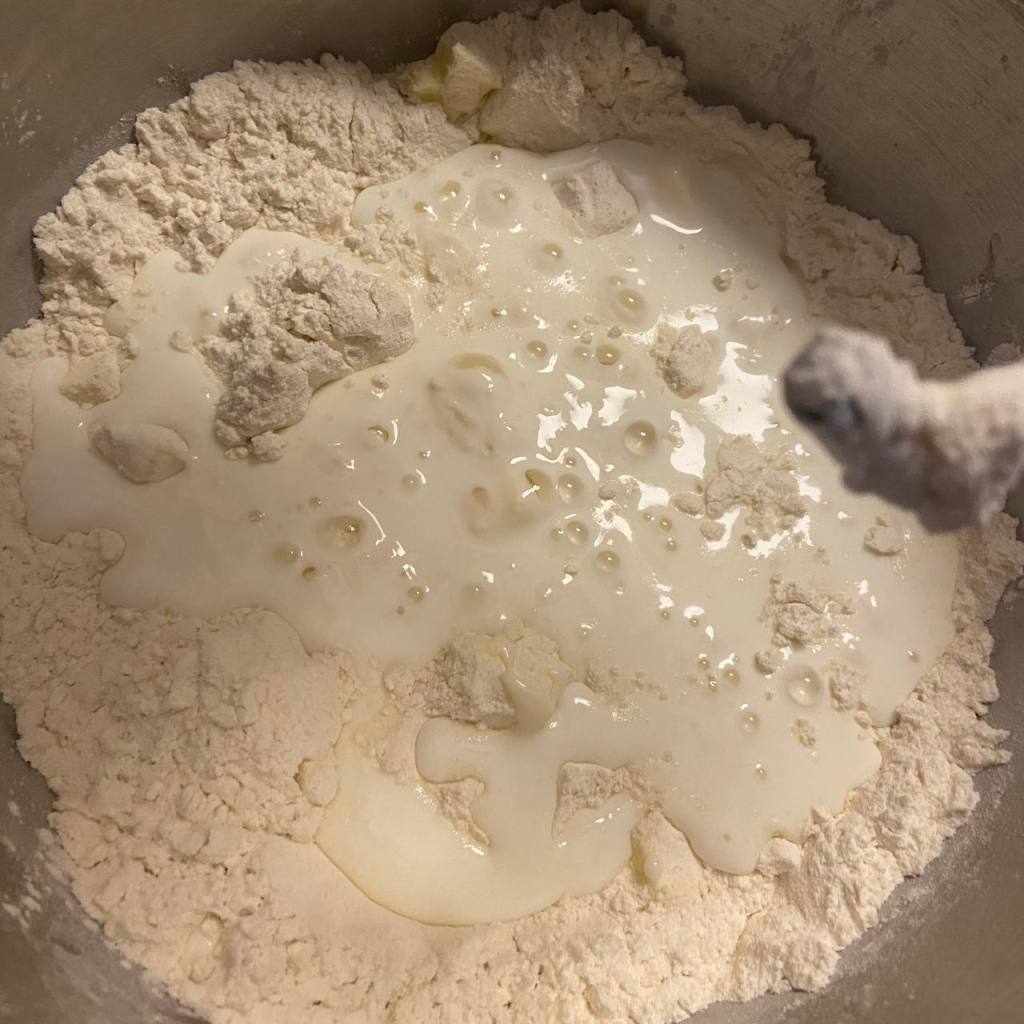
    Add the cold buttermilk and stir with a spoon or spatula until just combined. This will not take long and you don’t want to overmix as the biscuits will be tough. The batter/dough will be pretty wet and sticky.

    buttermilk in flour mixture

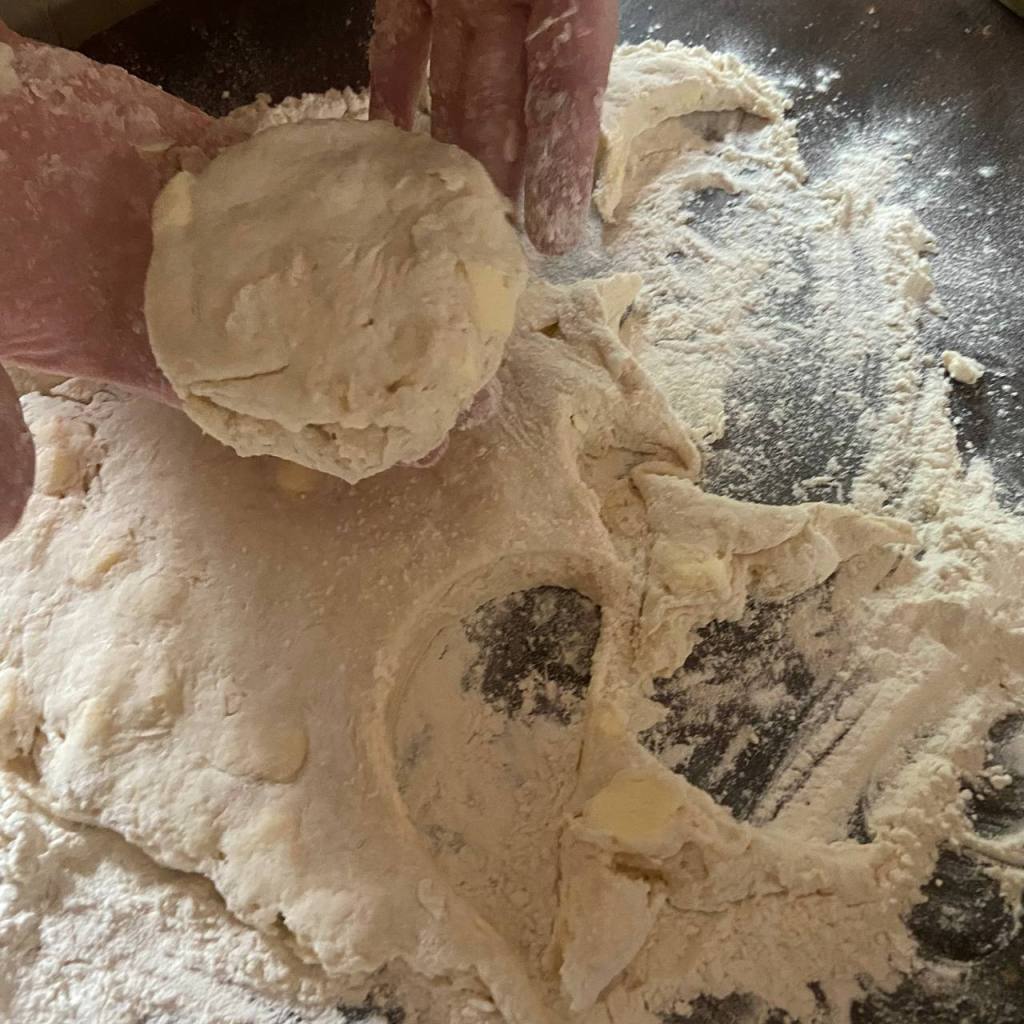
    Turn the mixture out onto a floured table or countertop. Dust flour over the top. With floured hands, bring the dough into one mass.

    flour on a table

    Pat the dough out and then fold in half. Turn 90 degrees and pat out again. Repeat this 5-6 times. The folds help the biscuits end up flakier.

    patting out biscuit dough

    Press the layered dough out until it’s about an inch thick and use a round cutter that has been dipped in flour to cut the biscuits. Press straight down with the cutter and do not twist. Pat the scraps back together and cut again. Or you can pat the dough into a rectangle and use a sharp knife to divide into 8 biscuits.

    a cut biscuit round
    cutting out biscuits

    Place the biscuits in the prepared pan, making sure the edges are touching to help the biscuits rise.

    unbaked biscuits on a cookie sheet

    Bake for 13-15 minutes until golden brown. Do not open the door for at least the first half of the bake time. Keeping the steam trapped inside the oven helps with the rise.

    golden brown biscuits on a cookie sheet

    Let cool, if possible, and then enjoy however you choose.

    Notes

    * I have substituted butter, tallow, and bacon grease for the lard with no problems. You just want it cold when it goes in.

    *I make mine in my stand mixer and it works just great. Just don’t overmix.

  • A Look At Nature

    A Look At Nature

    With the idea of doing things a bit differently this time, I thought I’d showcase some of the pictures Tim’s been getting with his new Canon R7. I’ll include links to the camera and lenses later, if anyone is interested.

    Affiliate disclosure: As an Amazon Associate, I earn from qualifying purchases. Links marked “#ad” below are affiliate links, which means I may earn a small commission—at no extra cost to you—if you purchase through them. Thank you!

    First of all, a bit of backstory. Tim has always been interested in photography. Photography in general, but especially nature shots. But with kids, wife, eBay business, building a house, and starting a homestead from the ground up (pun intended), he hasn’t had much time to explore other interests.

    Lately though, the eBay business, which is our income source, has been taking a slow dive from thriving to barely above surviving. We naturally started looking into other ideas, but very few felt like “us”. And when you’re running a business day in and day out, it really helps if it’s something you enjoy.

    Then, about three months ago, we started seriously looking into the idea of Tim starting a nature photography business and selling the pictures online. Prices for good quality gear seemed staggering, but we also felt, after a lot of prayer and research, that it was what we needed to do.

    So we started by jumping off the deep end. Or so it felt when we took out a business loan to buy the camera and lenses needed to get this venture off the ground. Tim and I both despise debt, but it was the only option in this case to take the next step God was leading us to.

    Well, Tim placed the orders and we waited. Then the big day came. The equipment all arrived safe and sound and Tim got down the work (fun?) of learning his new camera and lenses. We hadn’t had them very long before something thrilling happened. While I’m not at liberty to go into details, God worked a miracle and the business loan was paid off!

    Needless to say, Tim has been enjoying his new “job” very much. His morning and evening walks have now become photo sessions and he has managed to get some lovely shots, even just right down the gravel road from us.

    But enough backstory. Here’s some of his favorites.

    a pearl crescent butterfly sitting on a wet blade of grass
    A Pearl Crescent butterfly.
    a doe standing in a field of wildflowers
    A curious doe in front of a field of echinacea and other wildflowers.
    yellow rosinweed flowers on a black background
    Rosinweed flowers.

    These next three are bird shots that I think are particularly stunning. Tim didn’t remove the background or anything, that is just how the photo turned out.

    a yellow-breasted chat bird sitting on a bald cypress branch on a black background.
    A Yellow-Breasted Chat sitting on the branch of a Bald Cypress
    a male dickcissel bird sitting in a tree and singing with a black background
    A male Dickcissel singing in the top of a tree.
    male prothonotary warbler bird hiding in leaves
    Prothonotary Warbler bedding down for the night. This was a rare shot as these are shy birds and excell at hiding. Especially at night.

    I love how these sunset pictures turned out. I think if I had to pick a favorite, it would be the grass head.

    a vibrant sunset with silhouetted trees
    A stunning sunset!
    a fox-tail grass head with a rain drop on the tip silhouetted against a sunset
    I love how the drip of rain is just hanging on the tip of this fox-tail grass head.
    a moody orange sunset
    This sunset is so moody and beautiful.

    These next four shots were a blast for Tim to get, as I’m sure you can imagine.

    a large dragonfly in flight towards the tip of a twig
    Talk aout incredible timing!
    a widow skimmer dragonfly perched on the tip of a twig
    Tim has this picture named “Stick Shift”. lol
    a large dragonfly about to land on a twig
    Look how clearly the details on this Widow Skimmer show up, even in flight!
    I can’t get over how well these turned out!

    There’s your glimpse into what’s been putting a smile on Tim’s face lately. Or at least one of the things. And while nothing has taken off, we’re trusting in God’s timing; He does all things well.

    Now, for anyone interested in what gear Tim used to get these photos, here’s a list of links to the camera and different lenses.

    To see products with these and/or other photos, check out Tim’s Etsy store at TimsNatureCorner – Etsy

    You can also follow him on Facebook at Facebook for more pictures and the stories behind some of the shots.

  • The Delights of Echinacea

    The Delights of Echinacea

    purple coneflowers or echinacea growing next to bright yellow flowers

    You’ve probably seen echinacea purpurea before—even if you didn’t realize it. With its drooping purple petals and bristly orange center, it looks like a daisy that tried hairspray. But don’t let the frilly look fool you—this plant has earned its place in herbal medicine cabinets for centuries. And like a lot of herbs, the more I learn about it, the more I find myself marveling at how God packed so much usefulness into a wildflower.

    I’ve been looking into echinacea more lately—what it does, how it works, and why people use it—and I thought I’d share some of what I found in case you’re curious too.

    What Is Echinacea Purpurea?


    Echinacea is a native North American plant, often called “purple coneflower.” The purpurea species is the one most commonly used for medicinal purposes, though there are a few other types as well. It’s been used traditionally by Indigenous peoples and adopted into folk remedies for everything from infections to snake bites.

    echinacea flowers, also known as purple coneflowers, growing in a field

    What Is It Used For?


    The most common reason people reach for echinacea is to support the immune system—especially when cold or flu season hits. But its uses go way further than that. Here’s a quick list of what echinacea is said to help with:

    • Immune support: May shorten the duration and lessen the severity of colds.
    • Anti-inflammatory: Can reduce swelling and irritation, helpful for sore throats or skin issues.
    • Wound healing: Used in salves or teas for cuts, burns, or skin infections.
    • Antibacterial/antiviral: Traditionally used for bacterial infections and to support the body during illness. It works better in larger doses, maybe 3x what you would normally use of dried herbs.
    • Venomous Bites: Stops the venom from snake or spider bites and helps the body heal.
    a bee sleeping on top an echinacea flower

    How Is It Taken?


    Echinacea is often taken as a tea, tincture, or capsule. Some folks also use it topically (like in a salve or poultice). Most herbalists recommend using it at the first sign of illness—not as a long-term supplement. That’s because it works best to ‘kick-start’ your immune system when it’s under attack. Long-term use might reduce its effectiveness and may even overstimulate your immune system if taken constantly Think of it like a herbal first responder: ready when needed, but not meant to be on duty 24/7.

    A Few Notes to Keep in Mind

    • Not recommended for people with autoimmune disorders unless you’ve done your research or talked to an herbalist. Echinacea stimulates the immune system which might not be something you want to do in this instance.
    • Some people may be allergic—especially if they’re sensitive to plants in the daisy family.
    • Pregnant or nursing? Best to double-check safety guidelines before using it. Though it is generally considered safe, doing your own research to see if something is right for you is always a good idea.
    a single purple coneflower head with drooping purple petals and a bristly brown and orange center

    Final Thoughts


    Echinacea isn’t magic. But it is a great example of how God designed plants with more than beauty in mind. I like knowing there are things growing in the world—and in some gardens—that can help strengthen the body instead of just masking symptoms. Even if I’m not using echinacea all the time, it’s one of those herbs I like having on hand. Kind of like that friend who shows up with chicken soup when you’re sick—only this one grows from seed and doesn’t need a nap afterward.

  • The Right Road

    The Right Road

    a dirt road curving through the woods

    Let me tell you a story.

    A few years ago, our family took a road trip to from our home here in Indiana to Virgina. We visited a church camp there and had a wonderful time. But the story I want to tell you happened on the way home.

    Now, when this family takes a road trip, we do something different from probably most people. We go into our GPS settings and turn on the “Avoid Interstates” option. There is just something about getting off the main roads and taking the roads where less people are. Everyone enjoys it and it makes the whole trip more fun. You get to see things and places that most people don’t get to when they’re flying down the interstate.

    So that’s what we did on the way home from Virginia. Coming through West Virginia, we took the highway that runs through the New River Gorge. We had visited the bridge the previous year on our way to or from that church camp, so we changed things up. Decided to see some new scenery.

    waterfall on the New River
    a wide waterfall on the New River
    a view down the New River
    Micah and Alayna hiking back up the trail from the river

    After enjoying the beautiful waterfalls and views, we decided we’d better keep moving towards home. We loaded everyone back in the vehicle, a Suburban at that time, and kept following the GPS.

    Not too much later, the GPS told us to turn on to WV Highway 26. Ok, not a problem. Except the road didn’t stay a road for long. Soon, we were driving on a mountain path that consisted of more mountain than path. And the only thing high about it was how far up we had to climb.

    I took this picture before the road got super crazy. Before it was all said and done the “road” was dirt. At least, it was dirt between the rocks and tree roots. We were very thankful for a Suburban. Otherwise, I’m sure we would have ended up stranded with no cell phone service until the cows came home. And then some.

    I have to admit, I thought we must have taken the wrong turn. How on earth could this be the road we were supposed to be on? There must have been a mistake somewhere. Either I had misread the map, or the GPS must be wrong. There were no other options, right?

    Well, turning around wasn’t doable so we had to follow this crazy “highway” clear to the end, wherever that turned out to be. Finally, we came back down the mountain. Finally, the road turned back to gravel. And, finally, we came to the next road we needed to take.

    I still remember rolling my window down, twisting clear around, craning my neck, and finding the road sign to see just what road we had actually been on.

    It said, “Highway 26”.

    That whole time, we had been right where we needed to be. There was no mistake. I didn’t read the map wrong and the GPS didn’t give us the wrong directions. It was the right road.

    So why tell you this story? Well, life is like this sometimes. Sometimes, even when we try our best to follow God’s directions and make the right choices, we end up in places where we are positive we messed up somewhere.

    We find ourselves thinking, “There’s no way God meant for me to end up here. I must have blown it.” We tend to send ourselves into panic mode trying to figure out how we took the wrong turn, what we can do to “fix it”, and on and on.

    But someone said something in church Sunday that is so simple and still so true. The co-pastor was preaching and in his message, he made this statement, “Stop trying to figure out the path, and get to know the Guide”.

    That’s all it takes. The better we know Jesus, the better we can follow and trust His leadership. Even when the road looks like West Virginia Highway 26.

    screenshot of a map showing a curvy road
  • Digging For Yukon Gold

    Digging For Yukon Gold

    When you aim for a gold rush but come up with a souvenir nugget.

    Now, before you go scrambling to find your pickaxe and gold pan, the elusive nuggets I’ll be talking about here are potatoes.

    a basket of Yukon Gold potatoes

    This year, we tried a new method of growing potatoes. Well, new to us. We had seen multiple places on YouTube and other places where people used this idea with seemingly great results. So, since our family can go through 5 pounds of potatoes in one meal, we decided to give it a go.

    Step 1: buy seed potatoes.


    It seemed easy enough. We got Yukon Gold, as those are Tim’s favorite. Not that I have a problem with them, but with living in Idaho as a teenager, I had gotten used to Idaho® Russets and never really branched out much.

    Step 2: get a barrel.


    We found what looked to be the perfect barrel. It was sturdy, bright blue plastic, with a wide mouth, a drainage hole, and it could hold 50 gallons. Sounded like a great size for an epic potato harvest.

    Step 3: plant seed pieces.


    We cut the potatoes in pieces with healthy eyes on them and buried them waaaay at the bottom of the barrel.

    Step 4: wait.


    The waiting was probably easier than it might of been with everything else we had going on this spring, but that didn’t dampen the excitement when we saw the first green shoots sticking up through the dirt.

    Now, up to this point, we had done close to everything right. But, unfortunately for us and our potato harvest, there were a lot of things we didn’t know.

    • Yukon Golds are determinate potatoes. They only produce one round of potatoes and won’t produce more if you keep hilling them higher.
    • Potatoes need lots of drainage to keep the moisture from getting too high and rotting the potatoes. Apparently the one drainage hole wasn’t enough to handle all the rain we got this spring and early summer.
    • Potatoes need light fluffy soil and all we have here is clay and more clay.
    • Mixing half-composted wood shavings into the dirt to break up the clay isn’t a good idea, as it leaches the nitrogen from the soil.
    • There’s probably more that we just don’t realize we don’t know.

    To make matters worse, now that it’s all said and done, the potatoes grew beautifully.

    Blue barrel with bright green potato stems coming out.

    This was how they looked when the barrel was about half full. We thought for sure they were doing great.

    potato flowers and ladybug larvae

    The flowers came on nicely and we even had several ladybug larvae to keep the aphids off.

    dying potato stems in blue barrel

    They look sad here, but this was not too long before we dumped the barrel. Harvest is supposed to wait until the stems have all died so we were excited to see what they had done.

    How much did we harvest, you may ask? One potato. One little round nugget slightly bigger than a golf ball. And a snail shell. Kaitlynn found a perfect snail shell almost as big as the potato. Oh, and one enormous nightcrawler. At least something liked the moisture. 🙂

    If only they had the decency to shrivel up right at the beginning, so we could have known something was wrong right off. Instead, they stayed green and healthy-looking the whole time while producing nothing.

    But, in all actuality, I think learning the lesson of how not to grow potatoes will stick with us longer this way. So, you win some, you lose some, but what counts is that you learn some and keep going.

  • No Thyme For Bugs?

    No Thyme For Bugs?

    If there is one thing about warm weather that I dislike and makes me start itching for the cold, it’s mosquitoes. With a pond nearby, a stream on the property, and a wetland down the road, we can get more mosquitoes than you can shake a stick at. Or your hand.

    After our flood earlier this year, we had clouds of biting pests so thick that someone actually put their vehicle into the ditch trying to swat them out of their face.

    Needless to say, bug repellent became a top priority. No one enjoyed being a buffet for bugs while feeding the dog or working in the garden or checking the mail.

    So I did what I do. I started researching and experimenting. I found the essential oils that are supposed to repel mosquitoes and went to work. I diluted them with carrier oils and water and added some vanilla to emulsify them or help them all mix together. Then we sprayed it on and ventured into the fray. 

    A vicious fight ensued in which we came out the losers. Maybe even sore losers. We retreated indoors to apply lavender to our wounds and discuss strategies.

    Now, if there’s one thing I’m good at, it’s coming up with ideas. I don’t guarantee them all as good ideas, but they are ideas, nonetheless. So, a few days later, after the itching calmed down some, I tried again. 

    This time I took three of the essential oils most known for repelling mosquitoes, mixed them with non-scented lotion, and applied the concoction liberally. The kids and I noticed a definite difference. We could now boldly leave the house and work outside while the mosquitoes kept a respectful distance of 6 inches or so. This blissful triumph lasted about 15 minutes. Once the lotion was all absorbed, we were right back to square 1. 

    So far, it was Mosquitoes 2; Rachel 0.

    Then, to add insult to insect injury, Tim noticed a definite difference, too. Everywhere he used the anti-bug lotion, he had broken out in a rash. Apparently, he can’t handle essential oils on his skin unless they are extremely diluted. This brought the score to a lovely Mosquitoes 2; Rachel -1.

    That put an effective stop to my experiments with bug repellent for a while. And thankfully, the majority of the flying hordes moved off or disappeared, making life much more manageable. 

    But then, Tim started taking walks almost every morning and night. He’s been given permission to even do some off-road exploring in the wetland, which opened up a slew of new opportunities for him and his camera. This brought insect repellent right back to the forefront though, since he and sometimes the kids were tramping through brush and weeds. So something had to be done for the bugs. 

    I tiptoed back to my research, unsure if I could find anything that would help without causing side effects. Finally, I found a recipe that looked promising. It called for beef tallow as the main part of the base since that stays on the skin longer than lotion or water. It also didn’t rely on just essential oils for its potency.

    No Thyme For Bugs Cream


    2 T Tallow

    1 t Beeswax

    1 T Vinegar (White or ACV)

    1 T Thyme Tea*

    10-15 Drops Lavender Essential Oil

    1/4 t Ground Clove

    Melt the tallow and beeswax in a double boiler or heat-safe bowl over simmering water. Once it is all melted, remove from heat and let cool 2-3 minutes.

    Stir in remaining ingredients and pour into a jar or sealable container. 

    Shelf life at room temperature should be 6-9 months.

    *To make the thyme tea, put 1 t of dried thyme in 1 c of boiling water, and let steep at least 5 minutes. The longer it steeps, the more potent the tea.


    Now, I know I said Tim cannot have essential oils on his skin, but that does not apply to lavender, which is how it made it into this recipe. If you know you’re sensitive to oils, feel free to test this on just a small patch of skin to see if it’s safe for you.

    I’m sure there will be more posts in the future about the efficacy of this anti-bug cream and any tweaks I make. But, I’d love to hear what worked for you and, as always, thanks for stopping by.

  • Homemade Beard Balm

    Homemade Beard Balm

    Tim has had a beard for over five years now, and it has been a surprising learning curve — for both of us. Apparently, the right way to grow a beard is not to simply quit shaving and hope for the best. It seems there are techniques and right and wrong ways to do it. Who knew growing hair could be complicated? 🙂

    For a while, he would just trim off all the tangly bits and edges and move on. But then disaster struck, the clippers clipped too much, and the whole thing had to be trimmed nearly off.

    To avoid ever doing that again, improve the overall health of his beard, and not need to worry with trimming, Tim started looking into different beard care products. But just take a wild guess how much that adds up to be in expenses over time! And the ingredients couldn’t always be vouched for either.

    So, since we were already moving away from buying things so much, beard balm joined the growing list of “Things To Make Ourselves”. Thankfully, finding a recipe wasn’t difficult and neither was mixing it up.

    Obviously, there are many recipes for beard balm. Probably as many recipes as there are men with beards, but anyway. This one uses what I had on hand, and according to Tim, works great.

    Homemade Beard Balm


    Ingredients


    1 Tablespoon Beeswax Pellets (Firmness and Hold)

    1 Tablespoon Jojoba Oil (Lightweight and Hydration)

    1 Tablespoon Argan Oil (Deep Conditioning)

    1 Tablespoon Evening Primrose Oil (Soothing and Anti-Inflammatory)

    Essential Oils (Optional, Your Choice, 10-12 Drops)


    4 Drops Cedarwood

    4 Drops Patchouli

    2-4 Drops Bergamot

    Instructions


    Melt the beeswax and carrier oils in a double boiler or a heat-safe bowl or jar over simmering water.

    Stir gently until everything is fully liquid.

    Remove from heat and let cool 2-3 minutes so it won’t scorch the essential oils.

    Add the essential oils of your choice and stir thoroughly.

    Pour into a 2 oz tin or small jar and let it harden uncovered. Then cover and store.

    This balm might not harden as much as some you might be used to as it does not have shea butter in it. If you would like it more firm, remelt, but only just as to not damage the essential oils, and add a little more beeswax.

    Also, be sure to buy only high-quality organic oils from sources you trust. According to my research, food-grade beeswax and carrier oils is best, and therapeutic-grade essential oils. I got my beeswax and carrier oils on Amazon, and I will do my best to add links as soon as possible. But, obviously, do your own research and make your own educated choices.

    While helping make this, a worried Micah handed me the Evening Primrose oil and half whispered, “Daddy can’t use this. Men can’t smell like roses.”

  • And Then There Were Nine!

    And Then There Were Nine!

    Sunday, July 6th, at 11:36 PM, our new addition made their long-awaited arrival. While we had a girl’s name picked out for a good while, we only settled on a boy’s name we liked a few days before. It’s a good thing we did!

    In the not-even two days he has been here, Judah Andrew has won the hearts of everyone in the family. Though I guess that’s pretty normal, isn’t it?

    Elsie is still having a bit of a time remembering his name, so she often calls him “Our family’s baby boy”. But we all know who she means. 🙂

    With choosing to have Judah at home, there has been none of the hassle of hauling children back and forth to the hospital or Tim in one place while I’m in another. It is also so much easier to recoup in my own house and my own bed. Obviously, it’s each to their own, but the pros of home births far outweigh any hospital birth experience I’ve had.

    Since Tim has stepped in and taken over cooking, among other things, for the time being, he has been using this as an opportunity to work on his sous chef-in-training, Alayna. She enjoys cooking and baking and is always thrilled to get to expand her skills. She already can make bread and tortillas as well as I can, and is working on getting to the point she can take over breakfasts some days.

    The others, down to Niel, are eager to help too. They line up to get their chance to do something, even if it’s “just” holding Judah for a while. 🙂 While our schedule is still somewhat askew, with helpers like I have, life is still moving along without too much upheaval. I definitely have a lot to be thankful for.

    I am sorry (somewhat) that this post is shorter than normal, and it is definitely late. But I think I have a legitimate reason this time, don’t you? 🙂 Thank you to all who kept us in your prayers. It meant a lot to Tim and I. Until next time!

  • A Day In My Life

    A Day In My Life

    Welcome back, friends!

    If you’ve ever wondered what a typical day looks like on our not-quite-finished, not-quite-animal-stocked, not-quite-quiet homestead… well, buckle up. You’re about to get a peek behind the curtain—and spoiler alert: there’s laundry, compost, and coffee remembered about three times.

    Notice: the following depiction may have been slightly exaggerated for comedic purposes.

    Mornings around here start early(ish), usually with me waving Tim off on his morning walk and photoshoot while I head upstairs to get breakfast started for his dad and sister. Somewhere in that blur, the kids start waking up—some happily, some like grumpy little trolls—and I herd them into clothes and conversation while eggs sizzle and the baby kicks me in the ribs.

    By the time our own breakfast is ready, it’s usually 9:30. We gather around the table for food and family devotions before diving into the day. That’s when I:

    • Make the bed (if I remember)
    • Start the first of several loads of laundry
    • Empty the composting toilets (yay homestead life!)
    • Make Pinterest pins
    • Scribble out a to-do list that may or may not survive contact with reality
    • And get the youngest three down for naps (on good days)

    Then comes the rapid-fire rhythm of more laundry, snacks for hungry monsters… I mean, kids, and checking in on the garden. Right now, we’ve got tomatoes, peas, peppers, cucumbers, melons, and okra growing—but so far, only the peas are ready to pick. There’s watering to do and never-ending weeds to fight.

    The afternoons are a whirlwind of:

    • Cleaning and organizing, aka moving it somewhere else
    • Discussing house ideas with Tim
    • Remembering to get supper prep started
    • Project planning
    • More laundry (because of course)

    Then it’s supper for ten people, followed by handing out chores, circling back to make sure those chores were done properly, blog work, finally getting the bed made, and helping Tim list eBay items. Somewhere in there, we wrangle kids into pajamas and try to end the day with everyone clean(ish) and in their beds.

    After that? Tim and I usually sink into our chairs for a bit of breathing room, chat about the day, and maybe split a snack before he heads out for his evening photo walk. Then it’s finally, finally, my bedtime.

    And we do it all again tomorrow.

    It’s a season full of noise, motion, hope, and chaos. The garden’s growing (slowly), the peaches are ripening, the house is still half-finished, and the baby is… well, overdue.

    But somehow, this wild in-between is where life is happening. Right here, in the waiting and the working and the wrangling, the dream is already unfolding.

    Thanks for walking through a day with me. 💛


    Homestead Hilarity

    “Mommy doesn’t really work, Daddy does” –Multiple kids, multiple times

    (Clearly all the compost-emptying, meal-making, chore-wrangling, and laundry-mountain-slaying doesn’t count. 😅)


    Disclaimer: This only shows the day from my point of view. Tim could write his own post, or three, about what gets included in his days.

    Disclaimer 2: At the beginning of the post I mentioned that this is what a “typical” day looks like. Currently, Tim has even more to add to his days as he has stepped in to take over multiple parts of my responsibilities until the baby comes.

  • The Best Peach Cobbler, With A Secret Ingredient!

    The Best Peach Cobbler, With A Secret Ingredient!

    When summertime rolls around and the days start heating up, one thing that helps make up for the sticky discomfort is peaches.

    Now, I like peaches. I like them fresh, sliced with a little brown sugar and milk. I like them in muffins, in oatmeal, in cinnamon rolls… and did I mention fresh?

    Peach cobbler with bubbling fruit and browned topping

    But around here, if we have peaches, there’s one thing that always gets requested: peach cobbler. Sometimes I think I could make it every single day and no one would complain. I doubt I’ll test that theory—but I wouldn’t be surprised if they tried to talk me into it. 😊

    What makes peach cobbler so special—at least to me—is that it’s basically summer in a pan. You get the soft, bright flavor of peaches, the warmth of nutmeg and cinnamon, and the rich depth of vanilla, all paired with the buttery crunch of the buttermilk topping. It’s practically unbeatable.

    Fresh peach slices mixed with sugar, nutmeg, cinnamon, and vanilla.

    And in our house, everyone has their favorite part. The kids go for the fruity pockets. I like a solid mix of topping and fruit, especially with those sweet drippings you get when you’re last to serve and scraping the pan. And Tim? Tim always gets a corner or edge piece—the one with the well-browned, butter-crunchy topping I make just for him.

    Freshly baked peach cobbler in the pan with golden brown topping.

    Now, I had thought that I had my perfect peach cobbler recipe all figured out and set in stone. I use buttermilk, never regular milk, for the topping. The peaches always get freshly grated nutmeg, none of that store-bought ground nutmeg. Don’t get me wrong, I’m not saying you can’t get a good cobbler by using slightly different ingredients. I’m just saying that if I tried it, I think my family would accuse me of fraud or something.

    The last peach cobbler I made, though, threatened to change some of my “set in stone” ways. You see, we didn’t have enough buttermilk. And I didn’t even have any regular milk to stretch it with. So I gathered up my courage and tried something I wasn’t positive would work. I added enough sour cream to get the buttermilk to the amount I needed and hoped for the best.

    When I pulled it out of the oven and dished it up, I asked Tim his opinion of the substitution. He said it wouldn’t work as a substitute, but I had to start doing it that way from now on. Success!

    So, in honor of summer, peaches, and Tim’s crunchy-corner approval, here’s my go-to peach cobbler—with a slightly unexpected twist.

    Peach Cobbler With Buttermilk-Sour Cream Topping

    Thick buttermilk and sour cream batter being stirred in a mixing bowl.

    Ingredients

    For the fruit:

    4 cups Fresh Peaches, peeled and sliced*

    1/2 cup Sugar

    1 teaspoon Vanilla Extract*

    1 teaspoon Freshly Grated Nutmeg (or 1/4 tsp ground)*

    1/2 teaspoon Cinnamon (optional, to taste)*

    For the topping:

    3/4 cup Buttermilk

    1/4 cup Sour Cream

    1 cup Flour

    1/4 cup Sugar

    1 teaspoon Salt

    1 teaspoon Baking Powder

    8 tablespoons Butter, melted in the pan

    Optional:

    1 tablespoon Sugar for sprinkling on top

    Instructions

    Preheat your oven to 350 degrees F. Place the butter in an 8×8* baking dish and place it in the oven to melt while you prepare the topping and fruit.

    Butter melting in a baking dish in the oven, the first step of making peach cobbler.

    In a bowl, combine the sliced peaches with the sugar, vanilla, and spices. Set it aside to let the juices develop.

    In another bowl, whisk together flour, sugar, baking powder, and salt. Stir in the buttermilk and sour cream until just combined. The batter will be thick.

    Once the butter is completely melted, carefully remove the dish from the oven. Drop the batter by large spoonfuls over the hot butter. Do NOT stir. It’ll look messy, but that’s what you want.

    Cobbler batter spooned over melted butter in a baking dish, ready for peaches.

    Gently spoon the peach mixture over the batter. Again, no stirring!

    If desired, sprinkle the extra tablespoon of sugar over everything for a slightly crispy finish.

    Unbaked peach cobbler with batter and fruit layered in a pan.

    Bake for 45 minutes, or until the topping is golden brown and cooked through. Let it cool slightly before serving.

    Best served warm. Great with vanilla ice cream or homemade whipped cream, our family’s favorite.

    Juicy peach cobbler with golden topping, served warm in the baking dish.

    Recipe Notes

    If you want to double this recipe, it still works great. Just use a 9×13 and bake for 1 hour 15 minutes to 1 hour 30 minutes.

    Home canned peaches work great too, but you might want to drain some of the liquid off them before adding the other ingredients.

    My family likes the spice a little more than some people, so feel free to use less nutmeg and cinnamon if desired. And I’ll be honest, I never measure the vanilla, nutmeg, or cinnamon. I go by what smells right, so these measurements are estimates.

    A great variation is to add some raspberries to the peaches for pops of color and tartness.

    Juicy peach cobbler with golden topping.

    Whether you serve it warm with ice cream or sneak a bite cold from the fridge the next morning (guilty), I hope this cobbler brings your people to the table the way it always does mine.