Author: bringinglife

  • Thick, Chewy, Bold Gingerbread Cookies

    Thick, Chewy, Bold Gingerbread Cookies

    When I think of cookies, I think of thick cookies with centers that are still chewy. Cookies and cakey are seldom together in my vocabulary.

    That description applies to these gingerbread cookies too. While they could be rolled out and cut with cookie cutters, I much prefer them shaped into balls like one would for chocolate chip cookies. Thick and soft, even after a few days, these gingerbread cookies are full of warm spices and make an amazing addition to the holidays. Or any day, really.

    Dry Ingredients


    • 1 tablespoon ground ginger
    • 2 teaspoons ground cinnamon
    • 1 heaping teaspoon ground nutmeg
    • ½–1 teaspoon ground cloves (optional but adds wonderful depth)
    • 1 teaspoon salt
    • 1 ½ teaspoons baking soda
    • 4 cups all-purpose flour, sifted
    • PLUS ½–1 cup extra flour, only if needed

    Wet Ingredients

    • 1 cup (2 sticks) salted butter, softened
    • 1 cup packed brown sugar
    • 1 cup molasses
    • ¼ cup half-and-half
    • 1–2 teaspoons vanilla extract

    Instructions

    1. Cream butter + brown sugar + vanilla

    Beat until smooth, fluffy, and lighter in color.

    2. Add molasses and half-and-half

    Mix until combined. Slight separation is normal.

    3. Add all the spices, salt, and baking soda

    Stir well so they’re evenly distributed.

    4. Add the 4 cups of flour

    Mix until a soft but formed dough appears.

    5. Add extra flour only if needed

    Add 2–3 tablespoons at a time, stopping when the dough is:

    • Soft
    • Slightly tacky
    • But workable without heavy sticking

    (You want a tender dough, not stiff.)

    6. Chill at least 1 hour

    Improves flavor and prevents spreading.

    7. Roll out ½ inch thick

    Or shape into balls.
    These are meant to be thick, chewy cookies.

    8. Bake at 350°F for 8-10 minutes

    Pull when edges are set, but centers look slightly soft and puffy.
    They firm as they cool.

  • Homemade Yogurt from Scratch

    Homemade Yogurt from Scratch

    Why Make Yogurt at Home?

    Homemade yogurt isn’t just about saving money—it’s about freshness, control, and nutrition. When you make it yourself:

    • Cost savings: A single gallon of milk can yield 8 cups of yogurt for less than store-bought tubs.
    • Customization: You choose the milk type (whole, skim, goat, raw, organic, etc.), thickness (Greek-style or regular), and flavors.
    • Fewer additives: No thickeners, stabilizers, or hidden sugars—just milk and live cultures.
    • Sustainability: Making yogurt at home cuts down on packaging waste.

    How Yogurt Works: The Science Behind It

    Yogurt is created by fermenting milk with beneficial bacteria. The two classic starter strains are:

    • Lactobacillus bulgaricus
    • Streptococcus thermophilus

    Together, they convert lactose (milk sugar) into lactic acid. This acid lowers the pH, thickening the milk proteins and giving yogurt its tangy flavor. Many store-bought starters also include additional strains like Lactobacillus acidophilus or Bifidobacterium lactis, which may aid digestion.

    The fermentation process not only preserves milk but also boosts probiotic content, supporting gut health.

    four quart jars of homemade yogurt in a dehydrator

    Ingredients

    • 1 quart (4 cups) milk – whole milk makes creamier yogurt, but any type works
    • 2 tablespoons plain yogurt with live, active cultures (store-bought or from a previous batch)

    Equipment

    • Saucepan
    • Thermometer (optional but helpful)
    • Whisk
    • Clean glass jar or container with lid
    • Towel or blanket for insulation

    Step-by-Step Instructions

    1. Heat the milk
      Pour milk into a saucepan and gently heat to 180°F (82°C). This denatures proteins so the yogurt sets thicker.
    2. Cool the milk
      Remove from heat and let it cool to 110°F–115°F (43–46°C). This is the ideal range for the cultures.
    3. Add starter
      Whisk 2 tablespoons of yogurt into a small bowl with a bit of the cooled milk. Then stir this mixture back into the pot.
    4. Incubate
      Pour into a clean jar, cover, and keep warm (around 110°F) for 6–12 hours.
      • For thinner, milder yogurt: check at 6 hours.
      • For thicker, tangier yogurt: let it go longer.
        You can wrap the jar in a towel, place it in an oven with the light on, use an Instant Pot’s yogurt setting, or a dehydrator set to 110°F.
    5. Chill and enjoy
      Once it’s set, refrigerate for at least 2 hours. The yogurt will thicken further as it cools.

    Variations

    • Greek Yogurt: Strain finished yogurt through a cheesecloth or coffee filter for 2–4 hours to remove whey.
    • Flavored Yogurt: Stir in honey, fruit purée, vanilla, or jam just before eating.

    Storage

    Homemade yogurt keeps for about 2 weeks in the refrigerator. Save 2–3 tablespoons from each batch to use as the starter for the next one.

    If you would like a video on the process, check out this one on our YouTube channel!

  • Pumpkin Spice Streusel Muffins

    Pumpkin Spice Streusel Muffins

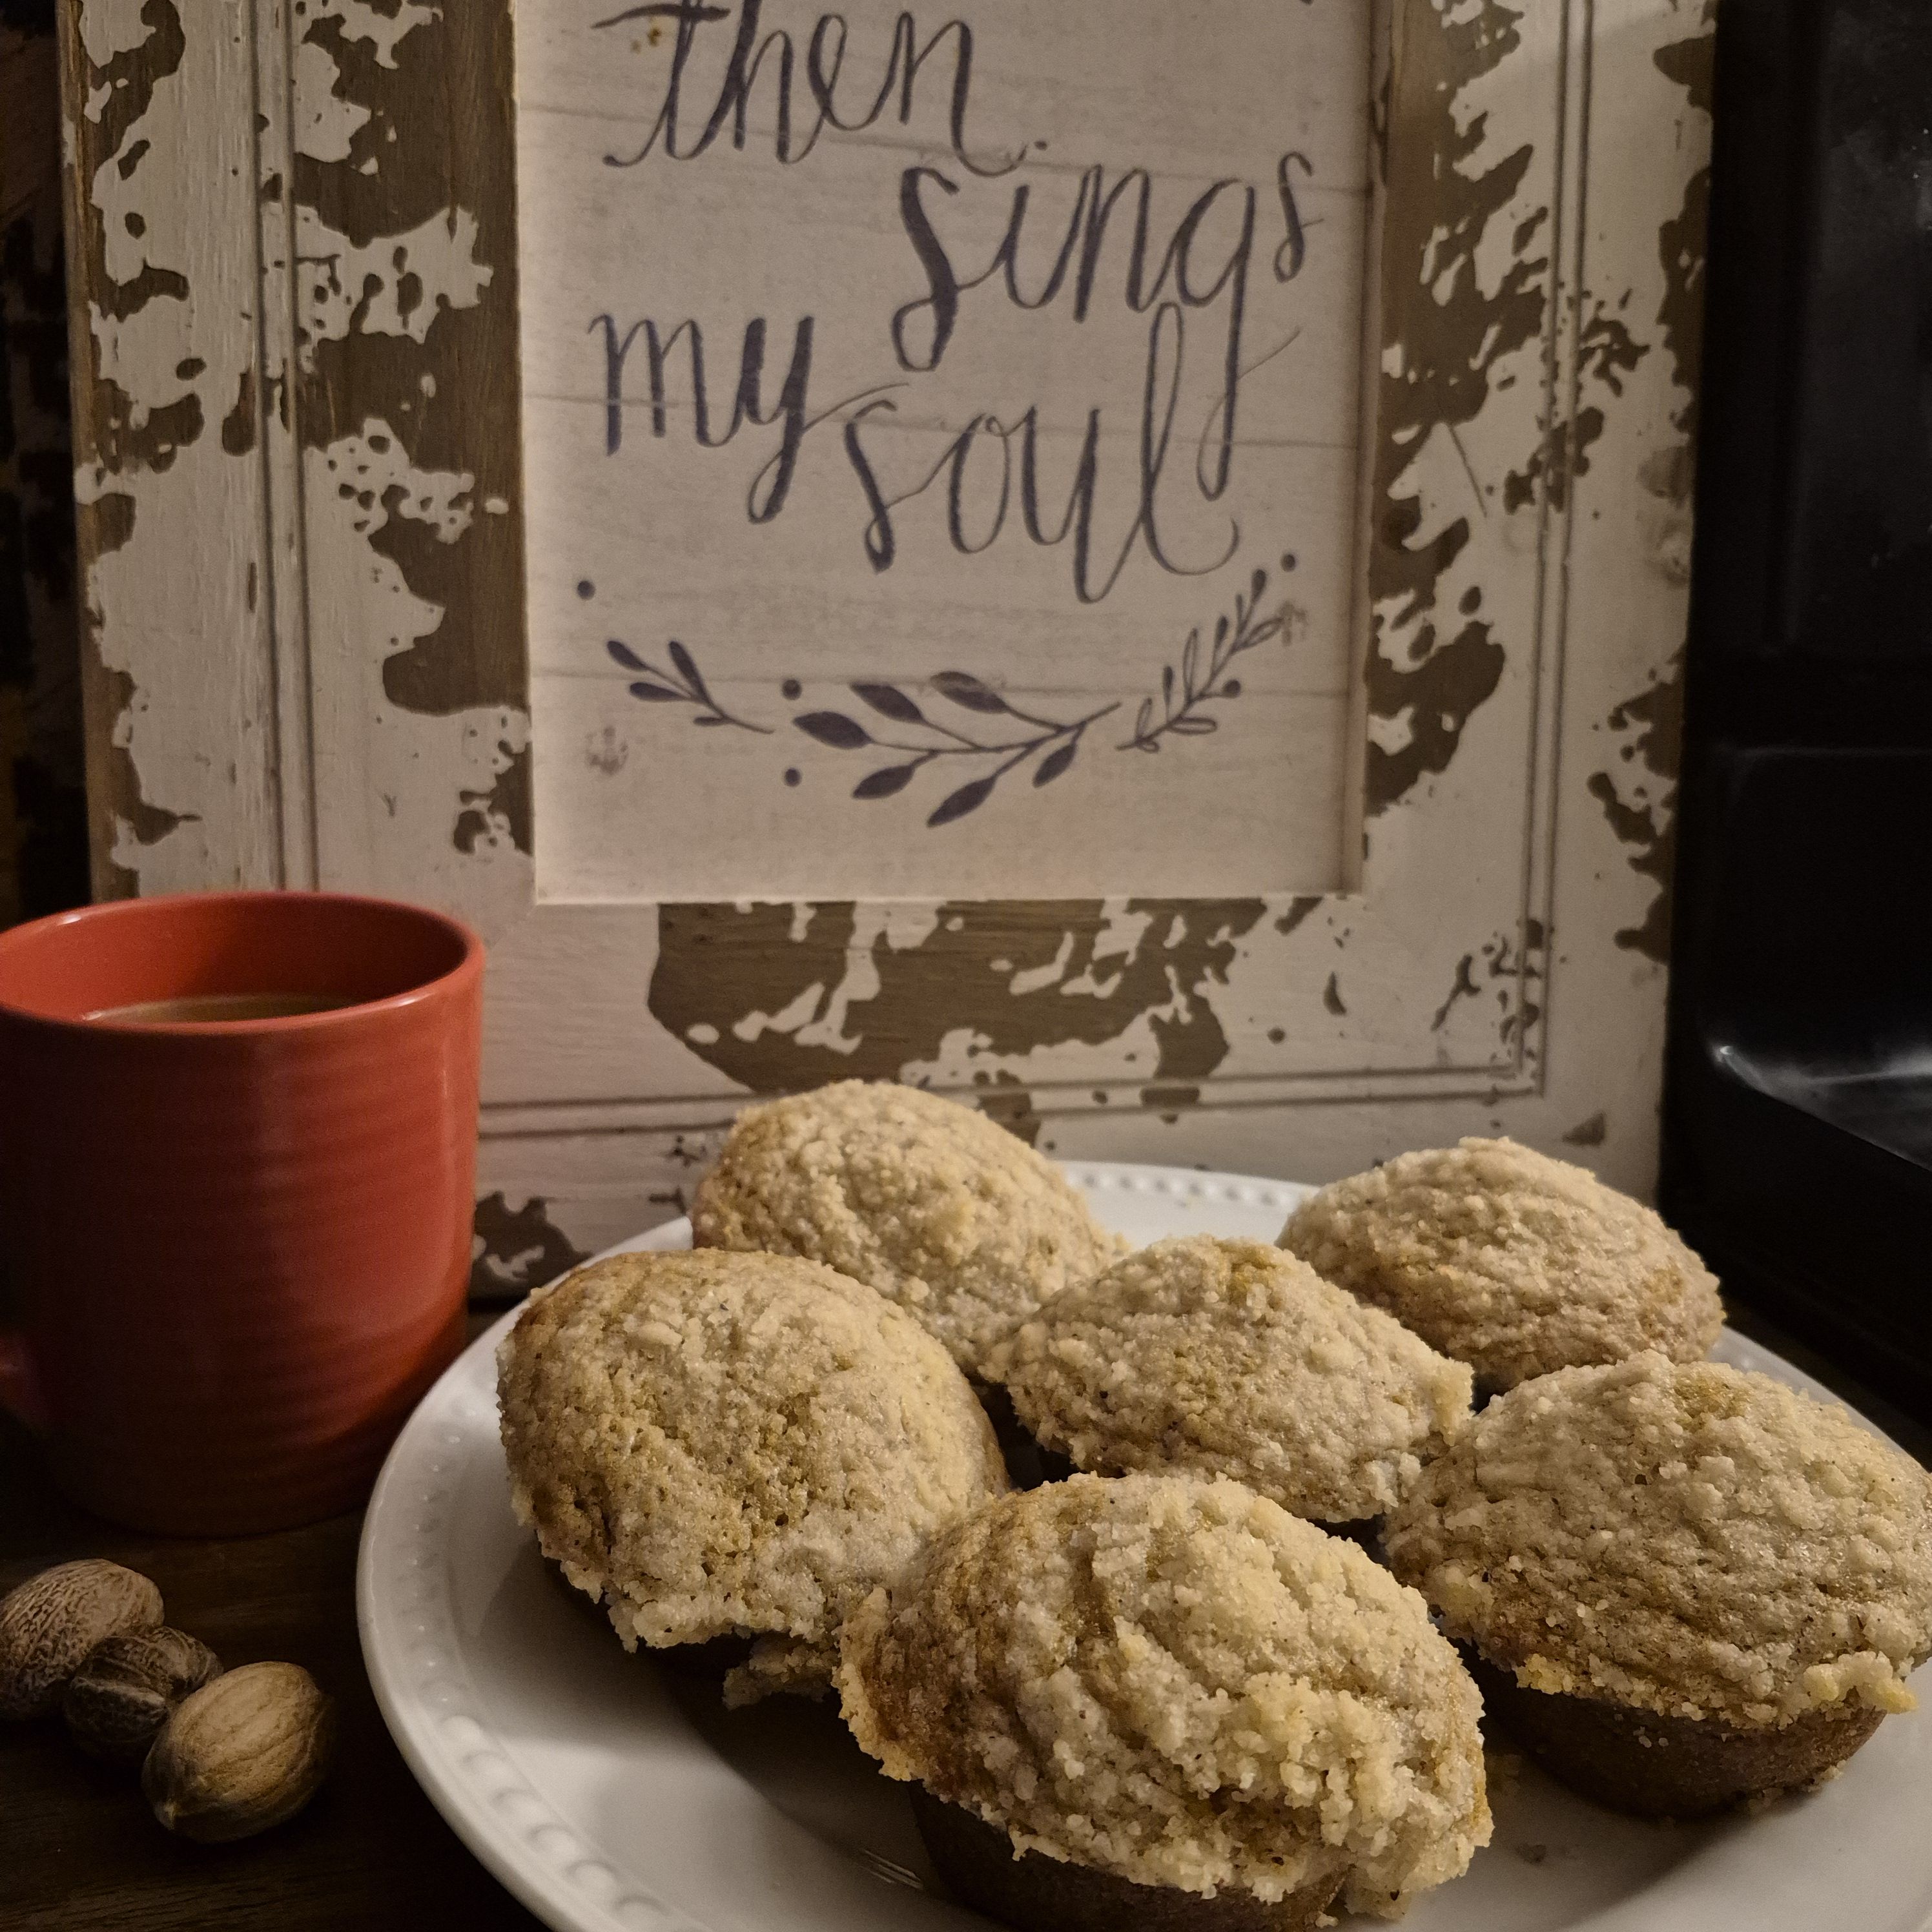
    A plate of pumpkin spice muffins with streusel topping with mug of coffee,  three whole nutmeg,  and a plaque that says "Then sings my soul".

    Maybe the cool weather is getting to me. Maybe I like pumpkin spice more than I thought. Whichever is the case, here’s a recipe I had to share. These muffins turned out so delicious I couldn’t keep them to myself.

    Pumpkin Spice Muffins (24 muffins)

    Ingredients

    Dry:

    • 3 ½ cups all-purpose flour
    • 2 tsp baking soda
    • 2 tsp baking powder
    • 1 tsp salt
    • 2 tsp cinnamon
    • 2 tsp nutmeg
    • 1/2 tsp ground ginger
    • 1/2 tsp ground cloves

    Wet:

    • 2 cups canned pumpkin purée (NOT pumpkin pie filling)
    • 1 cup granulated sugar
    • 1 cup brown sugar, packed
    • 1 cup sour cream
    • 1 cup melted butter
    • 4 large eggs
    • 2 tsp vanilla extract

    Streusel Topping

    • 1 cup all-purpose flour
    • ¾ cup granulated sugar (or half brown sugar, half white for deeper flavor)
    • 1 tsp cinnamon
    • ½ tsp nutmeg
    • ½ cup cold unsalted butter, cubed

    Instructions

    1. Preheat oven to 350°F (175°C). Line 24 muffin cups with paper liners (or grease).
    2. Make the streusel:
      In a bowl, whisk flour, sugar, and spices. Cut in butter with a pastry cutter or your fingers until mixture looks like coarse crumbs. Chill while you prepare the batter.
    3. Mix dry ingredients:
      In a large bowl, whisk flour, baking soda, baking powder, salt, and spices.
    4. Mix wet ingredients:
      In another large bowl, whisk together pumpkin, both sugars, sour cream, oil, eggs, and vanilla until smooth.
    5. Combine:
      Add dry ingredients to wet and stir just until combined (don’t overmix).
    6. Fill muffin tins:
      Divide batter evenly among 24 cups (about ⅔ full).
    7. Top:
      Sprinkle each muffin generously with streusel.
    8. Bake:
      Bake 20–24 minutes, until a toothpick inserted in the center comes out clean.
    9. Cool slightly before serving.

    These muffins are great the next day as well.

  • Spicedoodle Cookies

    Spicedoodle Cookies

    Do you ever start out to make one thing, but the farther you go the more you realize you’re actually making something else? That’s what happened with these cookies.

    I went into the kitchen fully intending to make snickerdoodles. That’s what had been requested and that’s what I had a recipe for.

    But then, as often happens, Tim came to help. Don’t get me wrong, that wasn’t a problem. Tim is, after all, the one who taught me to cook, and I enjoy working in the kitchen with him. But… It did mean the recipe was changing cause that’s what Tim does.

    Soon, I was pulling fresh cookies from the oven and trying to convince everyone that they would survive if they waited a few minutes for the cookies to cool.

    Then, came the first taste. All it took was one bite to know these were definitely not snickerdoodles. They had the same cinnamon sugar coating, but after Tim had added ginger, cinnamon, and nutmeg the cookies had morphed into… well… Spicedoodles.

    So a new favorite was created and now I’m passing it one to you!

    a plate of homemade cookies with whole nutmeg and cinnamon pieces

    Spicedoodle Cookies


    Ingredients (For approx 36 cookies)

    • 1 cup (2 cubes) Butter, softened
    • 1 cup Sugar
    • 1 teaspoon Vanilla
    • 2 Eggs
    • 4 teaspoons Baking Powder
    • 1 teaspoon Baking Soda
    • 1/2 teaspoon Salt
    • 1 tablespoon Cinnamon
    • 2 teaspoons Nutmeg, grated
    • 1/2 teaspoon ground Ginger
    • 3 1/2 cups Flour

    Instructions

    • Preheat the oven to 400 degrees.
    • Combine softened butter, sugar, and vanilla until creamy.
    • Add the eggs and mix well.
    • Mix in spices and dry ingredients. We like our spices strong, but if you want a more “normal” spice level, cut the amounts for the cinnamon, nutmeg, and ginger in half.
    • In a small bowl, mix sugar and cinnamon to roll the cookies in. Ratios can vary depending on how strong you want the cinnamon.
    • Form cookies into ping-pong sized balls and flatten slightly. This will help them stay thicker as they bake and come out softer.
    • Roll them in the sugar/cinnamon mixture and place on a cookie sheet an inch or so apart.
    • Bake at 400 degrees for 7-8 minutes. They will still look soft, but will be delicious and perfectly done. For my family at least. Feel free to adjust if you want, but I wouldn’t suggest going over 9 minutes.
    • Lastly, enjoy!
  • Homemade Laundry Detergent

    For Pennies A Load!

    Like maybe some of you, I used to enjoy meandering down the candle aisle in Walmart and smelling every one that sounded interesting. And I’d check every single bottle of soap or shampoo to make sure I bought the one I liked the best.

    Now, I find myself preferring, by far, natural scents over commercial ones. In fact, just one sniff of one candle or bottle of soap is often enough to bring on a headache.

    Add to that kids who break out from harsh chemicals in most laundry detergents, and we aren’t the easiest people to buy laundry soap for.

    So, the other day, I thought, why buy it?

    I started checking and soon found a recipe for laundry detergent powder with only 4 clean natural ingredients, one of them being fragrance of my choice. It sounded great to me and we even had most of the ingredients on hand.

    • Borax for odor control, stain removal, and general whitening. I used 20 Mule Team brand.
    • Fels-Naptha for cleaning and stain removal. I used Purex brand
    • Washing Soda for more cleaning power and odor control. I used Arm and Hammer brand.
    • Essential Oils for a great natural smell. I used one of Plant Therapy laundry blends.

    I didn’t have Borax or Washing soda, but a quick trip to our little local store provided Borax and we found a way to make our own Washing soda.

    It turns out, if you put regular baking soda on a cookie sheet in the oven at 400 degrees for an hour, you have Washing Soda!

    A box of Borax, a bar of Fels-Naptha, a box of essential oils, a bowl of washing soda, and a jar of laundry detergent powder.

    Homemade Laundry Detergent


    1 cup Borax Powder

    1 cup Washing Soda

    1 cup Fels-Naptha, grated (about 1 bar)

    15-20 drops of essential oil, your choice

    If you have Washing Soda, put it and the Borax in a jar or container. You will want to use a mask or something to cover your face to keep you from breathing in the fine powders. If you don’t have Washing Soda, you can make your own by putting a cup of baking soda on a cookie sheet in a 400 degree oven for an hour. This changes the chemical formula and makes Washing Soda.

    Take the bar of Fels-Naptha and grate it. You can use the fine side of a cheese grater or your food processor shredder disc on the small side. Again, the powder is very fine and not something you want to breathe so wear something over your mouth and nose. Let it settle before you open the food processor.

    Put all three dry ingredients in a container or jar. I used a jar so I could just put a lid on and shake it to mix it.

    Let the mixture settle and then open and add 15-20 drops of essential oils for scent.

    Shake to mix in the oils and let sit overnight.

    Use 2 tablespoons for a regular load and 3 tablespoons for a heavy load.

    I also have a video showing the process on YouTube at Bringing Life Homestead.

  • Homemade Herb Bread

    Homemade Herb Bread

    I love making bread. There’s nothing quite like the look of bread dough rising or the smell of it coming out of the oven or the taste of hot buttered slice fresh off the loaf.

    I’ve experimented with several different varieties of bread. From oat bread to seedy bread to whole wheat bread. I found out I like them all.

    This recipe, however, is one I use when I feel like making some extra special bread. It takes extra time and effort, but it is worth every minute. Believe me!

    This recipe is all my own, so if there is anything wrong with it, I have no one to blame but me. Thankfully, I know of nothing wrong with it. 🙂

    Anyway, on to the details of the bread. There are several things that make this bread unique.

    • Buttermilk. I replaced the typical water with warm buttermilk, and it really takes this loaf up a notch. Super soft and moist.
    • Fresh herbs. You might be able to use dry herbs in place of fresh, but I’ve never tried it and don’t think it would work quite as well. I have used several different blends of herbs and they were all good. Rosemary, thyme, and parsley is a delicious combo. Chop them fairly small and discard the tough stems.
    • Cheddar Cheese. While not an absolute necessity, it does add a nice flavor. It’s also delicious without it, but I’ll give the recipe with cheese included. Other kinds of cheese would probably be good as well.
    a cutting board with sprigs of fresh rosemary and thyme and an onyx mortar and pestle sitting near the cutting board

    Homemade Herb Cheese Bread


    Ingredients

    2 c Warm Buttermilk

    2 T Sugar

    2 t Yeast

    2 t Salt

    1/4 c Oil (or melted butter or lard)

    4.5-5 c Flour

    1/2 c Fresh Herbs, chopped

    1/2 c Cheddar Cheese, grated

    a wooden cutting board with a large knife and chopped fresh parsley leaves

    Instructions

    • Put warm buttermilk, sugar, and yeast in bowl of stand mixer. If you’re using active yeast, let it bloom for 5-10 minutes until foamy. If you’re using instant yeast, blooming is not needed.
    • Stir to make sure sugar and yeast are mixed in and not stuck on the bottom.
    • Add the salt, oil of choice, and flour.
    • Mix until flour is mostly incorporated then add chopped herbs and shredded cheese.
    • Continue to knead until everything is well mixed and the dough is pulling away from the sides of the bowl. Add more flour if needed.
    • Keep mixing for at least 5 minutes. I’ve found that the longer you knead the dough, the softer the bread is. If the dough stays really soft and sticky and you don’t want to add more flour, it should still work. I’ve had it happen to me lots of times, especially in warm or humid weather, and the bread turns out great. You just have to kinda pour the dough into the bowl and then the loaf pans instead of forming it.
    • Transfer the dough into a large, greased bowl, cover, and let rise until doubled. About 1-1.5 hours.
    • Form dough into a loaf, or two if it rose enough, and place in a greased 9×5 bread pan. Cover and let rise until the center is about 1-2 inches above the edge of the pan. I usually turn the oven on to preheat and let the pans sit on top the stove to cut down the rise time.
    • Preheat oven to 375 degrees
    • Bake at 375 degrees for 15 minutes, then without taking the bread out, turn the oven down to 350 degrees and bake another 20 minutes or until the bread is golden brown and sounds hollow when tapped.
    • Try to let it cool before you blister your fingers to get it out of the pans and sample it. If you’re like me and mine, you’ll endure the pain just to get a fresh, hot slice with butter. 🙂
    • Serve warm with stew or baked chicken or cool as a delicious sandwich base. Whatever you do, make sure you enjoy it!
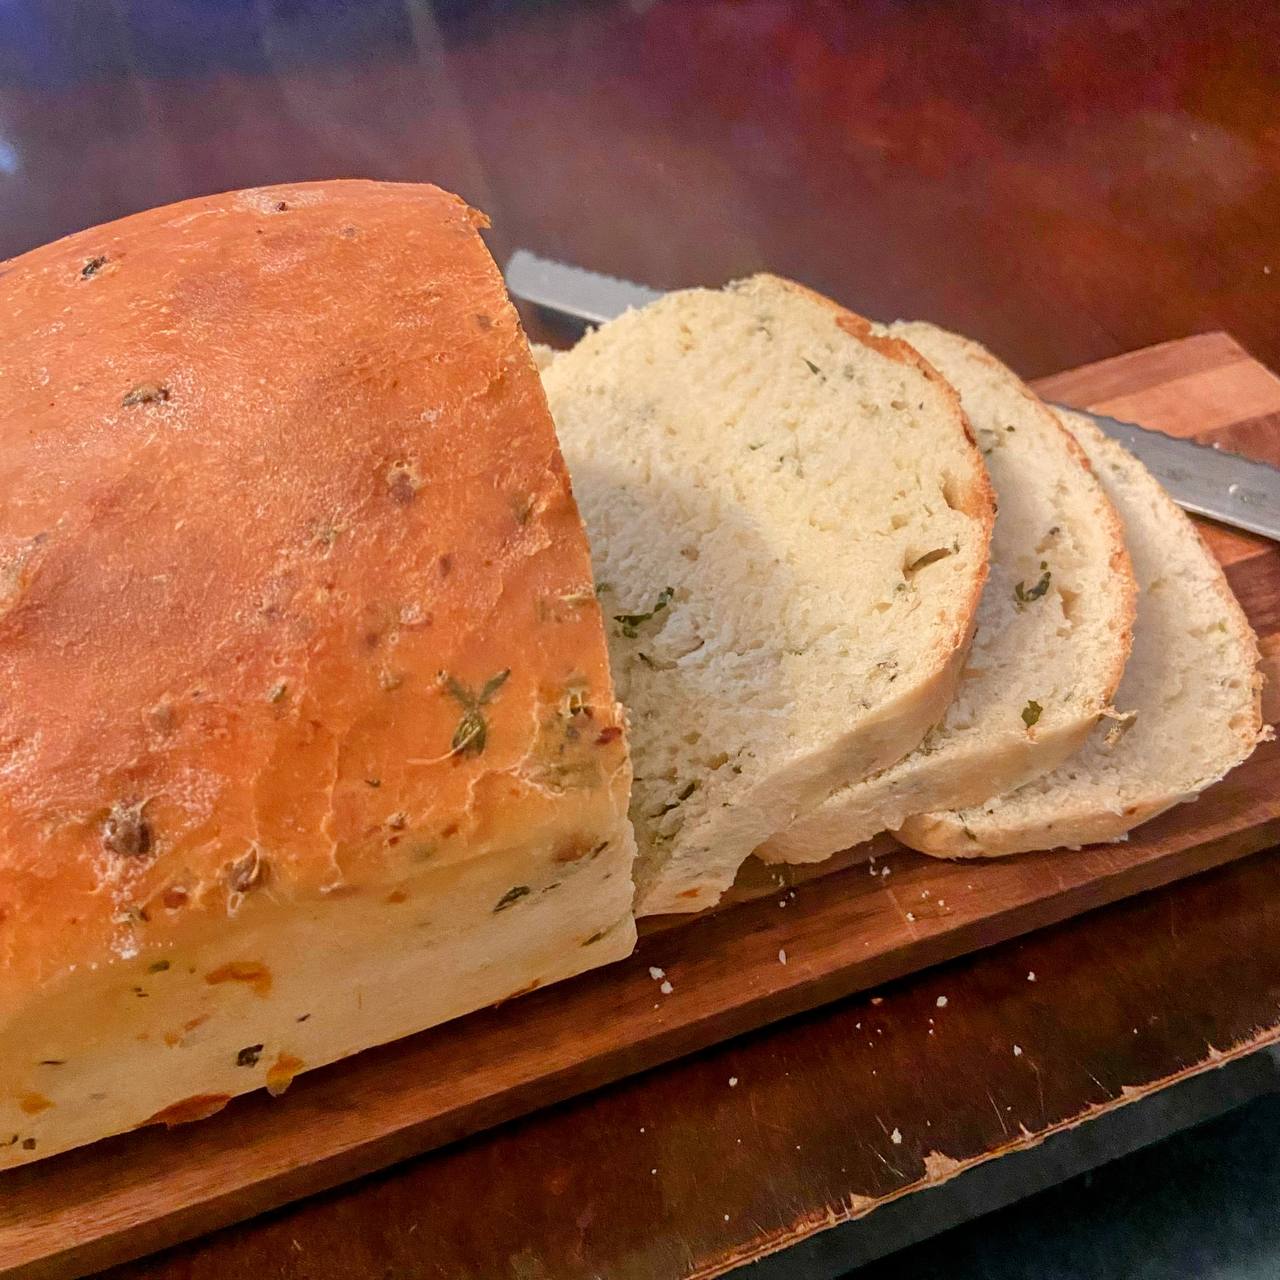
    a loaf of freshly baked herb and cheese bread sitting partially sliced and still steaming

  • Bluegill Supper

    Bluegill Supper

    Some of y’all might disagree, but nothing tastes quite like fried bluegill that you caught yourself. Especially when it’s pan fried so nicely and combined with foraged Train Wrecker mushrooms and sautéed green beans.

    Tim brought in most of the fish, but Micah managed to land one too.

    I cleaned them the night we caught them while Tim made the marinade for them.

    Once all 10 were ready to go, Tim placed them in the marinade and we put them in the fridge overnight.

    Then, the next afternoon I went looking for mushrooms. We had seen a cluster of them, so I knew where to go.

    Train Wreckers, or Neolentinus lepideus, earned the name by their ability to grow on highly treated railroad ties. If they’re ignored, the tie would eventually disintegrate and could cause a train wreck. Thankfully for us, these mushrooms were growing on a pine root which meant they were safe to eat.

    They do have some look-alikes, some of which are poisonous, so a positive ID is essential before they go in the skillet.

    Fresh green beans were in the fridge just waiting to be used. And so the meal came together.

    The results were delicious and filling. We’re already planning our next fish meal. 😊

  • Best Buttermilk Biscuits

    Best Buttermilk Biscuits

    Hello again!

    Around here, we usually keep breakfasts pretty simple. Bacon and eggs, eggs and bacon, that sort of thing. Sometimes, for variety, we add cottage cheese, veggies, or fruit to the menu.

    And then, other times, we feel like splurging a bit. Usually in those cases, our minds (Tim’s for sure!) turn to biscuits.

    Finding the perfect recipe was a bit of a journey. Especially since we started with store-bought biscuits out of a can. I still shudder sometimes to think of it.

    This recipe is not original to me. I found it online at bakerbettie.com

    The enjoyment we get from eating these flaky rounds of yummyness is ours, though. They are amazing with butter and honey or jam, with Tim’s delicious sausage gravy, or as breakfast sandwiches. Or even reheated with a little butter.

    biscuit bacon egg and cheese sandwiches

    OLD FASHIONED LARD BISCUITS


    Ingredients

    • 2 c Flour
    • 1 T Baking Powder
    • 1/4 t Baking Soda
    • 1 1/4 t Salt
    • 6 T Leaf Lard, cold *
    • 1 c Buttermilk, cold

    Instructions

    Preheat oven to 450 degrees and make sure an oven rack is in the center of the oven.

    Grease a cake pan or cookie sheet or line with parchment paper or a silicone baking mat, if desired. I never grease my pan for biscuits and they seldom stick more than a little bit. If you use a cookie sheet, make sure it has a rim to keep any melted lard from running off.

    Keep lard and buttermilk in the refrigerator until needed.

    In a large mixing bowl, combine the dry ingredients and whisk. *

    flour mixture in a mixer bowl

    Add in the cold lard and cut into the flour mixture using a pastry blender or fork. You want the lard to be mostly in pea-sized pieces with a few larger.

    pieces of butter in flour mixture in a mixer bowl
    butter pieces in flour mixture

    Add the cold buttermilk and stir with a spoon or spatula until just combined. This will not take long and you don’t want to overmix as the biscuits will be tough. The batter/dough will be pretty wet and sticky.

    buttermilk in flour mixture

    Turn the mixture out onto a floured table or countertop. Dust flour over the top. With floured hands, bring the dough into one mass.

    flour on a table

    Pat the dough out and then fold in half. Turn 90 degrees and pat out again. Repeat this 5-6 times. The folds help the biscuits end up flakier.

    patting out biscuit dough

    Press the layered dough out until it’s about an inch thick and use a round cutter that has been dipped in flour to cut the biscuits. Press straight down with the cutter and do not twist. Pat the scraps back together and cut again. Or you can pat the dough into a rectangle and use a sharp knife to divide into 8 biscuits.

    a cut biscuit round
    cutting out biscuits

    Place the biscuits in the prepared pan, making sure the edges are touching to help the biscuits rise.

    unbaked biscuits on a cookie sheet

    Bake for 13-15 minutes until golden brown. Do not open the door for at least the first half of the bake time. Keeping the steam trapped inside the oven helps with the rise.

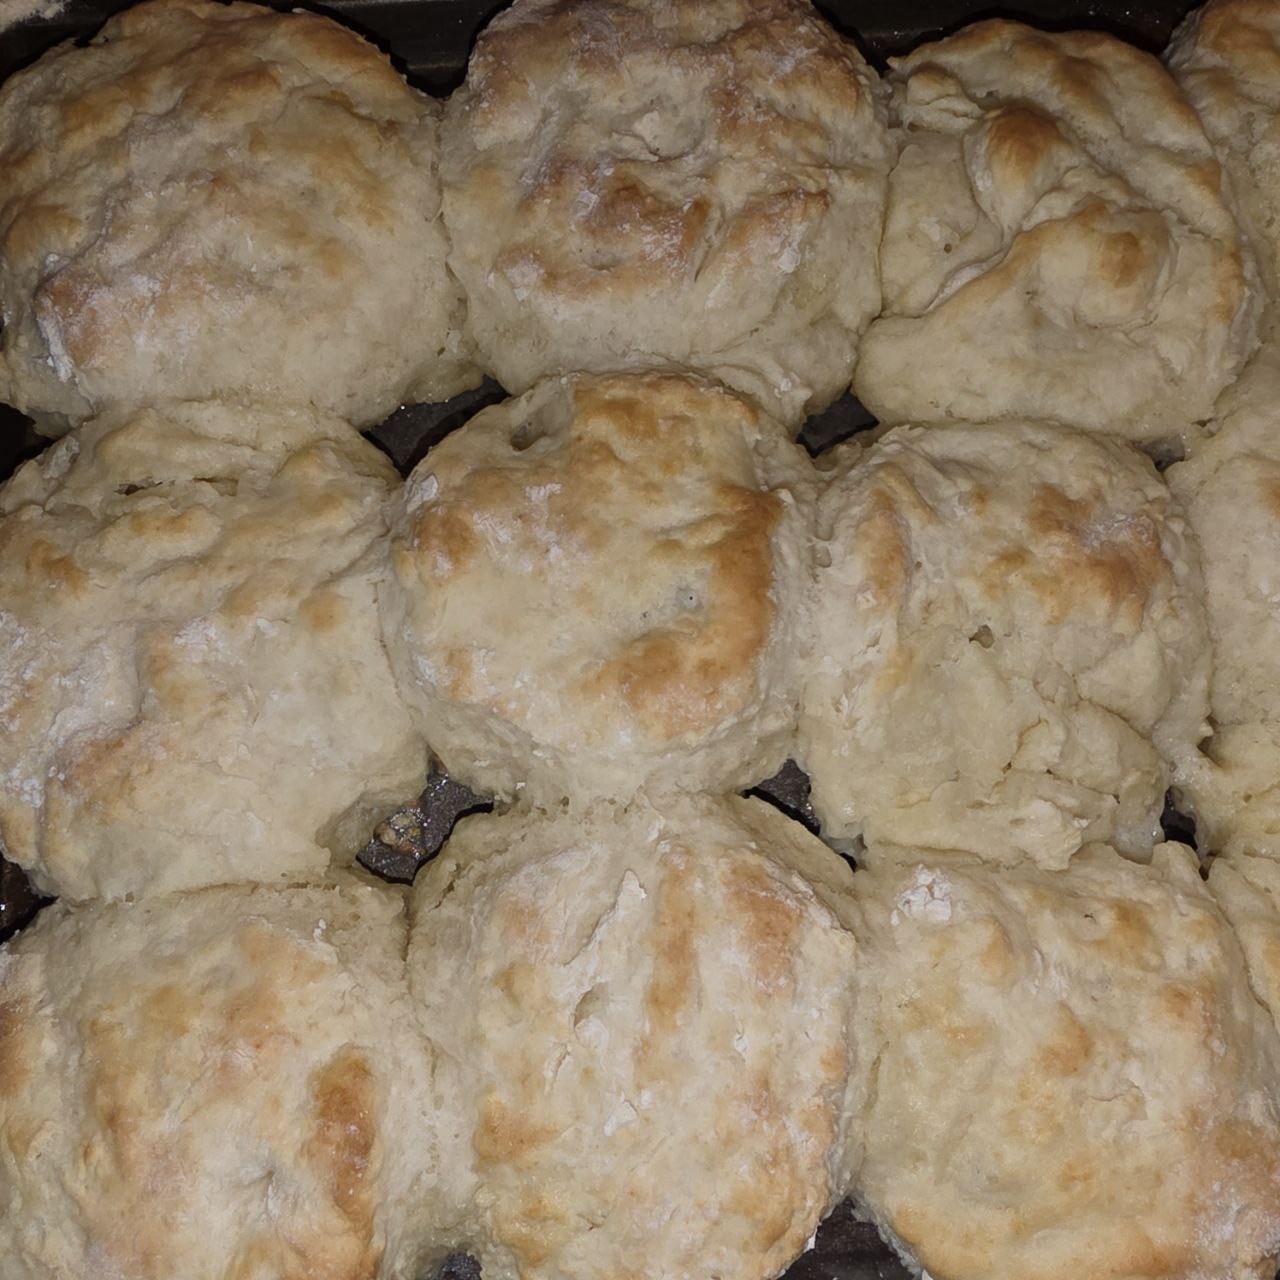
    golden brown biscuits on a cookie sheet

    Let cool, if possible, and then enjoy however you choose.

    Notes

    * I have substituted butter, tallow, and bacon grease for the lard with no problems. You just want it cold when it goes in.

    *I make mine in my stand mixer and it works just great. Just don’t overmix.

  • The Delights of Echinacea

    The Delights of Echinacea

    purple coneflowers or echinacea growing next to bright yellow flowers

    You’ve probably seen echinacea purpurea before—even if you didn’t realize it. With its drooping purple petals and bristly orange center, it looks like a daisy that tried hairspray. But don’t let the frilly look fool you—this plant has earned its place in herbal medicine cabinets for centuries. And like a lot of herbs, the more I learn about it, the more I find myself marveling at how God packed so much usefulness into a wildflower.

    I’ve been looking into echinacea more lately—what it does, how it works, and why people use it—and I thought I’d share some of what I found in case you’re curious too.

    What Is Echinacea Purpurea?


    Echinacea is a native North American plant, often called “purple coneflower.” The purpurea species is the one most commonly used for medicinal purposes, though there are a few other types as well. It’s been used traditionally by Indigenous peoples and adopted into folk remedies for everything from infections to snake bites.

    echinacea flowers, also known as purple coneflowers, growing in a field

    What Is It Used For?


    The most common reason people reach for echinacea is to support the immune system—especially when cold or flu season hits. But its uses go way further than that. Here’s a quick list of what echinacea is said to help with:

    • Immune support: May shorten the duration and lessen the severity of colds.
    • Anti-inflammatory: Can reduce swelling and irritation, helpful for sore throats or skin issues.
    • Wound healing: Used in salves or teas for cuts, burns, or skin infections.
    • Antibacterial/antiviral: Traditionally used for bacterial infections and to support the body during illness. It works better in larger doses, maybe 3x what you would normally use of dried herbs.
    • Venomous Bites: Stops the venom from snake or spider bites and helps the body heal.
    a bee sleeping on top an echinacea flower

    How Is It Taken?


    Echinacea is often taken as a tea, tincture, or capsule. Some folks also use it topically (like in a salve or poultice). Most herbalists recommend using it at the first sign of illness—not as a long-term supplement. That’s because it works best to ‘kick-start’ your immune system when it’s under attack. Long-term use might reduce its effectiveness and may even overstimulate your immune system if taken constantly Think of it like a herbal first responder: ready when needed, but not meant to be on duty 24/7.

    A Few Notes to Keep in Mind

    • Not recommended for people with autoimmune disorders unless you’ve done your research or talked to an herbalist. Echinacea stimulates the immune system which might not be something you want to do in this instance.
    • Some people may be allergic—especially if they’re sensitive to plants in the daisy family.
    • Pregnant or nursing? Best to double-check safety guidelines before using it. Though it is generally considered safe, doing your own research to see if something is right for you is always a good idea.
    a single purple coneflower head with drooping purple petals and a bristly brown and orange center

    Final Thoughts


    Echinacea isn’t magic. But it is a great example of how God designed plants with more than beauty in mind. I like knowing there are things growing in the world—and in some gardens—that can help strengthen the body instead of just masking symptoms. Even if I’m not using echinacea all the time, it’s one of those herbs I like having on hand. Kind of like that friend who shows up with chicken soup when you’re sick—only this one grows from seed and doesn’t need a nap afterward.

  • The Right Road

    The Right Road

    a dirt road curving through the woods

    Let me tell you a story.

    A few years ago, our family took a road trip to from our home here in Indiana to Virgina. We visited a church camp there and had a wonderful time. But the story I want to tell you happened on the way home.

    Now, when this family takes a road trip, we do something different from probably most people. We go into our GPS settings and turn on the “Avoid Interstates” option. There is just something about getting off the main roads and taking the roads where less people are. Everyone enjoys it and it makes the whole trip more fun. You get to see things and places that most people don’t get to when they’re flying down the interstate.

    So that’s what we did on the way home from Virginia. Coming through West Virginia, we took the highway that runs through the New River Gorge. We had visited the bridge the previous year on our way to or from that church camp, so we changed things up. Decided to see some new scenery.

    waterfall on the New River
    a wide waterfall on the New River
    a view down the New River
    Micah and Alayna hiking back up the trail from the river

    After enjoying the beautiful waterfalls and views, we decided we’d better keep moving towards home. We loaded everyone back in the vehicle, a Suburban at that time, and kept following the GPS.

    Not too much later, the GPS told us to turn on to WV Highway 26. Ok, not a problem. Except the road didn’t stay a road for long. Soon, we were driving on a mountain path that consisted of more mountain than path. And the only thing high about it was how far up we had to climb.

    I took this picture before the road got super crazy. Before it was all said and done the “road” was dirt. At least, it was dirt between the rocks and tree roots. We were very thankful for a Suburban. Otherwise, I’m sure we would have ended up stranded with no cell phone service until the cows came home. And then some.

    I have to admit, I thought we must have taken the wrong turn. How on earth could this be the road we were supposed to be on? There must have been a mistake somewhere. Either I had misread the map, or the GPS must be wrong. There were no other options, right?

    Well, turning around wasn’t doable so we had to follow this crazy “highway” clear to the end, wherever that turned out to be. Finally, we came back down the mountain. Finally, the road turned back to gravel. And, finally, we came to the next road we needed to take.

    I still remember rolling my window down, twisting clear around, craning my neck, and finding the road sign to see just what road we had actually been on.

    It said, “Highway 26”.

    That whole time, we had been right where we needed to be. There was no mistake. I didn’t read the map wrong and the GPS didn’t give us the wrong directions. It was the right road.

    So why tell you this story? Well, life is like this sometimes. Sometimes, even when we try our best to follow God’s directions and make the right choices, we end up in places where we are positive we messed up somewhere.

    We find ourselves thinking, “There’s no way God meant for me to end up here. I must have blown it.” We tend to send ourselves into panic mode trying to figure out how we took the wrong turn, what we can do to “fix it”, and on and on.

    But someone said something in church Sunday that is so simple and still so true. The co-pastor was preaching and in his message, he made this statement, “Stop trying to figure out the path, and get to know the Guide”.

    That’s all it takes. The better we know Jesus, the better we can follow and trust His leadership. Even when the road looks like West Virginia Highway 26.

    screenshot of a map showing a curvy road